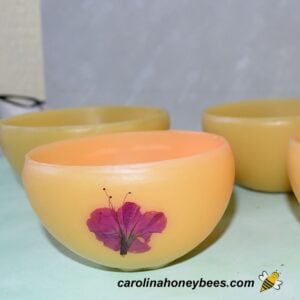
Beeswax Lantern Tutorial
Step by step directions for making beeswax luminaires or lanterns using balloons and beeswax.
This post may contain affiliate links. As an Amazon Associate, I earn from qualifying purchases.
Read my Disclosure.Tools
- scissors
Supplies
- 2 pounds beeswax
- 6 piece balloons - round medium
- 1 roll Parchment Paper or equivalent
Instructions
- Fill balloons with warm (not hot) water. Place mouth of balloon over faucet and fill. How much water should you put in there? It depends on how large you want your beeswax luminaries to be. Don’t overfill your balloons but they should be tight and firm. This gives the beeswax base the support needed to maintain its shape in the early stages.Remove from faucet and tip a knot in the balloon. Dry off any water – it should be dry before dipping in the hot wax.

- Heat your beeswax to about 160°F but not over 170°F in a double boiler set up. You can use a regular double-boiler if you have one dedicated to beeswax crafts. (And you really should as it is very hard to get all the wax out when you are done.)You can also use a slow cooker or crock pot to heat wax. By using a crockpot liner, cleanup should be very easy. This is a great way to make beeswax lanterns for a group where you have several people creating them at one time.

- When the pot of wax is completely melted, pick up your water filled balloon. Smoothing dip it 4 or 5 times in the beeswax but do not dip it in further than the water line. Doing so will cause the balloon to burst and make a graciously big mess.If you have a smooth dipping technique you will have a smoother finished product. Hesitating or stopping half way will cause a dip line in your beeswax luminaire.Try to dip in to the same depth each time.

- After 5 or so dips, carefully set the beeswax coated balloon down to cool on a piece of parchment paper. Let the wax harden by cooling the balloon for 5-6 minutes. Then repeat the process until you have a total of 25-30 dips. Our goal is to have it thick enough to be sturdy for handing but still thin enough to let light show through.If you choose to make several at a time, you can dip others while some are in the cooling phase. The number of dips needed to make your beeswax luminaire depends a bit on personal preference.

- After the final dip, carefully set your beeswax luminaries down on the parchment paper and let the wax cool until it is firm but still warm to the touch.

- Place your beeswax lantern over a dishpan or the sink and use a pin to pop the water balloon. Carefully, pour out the water and peel off the balloon.

- Use scissors or an exacto knife to trim away any rough edges on the top.

- Using a hot plate or warm flat pan covered in foil, set the beeswax luminaire down for just a few seconds to create a smooth bottom. Don’t leave it on long enough to melt through. This can be done before or after smoothing the top edges.

- Let cool again and then pour a bit of melted beeswax in the bottom inside to give the item a thick base. Let cool completely.

Notes
*To pop the balloon – without a mess: gently pinch a tiny spot near the neck and cut with scissors or place a piece of tape on the inflated balloon and pop with a pin through the tape.
*Use care when melting beeswax to avoid burns or fire danger.
Learn more about bees and using products from the hive!Join me on Pinterest - @carolinahoneyb