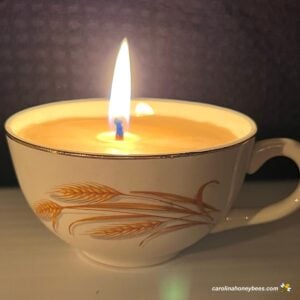
DIY Tea Cup Candle Tutorial
Be a part of the recycling generation. Bring vintage tea cup back to life with some beeswax and a little wick. An elegant way to reuse dishes that were nearing the end of their usefulness.
This post may contain affiliate links. As an Amazon Associate, I earn from qualifying purchases.
Read my Disclosure.Tools
- wooden skewers -or pencil
- scissors
Supplies
- 3 tea cups
- 18" cotton wick size 6
- 1 pound beeswax
- 3 wooden skewers or similar
Instructions
- Cut the required amount of wick for each candle. Mine measured about 6". You need enough to reach the bottom of the cup and a couple of inches to wrap around the wooden sticks at the top.Sometimes, I just wrap the wick around the skewer - sometimes I add a clothespin to hold the wick in place.

- Begin to melt your beeswax in the double boiler or other safe method. Take the wicks off the cups and pull them straight. Drop them into the melted wax and let the air inside bubble out. This is called - "pickling the wick". After a minute or so, use a skewer to remove the wicks from the hot wax. Be careful, they will be hot but they do cool quickly. Stretch them out straight to cool.

- Set the cool wick back into the cup with it held in place at the top. Be sure to have the wick in the center of the cup.When enough beeswax is melted to fill your cup - it is time to pour. Fill the cup with melted wax to just below the lip within a quarter of an inch of cup top.

- Leave tea cups on a level table to cool and set. Once they are solid, remove the skewer at the top and cut off the excess wicking. Before burning, trim the wick to about 1/4 inch.

Notes
Expert Tips
- don't overheat your beeswax - be safe
- use the right size wick for the diameter of your cup
- when burning - be sure to burn the candle until a large wax pool has formed before putting it out
Learn more about bees and using products from the hive!Join me on Pinterest - @carolinahoneyb