DIY Beeswax Melts Recipe
Step by step instructions for making wax melts or tarts with beeswax.
This post may contain affiliate links. As an Amazon Associate, I earn from qualifying purchases.
Read my Disclosure.Supplies
- 4 oz beeswax (net wt)
- 2 oz coconut oil (net wt)
- 50 drops Balsam Fir Essential Oil (optional)
Instructions
- Melting beeswax: While you can use the microwave, the best and safest way to melt beeswax is by using a double-boiler.I am loving this small double-boiler. It is easy to clean and is large enough for most of my projects. When paired with a pot to hold water, it makes a great tool for melting beeswax.

- Add coconut oil: Measure 4 oz. (net wt.) of beeswax and 2 oz. (net wt.) of coconut oil. Place these in your double boiler and turn the heat to medium.As the water in the bottom pot heats up, your wax will begin to melt. It will take longer for the beeswax to melt than the coconut oil. Gently stir occasionally until everything is melted and combined.

- Add fragrance oil or essential oil: Remove the melting pot from the hot water bath. Now, it is time to add our fragrance. Adding fragrance to hot oils can affect its aroma. Your beeswax melt recipe mixture should not be above 185° F when oils are added.I added 50 drops of Balsam Fir Essential Oil to this recipe because I wanted a strong scent. You may need to experiment a bit to choose the best one for you.

- Molding: This is the fun part. As soon as the fragrance oil is added – give the recipe a quick stir. Then pour the hot ingredients into any type of mold or form that you wish.There are many types of molds to choose from but silicone cupcake wrappers work well too. If not using silicone, you may need a mold release spray.

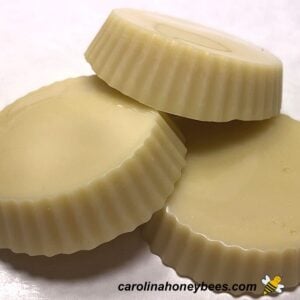
- Cool and remove from mold: Allow the mixture to cool for a couple of hours. As it cools, the mixture will harden and take the form of the mold.Once the mixture is set, you can easily remove your wax melts from the mold.They are ready to use! Add a cute bee bag and ribbon for a quick homemade gift.

Notes
*Don't overdo the fragrance - you can always add more. Fragrance oil should not exceed 6% or 1 ounce per pound of wax.
- beeswax is flammable (as are most other oils)- avoid overheating
- pots and pans exposed to wax are hard to clean - used dedicated craft pots
- take every precaution to prevent burns - use pot holders, safety glasses and gloves where needed
Learn more about bees and using products from the hive!Join me on Pinterest - @carolinahoneyb