How to Make a Solar Wax Melter
Make your own DIY Solar Beeswax Melter using a cheap cooler or similar container and some glass.
This post may contain affiliate links. As an Amazon Associate, I earn from qualifying purchases.
Read my Disclosure.Tools
- scissors
Supplies
- 1 piece Styrofoam cooler (or other insulted box)
- 1 piece cheese cloth (or nylon, t-shirt material) sized greater than top of box
- 1 piece small sheet of glass with taped edges to fit top of box
- 1 piece aluminum foil or smal pan
- 1 cup water
Instructions
- Purchase a small Styrofoam cooler. You can use an old plastic cooler as well or an insulated wooden box. The point is that we want something that will hold in the heat.A little white disposable cooler is about $9 at the grocery store. It will last several years, if you don’t break it!Place a sheet of aluminum foil in the bottom of the cooler. The sheet should be big enough to cover the bottom and extend up the sides just a bit.You may choose to use a small pan instead. That’s fine as long as it fits well into the bottom of the cooler.

- Pour a cup of water (or 2) into the bottom of the cooler. (on top of the foil or inside your pan). We want a thin layer of water to cover the bottom.This water will catch the melting beeswax! It helps separate even more honey residue from the wax and makes it easier to remove from the box when cooled. Removing impurities from your beeswax is important, if you want to produce clean burning candles!

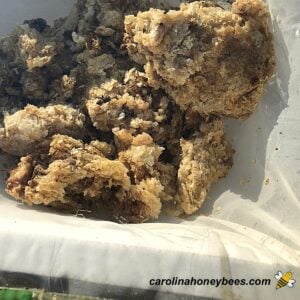
- Place your mound of beeswax cappings inside a piece of straining material. You can use a strainer bag, cheese cloth or t-shirt material. I search for old, clean nylon curtains at the thrift store!

- Carefully place your glass (with edges protected) on top of the cooler with the edges of the strainer material within reach.You need to suspend the cappings over the water reservoir in the bottom. We do not want it to touch the water.This can be accomplished using tape, pins or the light weight on the glass top. Anything that pulls the mound of cappings up off the bottom.Gently pull all edges of the strainer material until the wax is suspended above the water.

- A piece of glass that completely covers the top of the cooler is necessary. Clean glass lets the energy of the sun through and prevents its release.In partnership with our insulated box material, the air inside the box will heat up and melt the beeswax. You may see some condensation on the inside of the glass. Don’t worry, this is ok.With a little water in the bottom, beeswax cappings suspended above (on strainer material) and a tight-fitting glass top. You only need 2 more items. A sunny day and patience.Here in South Carolina it is hot as @#$@ in the summer. My small melter does a great job of melting beeswax by the end of the day. Place your wax melter in a sunny location out of the way. And, don’t open it to take a peek, LOL.

Learn more about bees and using products from the hive!Join me on Pinterest - @carolinahoneyb