Rolled Beeswax Candles - DIY
Step by step instructions on using colored beeswax sheet to make decorative rolled candles.
This post may contain affiliate links. As an Amazon Associate, I earn from qualifying purchases.
Read my Disclosure.Tools
- scissors
- ruler
- hair dryer/heat gun
Supplies
- 3 pieces candle beeswax sheets any color 8" by 16"
- 24 inches cotton candle wicking - 1/0 1/0 size for rolled candles
Instructions
- Prepare Beeswax Craft Sheet: Choose the beeswax sheet you want to use for your first candle. Wax sheets available in a rolled candle making kit or purchased for making rolled candles- will be approximately 8″ by 16″.This large sheet is commonly cut in half to allow 2 candles to be made from each sheet of beeswax. Using a ruler will help you to make a straight cut.

- Gently Warm the Beeswax Sheet:How warm is it in your crafting area? In cold temperatures, beeswax sheets can be brittle and difficult to cut without breaking.If your beeswax is not warm, a quick blast with a hairdryer will make it more pliable. You only need a couple of seconds.Just a really quick blast !! We don’t want to melt the wax. If the sheets are stored in a warm location, the hair dryer will not be necessary. Don’t heat your beeswax sheet if it is pliable and easy to work with.

- Prepare Your Candle Wick:Cut a piece of candle wick that is about 1 – 1 1/2″ wider than your wax sheet.Align it flush on one end (this will be the candle bottom) and protruding on the other end. This will be the part you light when the candle is finished.

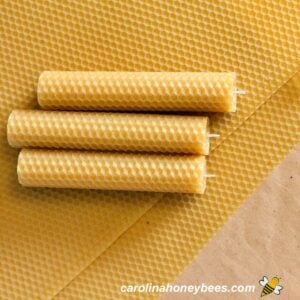
- Rolling Up the Beeswax Candle Sheet:This type of candle should be rolled up firmly but not so tight as to crush the wax. The exception is starting the wick - be gentle but firm.For this step, fold about 1/8″ of wax over the wick and press firmly. This will tightly encase the wick in the sheet of wax. Pay special attention to getting an even roll started.

- Sealing the Seam:Once the complete beeswax sheet is wrapped up, there will be a loose seam. Hold the candle gently in your hand.The warmth from your hand should soften the loose seam and adhere it to the candle.If the weather is cool and you have trouble, another quick blast from the hair dryer will seal that seam.

Notes
** Rolled beeswax candles are more for decoration than use. However, if you use the correct size wick - the candle should be able to function.
Learn more about bees and using products from the hive!Join me on Pinterest - @carolinahoneyb