Make Rolled Beeswax Candles
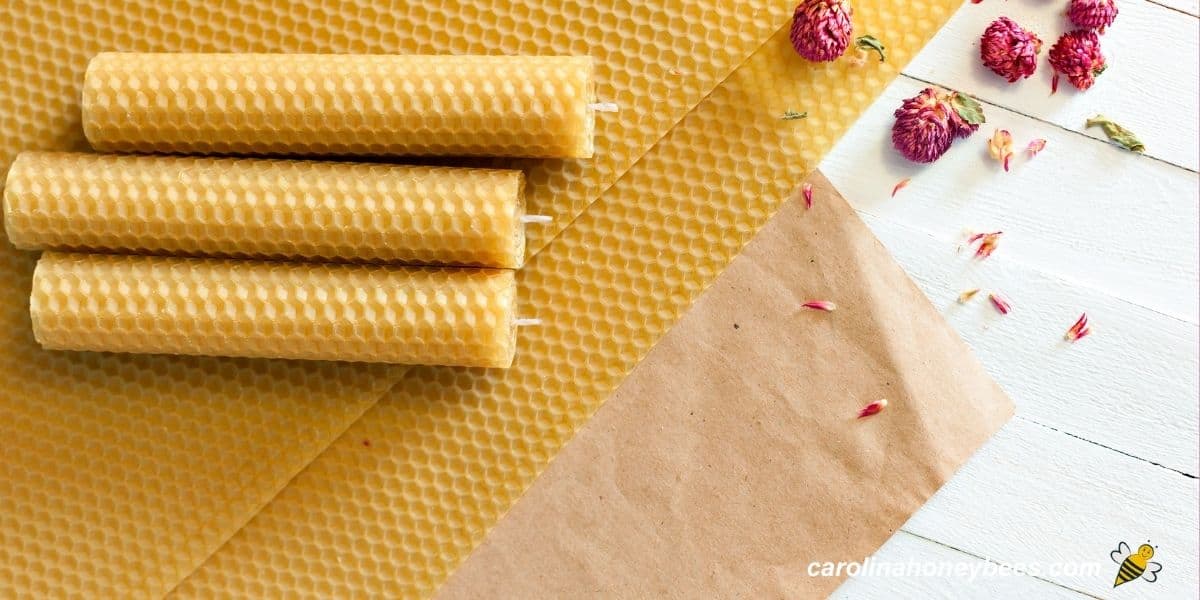
They look so elegant and expensive – but you will be amazed when you learn how to make rolled beeswax candles. It is super easy! This is a great beeswax project that can involve everyone in the family. Even the kids can help with this candle making craft. Rolled beeswax candles are often used for decoration – but you can really use them too.

There are so many ways to make beeswax candles. That is one reason why beeswax is such a fun material to work with – it is very versatile.
DIY Rolled Beeswax Candles
This type of beeswax candle is made by rolling sheets of wax around a wick of the proper size. You can use them as regular candles but they do not burn as long as a solid poured candle.
This is due to the fact that they don’t have as much wax to burn. But, they are very decorative and often are made for their style and beauty more so than function.
Decorated with ribbon, lace, burlap etc, they are often used as stand alone gifts. And, they make a nice addition to any gift basket.
This post may contain affiliate links. As an Amazon Associate, I earn from qualifying purchases. Please read my disclosure.

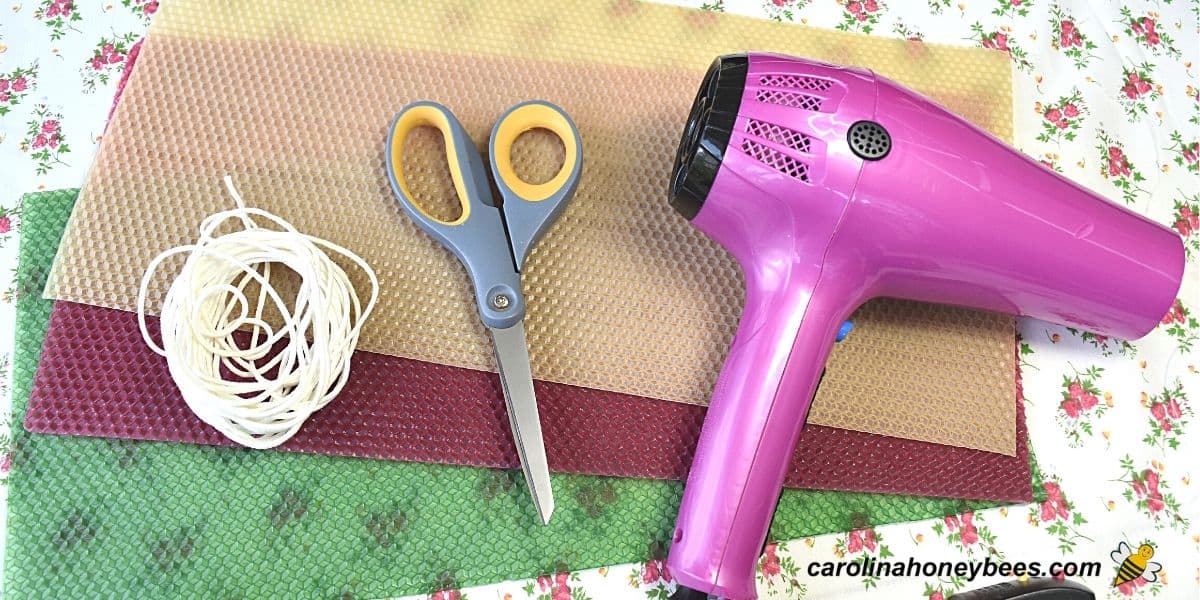
Materials Needed
This simple project will go smoother if you assemble the needed tools and materials prior to starting. But, isn’t that true for any type of craft?
- beeswax sheets
- small cotton wick
Beeswax Sheets
What kind of beeswax sheets must you buy to make them? Actually you have several choices. You can purchase special beeswax craft sheets intended for making hand rolled candles.
The process will go smoother if you use them because they are a bit thicker than normal beeswax sheets used in beekeeping.
Also, they come in so many pretty colors that it is easy to match your home décor or that of the someone special you plan to give them too.
However, even beeswax foundation intended for use in the hive will work if you choose the ones without wire. I have made them with some of my unwired foundation on many occasions and they look very nice.
Cotton Wick
If the candles are only for decoration, wick size is not that important. However, if you ever plan to burn them, a small 1/0 wick is essential. Pay attention – that is 1/0 not 1.
Beeswax burns differently than some candle materials – that is one of the benefits of beeswax candles. But, without the right size wick – you will not get a good burning candle.
Equipment
Only a few pieces of equipment is needed. Grab some scissors and a hair dryer or heat gun (on low only), and perhaps a ruler – you are ready to begin.
Rolling Up Beeswax Candles-Step by Step

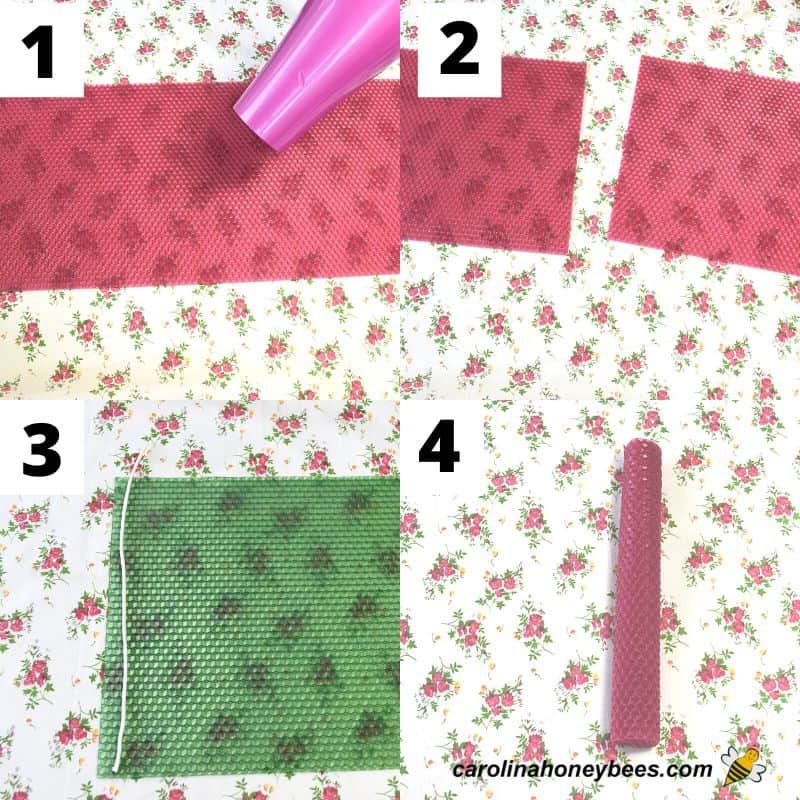
1. Is your wax is warm, this step may not be necessary. However, even the thicker sheets of beeswax made specifically for candles will crack if cool. Gently warm the wax sheet – just a bit. Be very careful – it will also melt. Just a little blast of warm air is enough.
2. To make the common rolled taper candles, beeswax craft sheets are normally cut in two. This allows you to make 2 tapers from each sheet. Use scissors (and a ruler if you wish) to cut the sheet into 2 pieces.
3. Now place your length of wick along one side. You need 1 1/2″ sticking out the top and a little over the bottom. Use a firm hand to make one tight roll of wax that encases the wick in the sheet.
4. Once the wick is seated, firmly – but gently roll up the remainder of the beeswax sheet. Once you are finished, hold it in your hand for a minute. The warmth will help seal the seam. If you are having problems with the seam, another light blast from the hair dryer will help.
Expert Tip
Compared with many crafts ideas, this is not a messy project. However, if you are working with kids or messy adults – consider spreading a drop cloth under the table.
Tiny bits of beeswax will end up on the floor. They can be easily swept up if no one steps on them first. After they are stepped on, you may have a stick floor for a while.

Variations – Different Sizes
You can make more than just tapers. Cut the sheet in various widths to make votives, short pillars and more.
There is no limit to the variations – let your imagination run wild and create a special one-of-a-kind candle.
As for scent, you could add a few drop of candle fragrance or essential oil to the inside if you wish – most people opt for the natural beeswax scent that is already present.
Using sheets of different colors and special cutting techniques, you can even make your own Christmas tree shaped candles – they can be used as a small candle or an ornament (not lit of course).
These two are the easiest methods for making candles with bees wax sheets.
Decorating and Storing
Decorate your rolled beeswax candles in any way that you wish. A natural piece of jute twine holds them together for display or as a gift pack.
Store them in a cool dark place until you are ready to use them. They make great gifts but can be damaged easily. Pack them with care.
FAQs
Yes, you can use beeswax foundation sheets (without wire) to make rolled beeswax candles. However – keep in mind that the sheets intended for the hive are not the same thickness as craft sheets. It may be a bit more difficult to properly roll them.
Beeswax sheets and candle wick can typically be found at craft stores, online retailers specializing in candle-making supplies, or directly from beekeeping suppliers.
No special equipment is required. Basic crafting skills, such as cutting and rolling, are sufficient. However, using a hairdryer to warm the wax slightly can make the rolling process easier.
Before rolling, place the wick along one edge of the beeswax sheet and press it gently into the wax. As you roll the candle, ensure the wick stays centered to prevent it from shifting.
More Candle Ideas
You can also use molds for beeswax candles. Poured beeswax candles are more expensive to make but have a longer burn time.
Making hand dipped beeswax candles involves a bit more effort but it is something to consider if you want to take the next step in working with beeswax.
Another option for beeswax crafting without a commercial mold is to use a natural object. Empty egg shells make unique beeswax candles.
And if you like to collect shells at the beach and then wonder what to do with them.. try these tealight seashell candles.
For an extra elegant gift or craft, make beeswax candles with dried flowers and added essential oils if desired. And these beeswax luminaires are made using balloons and beeswax – so elegant.

Rolled Beeswax Candles – DIY
This post may contain affiliate links. As an Amazon Associate, I earn from qualifying purchases.
Read my Disclosure.Tools
- scissors
- ruler
- hair dryer/heat gun
Supplies
- 3 pieces candle beeswax sheets any color 8" by 16"
- 24 inches cotton candle wicking – 1/0 1/0 size for rolled candles
Instructions
- Prepare Beeswax Craft Sheet: Choose the beeswax sheet you want to use for your first candle. Wax sheets available in a rolled candle making kit or purchased for making rolled candles- will be approximately 8″ by 16″.This large sheet is commonly cut in half to allow 2 candles to be made from each sheet of beeswax. Using a ruler will help you to make a straight cut.

- Gently Warm the Beeswax Sheet:How warm is it in your crafting area? In cold temperatures, beeswax sheets can be brittle and difficult to cut without breaking.If your beeswax is not warm, a quick blast with a hairdryer will make it more pliable. You only need a couple of seconds.Just a really quick blast !! We don’t want to melt the wax. If the sheets are stored in a warm location, the hair dryer will not be necessary. Don’t heat your beeswax sheet if it is pliable and easy to work with.

- Prepare Your Candle Wick:Cut a piece of candle wick that is about 1 – 1 1/2″ wider than your wax sheet.Align it flush on one end (this will be the candle bottom) and protruding on the other end. This will be the part you light when the candle is finished.

- Rolling Up the Beeswax Candle Sheet:This type of candle should be rolled up firmly but not so tight as to crush the wax. The exception is starting the wick – be gentle but firm.For this step, fold about 1/8″ of wax over the wick and press firmly. This will tightly encase the wick in the sheet of wax. Pay special attention to getting an even roll started.

- Sealing the Seam:Once the complete beeswax sheet is wrapped up, there will be a loose seam. Hold the candle gently in your hand.The warmth from your hand should soften the loose seam and adhere it to the candle.If the weather is cool and you have trouble, another quick blast from the hair dryer will seal that seam.


