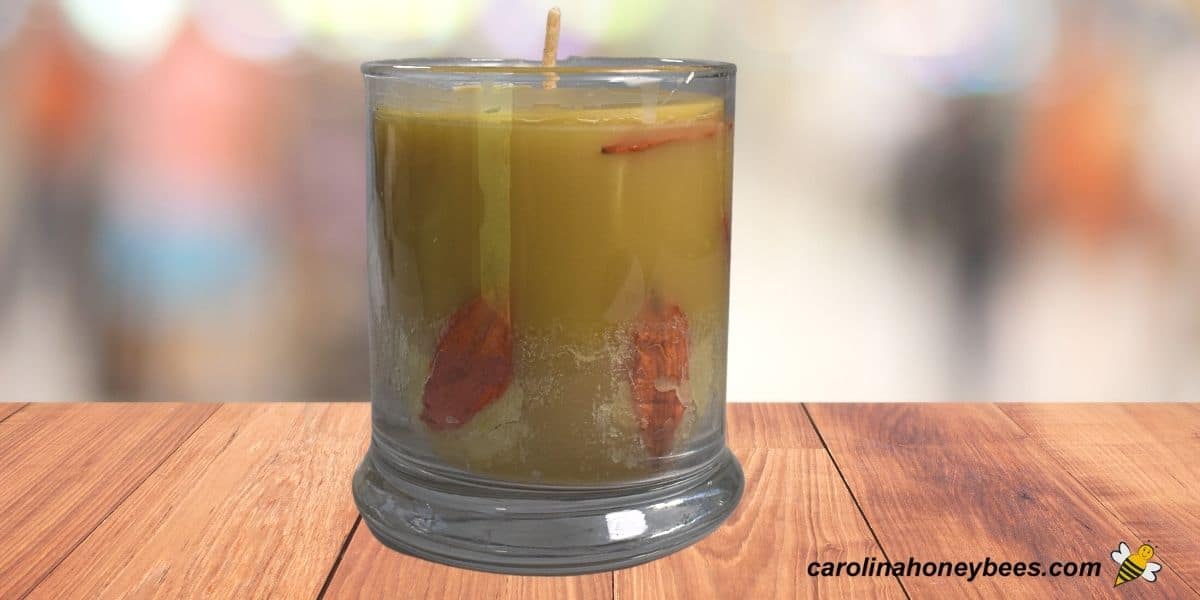
Candles with Dried Flowers

Show your creative flare in this project of making a candle with dried flowers using beeswax. These handmade candles add a special warmth to your home décor and they make great gifts too. Cleaning burning beeswax and colorful flower petals combine to become one of a kind creations. You can create a special candle that is as unique as you are.
Learning how to make beeswax candles can involve many different techniques. Some of the processes are easier than others. This project can be rather involved.
If you want an easier beginner project – consider a simple diy beeswax candle recipe. Then, come back to this project for more advanced work.
DIY Beeswax Candles with Dried Flowers
Even today, in a world that is filled with artificial light of every brightness and color, we find a place in our lives for candles. It seems that candles have a fixed place in our society representing light in a world filled with so much darkness.
Materials
You only need a few materials and your imagination.
- beeswax
- wick
- jar
- dried flowers
Beeswax
For making candles, your beeswax should be free from dirt and impurities. That does not necessarily mean bleached white but rather cleaned of trash, honey reside etc. If you use wax from your own hive, be sure to clean your beeswax well.
The amount of beeswax needed will of course depend on the size and quantity of candles you want to make. Never fear – it is good to have extra beeswax has many uses. It never spoils.
Wick
I prefer cotton wicks due to the fact that they burn cleaner. For beeswax, a larger wick size is needed than for some other wax blends.
Be sure to match the size (diameter) of your wick to the wax blend you are using. For this project – I am using a 6/0 wick for a candle over 3″ in diameter.
Jar
Choose a simple glass container that is supposed to be used for candles. Be sure to use a candle-rated glass and avoid very thin walled glass.

Flower Petals in Candles
Dried flowers are a beautiful addition. Choose dried flower petals that are flatter in appearance and bulk. They are often seen embedded in the wax or as a topping.
However, it is important to remember that you do not want the candle wick to come into contact with a combustible object. I have seen photos of candles with dried flowers scattered thickly on top.
While this may look lovely… those things do burn you know. Do not have pieces of flowers floating in the wax or scattered on top of the finished candle.
Always use care when making or using any candle project that involves combustible material or an open flame.
Step by Step

1. While your beeswax is safely melting in a double boiler setup. Prepare the glass jar with the proper size wicking. I use a simple chop stick to hold the wick at the top of the jar.
Sometimes I pickle the wick (dip it in beeswax) – this coats the wick and as the wax cools the wick is stiffened. Be sure the wick extend down into the jar to the bottom.
2. With the wax in liquid form – use a small paint brush to adhere dried flower petals inside the glass jar. Brush a swipe of wax on the jar and quickly push on a dried flower.
Wait a moment and then brush another coat of beeswax over the flower. Continue until you have as many dried flowers in the jar as you wish.
3. Set the jar down – ensure that the wick is hanging straight and extending down into the jar. Slowly pour melted beeswax into the jar.
4. Fill to the desired level – then let the candle cool for several hours. It is good if the candle cools slowly. You may cover it with a cardboard box to allow a slow cool – but this is optional.
Expert Tips
It is important to understand the natural properties of beeswax when pouring into clear glass jars. Beeswax shrinks when it cools.
What does this mean for your candle with dried flowers project? When the wax pulls away from the inside of the glass – this air space is noticeable. This causes a frosted appearance on the glass.
Some people don’t like this appearance. Others feel that the natural frosting adds to the unique look of the jar candle. As for myself, I embrace it as a natural part of making candles with natural wax.
However, if you are not a fan of frosting, these tips may help minimize this look:
- preheat your glass jars before pouring
- keep your pouring beeswax as cool as possible – less shrinkage
- wrap the candle up so they will cool very slowly
Problems with Candles Cracking
Any type of candling making can present a few problems. Candles that crack on the top after cooling are a concern for some crafters.
If you have problems with the surface of your beeswax pillar candles cracking, don’t be alarmed. The easiest way to lessen the chance of cracking is to ensure slow cooling of the wax. And, don’t get your pouring wax any hotter than is needed.
I must admit that this is not my favorite candle project. It can be beautiful with the right touch and patience. A good way to test your skills – not best for absolute beginners.
Using Wax Blends
While I am a big fan of pure unbleached beeswax, I do admit that creating a wax blend can make a wonderful candle. Beeswax is often combined with either soy wax or coconut oil.
Especially when working with candles in clear glass jars, this combination may give you a more pleasing experience. You honestly have to try and see what you prefer – there is no wrong way.
More Ideas Projects
With just a few inexpensive materials you can make other special candle projects for your family and friends. Beeswax lends itself well to creating many different forms including beeswax candles with molds.
You can create dipped beeswax candles using only melted wax and some wicking. People have been doing that for thousands of years.
Another method of crafting with wax when you don’t have a mold – make these cute egg shaped candles. All you need is a clean, empty egg shell, some wick and a little beeswax.
Looking for something quick and easy? These rolled beeswax candles are so simple – even the younger children can participate in making them. What about some ornaments or candles shaped like a Christmas tree?
Creating homemade projects for your home or someone special is fun and easy. Try these beeswax citronella candles for your next outside gathering.
And, you don’t have to always make candles – these diy beeswax fire starters are useful and cute. Make some for yourself or a friend.
You can even preserve the bright colors of Fall by dipping leaves in beeswax. Then use them to create a Fall display, garland or wreath.
Create Beeswax Candles with Dried Flowers Tutorial
This post may contain affiliate links. As an Amazon Associate, I earn from qualifying purchases.
Read my Disclosure.Tools
- large rubber bands – to fit jars
- craft sticks – wooden popsicle sticks
- scissors
Supplies
- 22 oz beeswax (varies with mold size)
- 1 roll cotton candle wicking (6/0) for 3" diameter candles
- 1 bag dried flowers any color
- 2 jars glass candle jars
Instructions
- Melt the beeswax. Use the double boiler method with water in the bottom pot and wax in the top section.This is the safest way to melt beeswax. Beeswax is flammable- don’t be afraid. But, be careful to avoid burns – melt the wax slowly – this takes a little time. Constant supervision is important.

- Measure and cut wick. Measure the wick needed for a 3″ wide candle I used wick size 6. Length depends on the depth of your candle container.You need enough wick to reach the bottom of the jar with a few inches extra at the top.
- Pickle the Wick. Now I don’t always do this step but it seems to work well with this thick wick. Pickle your wick – give it a dip into the melting beeswax. Then use something to get it out and pull it straight. Once cool, the wick will behave much better.
- Attach dried flowers to jar: Choose the pieces of dried flowers that you want to feature around the sides of the glass jar.My OCD makes me go for the minimal look but you can put as many as you want!Adhere these inside the jar using a craft paint brush and some of the melting wax. Place petals against the glass and then a light coat of wax on top to adhere to glass. Let cool.
- Anchor Wick: With the wick extended into the candle all the way to the bottom – a craft stick under the wick and a rubber band around the outside will hold the pickled wick in place.Be sure that the wick in centered in the jar and reaches very near the bottom.(Optional: If needed, you can use a glue dot to hold the wick in place in the bottom of your candle jar.)
- Pour beeswax: Let the wax cool for a few minutes until it almost begins to skim over. Slowly pour the melted beeswax mixture into the candle jar. Fill to the preferred level.I do not recommend adding pieces of dried flowers to the mixture or the top of the candle. This may look nice but it can be a fire hazard.
- Slow cool. Cover the candles with a cardboard box, towel etc. We want the candle to cool very slowly. This helps to avoid cracking wax on the top.
- Trim the wick. Let sit for 24 hours. Then, remove the rubber band and wick support – trim the wick to the desired length. You did it!


