DIY Citronella Candles [with Beeswax]

If you love the outdoors-but not the bugs and insects, these diy citronella candles made with beeswax is just what you need. Citronella oil has natural insect repelling qualities and beeswax is know for giving a clean burn and bright flame. When you combine the two – perfection. Making homemade citronella candles is a great opportunity to create something beautiful and useful.
There are so many ways to make beeswax candles. But, perhaps you have never thought about using them outside. In fact, they are a beautiful addition to outdoor events.
How to Make Citronella Candles
It is impossible to rid the outside world of insects that bug us – and we would not really want to anyway. Each life form has a role in the ecosystem, but that does not mean you have to make a blood donation to every hungry mosquito.
Rather than using toxic chemicals that are present in many commercial products – make your own insect repellent. This project has room for many substitutions so you should be able to personalize the project as you wish.
Materials Needed
Only a few materials are needed to make citronella candles using beeswax. Of course, you can substitute in other containers, waxes or decorations.
- small clay pots
- beeswax
- wick
- citronella oil
Clay Pot Containers
Naturally, you can use any (fire-safe) type of container that you wish or already have on hand. Small glass jars work well or even mason jars.
But, these cute clay pots are nice because they fit into almost any outside décor. They sit well on the outside deck or patio and add a nice ambiance to the setting.
You can make then fancy with lace or other embellishments or leave them plain. They can be painted to any color scheme.
Using larger pots is certainly a possibility – but you may get into problems finding a wick of the correct size. It was also require more beeswax.
Beeswax
When making candles with beeswax, you can avoid the use of suspected carcinogens found in many commercial candles. It burns bright and clean with little soot or smoke.
However, if using raw wax, be sure to clean your beeswax before you begin. Otherwise, your candle will not burn well.
Wicking
This project uses 2/0 cotton wicking (based on the diameter of the container). Wick size is important when making candles. If your wax is not clean, or your wick is too small – your candle will not burn properly.
Try to avoid zinc core wicks. These are readily available in my stores but are not the best choice for beeswax candles.
Citronella Oil
This essential oil comes from the leaves and stems of several types of citronella grass (Cymbopogon). This essential oil has a fresh, lemony aroma. Popular in insect repellents, it is also used for cosmetic purposes and aroma therapy.
The theory behind the use of Citronella oil to repel pests is that it masks the scents that insects find attractive.
It is one of the most popular natural repellents in use. Yet, many scientists say that it does not work well as a repellent for mosquitoes.
Adding a little natural citronella oil to your beeswax candles is a great way to at least discourage some insect visitors at your outside events.
Putting It Together
Here are a few basic steps for your project (full instructions at bottom of post).

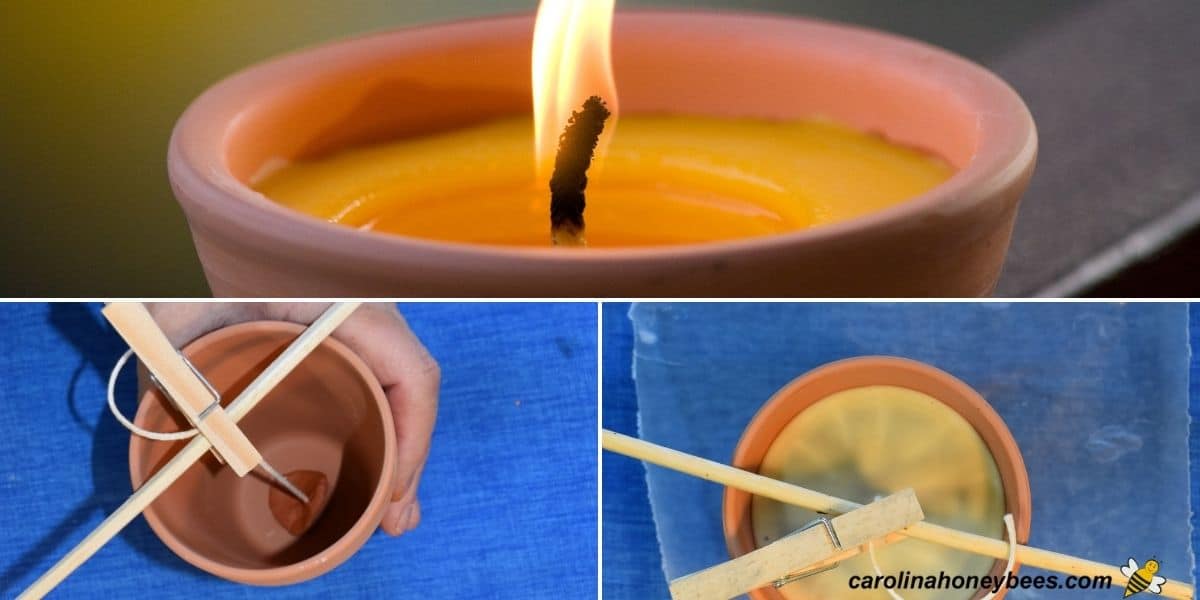
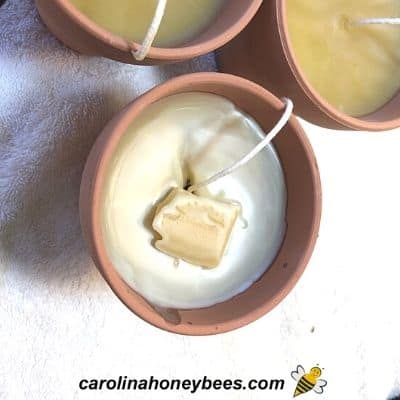
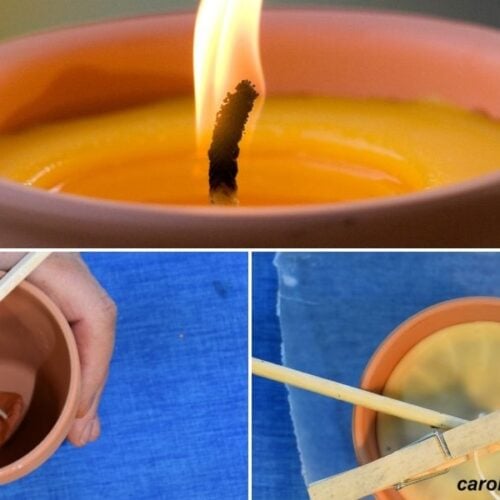
1. If you use tiny clay pots – you need to plug the drainage hole in the bottom. There are several ways to do this – I prefer to use a little air dry clay (like I use to make clay flower seed bombs).
2. Measure and prepare your wick. I actually stick one end of it into the clay plug just a bit to make sure it hangs straight. (Or, you can pour a tiny amount of melted beeswax into the bottom and let cool). A skewer and clothespin helps hold the wick at the top.
3. After safely melting your beeswax, measure your citronella oil into a small container. You could just add it from the bottle and count drops but I like to have it separate. Remove wax from heat source – add citronella oil.
4. Slowly pour your beeswax and oil mixture into your clay pots. Let them sit for an hour or so to cool and then trim the wick to about 1/4″.
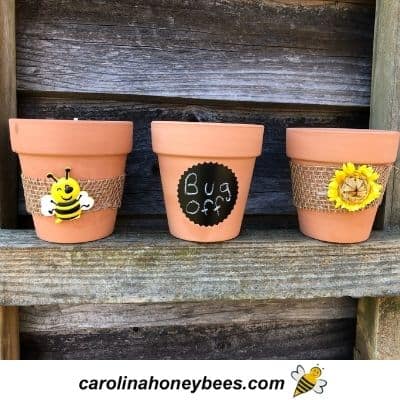
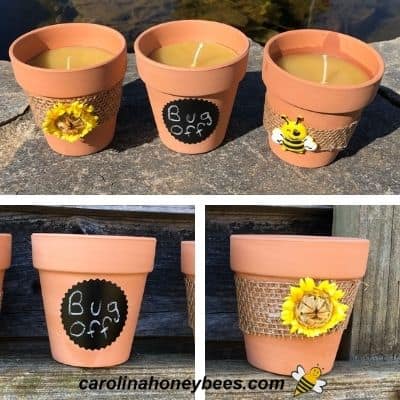
Decorating Your Candles
These cute clay pot beeswax citronella candles are just fine as they are. However, you can dress them up with a label, ribbon, etc. to match your décor or party design.
Expert Tips
When you make crafts do things always turn out well? If so, I am happy for you but for myself that is not always the case.
Beeswax shrinks as it cools. Therefore when making large diameter beeswax candles (such as pillars – etc.), it is not unusual for cracking to occur. It doesn’t hurt the candle-but it sure is ugly.
Sometimes, cracking can be prevented by slow cooling. Therefore, I covered my cooling candles with a towel.
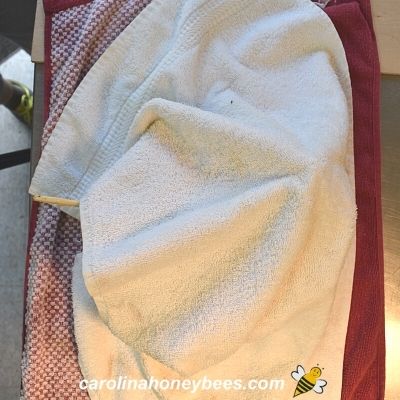
Alas, though this strategy helped 2 of my candles – one still had an ugly crack in the beeswax. Never fear – there is a fix.
You can either pour a small amount of additional wax on the cracked area. Or, you can place a bit of beeswax on the crack and heat it with a craft heat gun.
Using Your Citronella Candles
Always use beeswax citronella candle pots outdoors in a well-ventilated area. And, as always, avoid breathing the smoke of any candle.
If you have any concerns about the use of essential oils in candles, consult a medical professional.
Your candles may not keep away all of the pesky mosquitoes in the neighborhood. However, any time we can discourage a few insects pests, I count that as a win. This makes a bit of citronella oil worth a try.
More Ideas
If you have a little beeswax left over, how about trying some egg shaped beeswax candles next time. What a great lesson in recycling and using natural molds.
Another wonderful option to use for yourself or give to someone special – try these homemade beeswax fire starters. They are great to use on camping trips or at the backyard fire pit.
For a more unique elegant project, use your favorite dried flower petals in a candle. This project uses a clear glass container to show off the petals.
There are so many things you can make with beeswax, including many DIY beeswax gifts. Handmade items are always very special. For a wedding or other romantic occasion, seashell candles can be a nice touch.
I can’t promise your DIY citronella candles will keep all the bugs away. But, they are adorable, useful and will add a spark to your outside event.
Citronella Beeswax Candles Tutorial
This post may contain affiliate links. As an Amazon Associate, I earn from qualifying purchases.
Read my Disclosure.Tools
- scissors
Supplies
- 3 units 2 1/2" diameter clay pots
- 19 ounces beeswax
- 1 ounce citronella oil
- 20 inches cotton candle wick 2/0
- 1 teaspoon air dry clay (optional)
- 3 pieces clothespins (optional)
Instructions
- Choose several small clay pots. Simple craft clay pots are inexpensive and great for many projects. These are 2 1/2″ in diameter. Sometimes you can find them a local dollar store.

- Seal the drainage hole in the pot with some type of clay or glue. For this project, I used air dry clay.
- Measure and cut a 6 1/2″ piece of 2/0 cotton candle wicking. Attach a small amount of air dry clay to the bottom of the wick.Use your fingers to reach down into the small pot and adhere the wick in place. (You can use tape or anything that will seal the hole).
- Secure top of candle wick. Use a clothespin and skewer to secure the top of the wick. Be gentle-do not pull too hard or your wick will release from the bottom.Your goal is to center the wick inside the pot. It does not have to be pulled tightly.
- Place your beeswax in a double boiler for safe melting. I like using a neat little double boiler insert and a regular pot for the water in the bottom.
- Adding the citronella oil. Once the beeswax is completely melted, remove the pot from the heat. Measure your citronella oil and pour into the beeswax. Stir well.
- Carefully pour a small amount of beeswax into each clay candle pot. An inch or two of depth is fine.Let this sit for a couple of minutes – then continue to fill the pot to the desired level.This helps set the wick – but you can use a hot glue gun to attach the wick to the bottom of the jar or pot if you wish.
- Cooling. Leave your beeswax citronella candle stationary for a couple of hours. Do not move it – allow the wax to cool and set.
- To ensure good burning, once the wax is completely cool – trim the candle wick to 1/4″.


