How to Clean Beeswax
Beeswax is a valuable natural substance with many creative uses. From candles to skincare products, beeswax has much to offer. However, raw beeswax straight from the hive is not suitable for all purposes. In this guide, I will share my favorite ways to clean (or render) beeswax. The cleaner your wax, the better your final product will be!

When I harvest wax from my hives, I want to save every scrape. There are so many ways to use beeswax but you want to work with as pure a product as possible. Can beeswax be dirty? Perhaps, not in the way you think but it can have impurities.
Why Cleaning Beeswax is Necessary
Raw beeswax, whether collected from hive cappings, burr comb, or old frames, contains natural impurities that must be removed before use.
By melting and filtering out unwanted debris, our wax is ready for any project. This is especially important if you want to make beeswax candles.
Impurities in wax (even honey residue) will clog the wick and leave you with a sputtering mess!
Natural Impurities
While in the hive, beeswax is exposed to many substances that need to be filtered out.
- honey residue (leftover honey makes wax sticky)
- pollen and bee propolis (cause wax to darken and affects quality)
- bee parts and debris (no one wants that in their lotion bar!)
This post may contain affiliate links. Carolina Honeybees earns a tiny commission when you shop from our links. See our privacy policy for terms.
Tools & Supplies Needed
Of course, the exact tools and supplies needed to render beeswax will depend on which method of cleaning you choose. In all cases, you will need a heat source and some type of filter material.
Thankfully, there are several options – some are more suited for beekeepers cleaning a large amount of beeswax – others are fine for crafters working with smaller portions.
Safety Concerns
Melting beeswax is fairly easy because it has a melting point of about 147°F. However, it is flammable and will ignite if over heated.
The double boiler method (2 pots-with water in the bottom pot and wax in the top) is the safest.
People can and do use a microwave (or their oven?) to melt beeswax but I do not recommend it. The opportunity for overheating, fire or a very big mess is too great.
Likewise, it is safer to use a heat source without an open flame. An electric burner is a bit safer than a gas stove with open flames.
Regardless of the method you use, you must be vigilant to avoid fire or burns. Protect surfaces with newspaper or plastic drop cloths. Never leave melting wax unattended.
Preparing Beeswax for Rendering
For beekeepers, the process usually begins while extracting honey. The wax cap is removed from honey cells to allow the honey to flow out. If you only have a couple of boxes to harvest, it’s fun. Once you have 10 or more boxes, it’s work!

The amount of honey in the cappings can be quite significant and worth saving. The 2 common methods of separating the wax and honey are using a double bucket system or a honey filter bag.
Double Bucket System
I often use a 2 bucket process to separate my beeswax from honey. A tall 5 gallon bucket is the base. A slightly shorter bucket close to the same diameter is placed inside the large bucket.
Because of the top rims of both buckets, this usually results in a space of several inches being open in the bottom of the larger bucket. This is the collection space for honey.
The smaller bucket has many holes drilled in the bottom. Cut cappings (or crushed comb) are collected and placed in top bucket with holes. Any remaining honey drips down into a clean chamber.
Left to drain overnight – most of the honey drips through into the bottom container. Of course, this is done inside my honey house where no bees can get in.

Use a Filter Bag
You can also use a filter bag (or strainer bag) to hold the wet cappings. Some beekeepers use paint bags or cheese cloth.
Suspended over a clean bucket, any residual honey will drip into the bucket in a few hours. Use good hygiene when filtering honey and it can be used or sold.
Warning – the bag will be heavy! Tie the bag to something sturdy enough to handle the weight. This must be done in a warm, bee tight location.
As part of my cleanup regime, I like to rinse the stickiness out of the cappings wax. Only use cool clear water. It is as simple as placing your cappings in a bucket and adding water ( similar to washing green beans). 🙂
Place a clean strainer bag in a 5 gallon pail – then add wax. Fill 3/4 of the bucket with cool water and hand wash the wax .
And for heavens sake don’t wash wax in your kitchen sink! How do you spell clogged drain? One way is B-E-E-S-W-A-X.
For Crafters
For non beekeepers, perhaps some of the initial work has already been done. You are faced with various blocks of wax or a bucket of cappings wax.
Before further cleaning, remove any obvious sticks, pieces of wood, bee body parts etc. Large chunks of beeswax will take longer to melt than small pieces. Consider breaking them up into smaller pieces with a hammer.
Either way, we want to melt the wax slowly and at the lowest temperature possible to preserve its quality and color. Even though the color of beeswax does not really imply quality – most people prefer golden or light colored wax.
Methods for Cleaning Beeswax
Even if the wax appears to be clean – it may not be ready to use for every type of project. How you proceed from here depends on the amount of beeswax you want to render and the tools at your disposal.
Here are the most common methods:
- water bath
- double boiler method
- crockpot or slow cooker
- solar melter

Water Bath Method
The water bath method is one of the simplest ways to clean beeswax. By melting beeswax directly in water impurities separate from the wax and sink to the bottom. It is often used in combination with other methods for really pure wax.
Equipment Needed
- raw beeswax
- large pot (dedicated for wax)
- water
- heat source
Step by Step Instructions
In a large pot (dedicated to be your wax melting pot), add a few cups of water. Place beeswax cappings or small pieces of wax directly into the water.
Turn the heat source on low to low-medium heat – the water should not boil. As the wax slowly melts, occasionally stir with a wooden skewer, etc. When the wax is completely melted, remove the pot from heat source and allow to cool.
Once cool, you should have a cleaner block of wax. You can discard the dirty water.

Double Boiler Method
A double boiler is the safest method for cleaning beeswax. One pot sitting on the stove contains water. A smaller pot sits inside and holds your wax. You can use full sized pots of course – but, I love these small melting pots for small amounts of wax.
This setup allows the heat to be transferred from the water to spread uniformly around the upper pot. There is less chance of over heating the wax or causing a fire!
Equipment Needed
- raw beeswax
- double boiler
- strainer or cheesecloth
- heat source
- flexible heat resistant container
Step by Step Instructions
Set up your double boiler. Place water in the larger pot and beeswax to the smaller pot that fits on top. Gradually heat the water causing the beeswax to melt. Gently stir the wax as it melts to promote even heating.
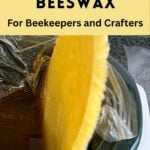
Once the wax is liquid, carefully pour it through a straining material. Use cheese cloth, nylons, paint strainers or old sweatshirt material for straining.
If you quickly wipe out the wax pot with paper towels – it will remove most of the wax. But, you need to have dedicated utensils, dishes or pots for wax work.

Using a Crockpot
Using a crockpot to render raw beeswax is a convenient and (mostly) hands-off method. It allows you to slowly melt the wax at a steady and controlled temperature. This method works well when you have a a quantity of beeswax to large to clean in a double boiler.
Equipment Needed
- uncleaned wax
- crockpot (slow-cooker) with adjustable temperature
- strainer or cheesecloth
- flexible container for collecting clean wax
Place the crockpot on a flat, heat-resistant surface. Sometimes you can find a used one at a thrift store that can be dedicated to wax cleaning. Another option, use disposable crockpot liners to make cleanup after a breeze.
Set the temperature setting on the crockpot to “warm” or the lowest temperature setting. Place the lid on the crockpot and allow several hours for the wax to melt.
The time required depends on room temperature, crockpot setting and the amount of wax in the pot. nce all of the beeswax is melted, turn off the crockpot.
Place a fine mesh strainer or cheesecloth over a clean container. Carefully, pour the molten wax through it into the collection container. Be careful – hot wax can burn you. Let the hot wax cool and solidify.


Clean Beeswax in a Solar Melter
A popular option for beekeepers with a lot of raw wax or a crafter with a tiny amount is a solar melter. The melter is made from a container that holds some heat with a glass top that lets in sun.
My melter is made from an old steel box with a heavy piece of glass on top. It is really ugly and looks gross but it does the job well.
Fresh wax cappings are placed into a pan inside the box that sits at an angle. Underneath, a tray with a small amount of water will collect the dripping wax as the heat of the sun melts it.
As temperatures drop, the wax will cool into solid form in the tray. Once cooled, I can remove the solid chunk and discard any water.
The water will be dirty and have honey residue – do NOT feed it to your bees. It may make them sick. (In many cases it is not good advice to feed honey to your bees anyway.)
For small jobs, you can make your own solar melter using an inexpensive Styrofoam cooler (or similar container) and a sheet of glass.

Storing Clean Beeswax
Beeswax does not require any special storage procedures. Clean beeswax doesn’t spoil like food, but it can absorb odors, collect dust, or become discolored if not stored correctly.
There are many types of silicone molds in a variety of shapes that makes storing and stacking beeswax easy to do. Then, it will be ready for any special projects when you need it.
Expert Tips
Beeswax is flammable at high temperatures. At about 400° F, it will flare and burn. **Be careful – always take proper precautions to prevent burns and fire**
Raw beeswax is often sold in larger cakes or a wax disc, luckily wax is brittle when cold – you should be able to hit it with a hammer and break off chunks.
You will hear the term “rendering” in regards to cleaning beeswax. It means the same thing-its an older beekeeping term.
It is important to remember that you do not want to overheat your beeswax (below 200°F). Too much heat will reduce the nice aroma and darken the color.
Cooled wax will NOT easily come out of every type of container-use something that is flexible. Leave your wax to cool and harden over night.
Ideas for Use
What will you do with your cleaned beeswax?
- create unique and beautiful beeswax candles with dried flowers
- creating a special batch of homemade beeswax lip balm
- natural beeswax furniture polish
- try making your own bees wax melts-customize their scent with different fragrances
- you can even make your own beeswax crayons – a great non toxic item for the kids
- need a natural herbal remedy – try this Black Walnut Herbal Salve Recipe
FAQs
Yes, beeswax will cause fire if overheated. The flashpoint of beeswax is about 400°F.
Cleaning beeswax is essential to remove impurities. Raw wax can contain pollen, debris, honey or dirt. The appearance and safety of your final products depends on clean wax.
You can use beeswax without cleaning it for some projects. Homemade beeswax firestarters do not require clean wax. However, dirty wax can clog the wick of beeswax candles.
No, there is no perfect method to clean raw beeswax. It depends on your preferences and the resources that you have available.
Yes, but the risk of a big mess and overheating could be an issue. The heat should be at the lowest possible setting and constant surveillance is needed.
Final Thoughts
Cleaning beeswax is not difficult. This valuable honey bee product sells for more per pound than honey. With a little patience and the right setup, you can turn raw wax into a beautiful, ready-to-use material for all kinds of projects. Whether you’re a beekeeper or a crafter, freshly rendered beeswax is a joy to work with.
How do you manage the water left over after rinsing the cappings?
Honestly, I discard it down the drain. I dont want my bees to eat it after it has been heated – even if not to a high temperature.
Thank you so very much! So appreciate your website and super timely responses!
Good luck!
I have extracted wax from the capping that I had frozen, heated and then strained. I am left with a lot of ‘honey’ – is this safe to eat? What can I do with it?
Honestly, I throw it out. It has been heated – I would not feed it to my bees. Better next time to get as much out as possible before freezing or heating.
Hello, I have melted my wax using in water, but after cooling down it was quite ‘friable’ or ‘crumbly’, not as hard as I have seen on many pictures and videos. Do you have any recommendations?
Hmmm, the only time I have seen something similar was when someone used a metal pot that reacted with the wax.
Appreciate your postings Charlotte. What would be the problem in putting the caps to boil before washing? Wouldn’t the honey still come out of the combs along with the debris?
Sure, but I let the honey drip out of the wax first because it is good clean raw honey. Then I rinse only because I want to reduce the amount of “goop” in my hot cleaning water. You don’t have to rinse though.
Brilliant! Thanks for your reply. That explains it. Yes, the comb was old. I will try melting some in hot water as you suggest but I’ve also found that it is a good starter fuel to get the log fire going. I think it’s to do with the large surface area. Do you happen to know what is the chemical makeup of pupil casings?
Thanks again for your reply. I always learn something when I visit your website.
Kind regards
Wonderful. Best of luck to you. I too worked with old comb once and it yielded such a small amount of wax – I said “never again” LOL
Hi Charlotte
Thanks for your very interesting website. I have learned such a lot from you.
Earlier in the year we had a colony die and I am ashamed to say I have only just got round to dealing with the hive. The empty comb was nasty grey/black and I thought I would just melt it and make rough candals to take the frost off my greenhouse in spring. I put it in a dish in the oven and it softened but it simply wouldn’t melt even when I turned the heat up much higher than would normally melt it. I am very curious to know what changes have taken place in the comb and wondered if you would know.
Kind regards
Was the comb old? If it had been in a hive for a few years – that could be the problem. Each round of brood leaves behind pupal casings in the cells. These of course do not melt. I’ve had this happen before when melting down several old frames of comb and only ending up with a tiny bit of real wax. Just in case (and to be safe in regards to fire), I would melt it in water and see what happens (in a throw away container of course ;).
Curious what other steps are needed when rendering wax to consider it “food grade?” Beeswax is basically edible, but no one wants to eat partial wings, propolis, old honey and other debris that harbor inside.. so melting down and fine-straining through a thicker (clean) nylon stocking seems to work.. thoughts? Thank you!
I have no idea though I would assume it is the same issues are processing honey. Clean conditions
Is it safe to put used wax into a feeding tray for the bees to clean up?
I think so, if you do it far away from your hives. Otherwise, you may start a robbing frenzy.
Hello Charlotte,
I’m sorry for the delay.
Thank you for the suggestions.
I asked the local producer what was the temperature of his beeswax processing, but he wasn’t sure about it. On the Web I found that to preserve the beeswax “alive”, the temp should not be over 64-65C(147-149F). Do you check your melting temperature, by any chance?
Thank you for your time.
Beeswax is composed of many compounds, esters, fatty acids etc. I have been to a lot of beekeeping meetings but I have never heard anyone say that wax was damaged at those temperatures. I have read that you dont want to heat beeswax over 185F or 85C. Also, it is worse for the wax to be held at a hot (but not scorching) temp for a long time rather than reaching a higher temp briefly. I checked my wax temp when I first started and it was about 162F – I would never get the wax melted at a lower temp.
Hello Charlotte,
I am looking to find raw(unheated) beeswax about 2lbs. From what I’ve seen on your site, I realized that it will be “mission impossible” to find what I’m looking for. In the states, most beekeepers use the same principle that you have so beautifully demonstrated here?
Any suggestions are greatly appreciated.
Thank you for your support and sharing of your passion,
Hmm. Well, I don’t think you will be able to find unheated beeswax unless you find a local beekeeper. Tell him or her that you want to buy the beeswax cappings left over from harvest. You don’t want them melted down. I do heat my beeswax carefully because it is the only way to clean the wax and separate from residual honey. So, I think beeswax cappings is what you would need to look for.
I have a pail of capping wax that was left unprocessed. All the wax is infiltrated with grey mold (definitely not bloom). Is it possible to safely process the wax and remove the mold? Will using this wax in candles run the risk of casting off mold into the air when candle is burned?
It will be fine. You can clean it – rinse it as well as you can and then remelt it and strain through cloth.
You are so wonderful. Would love to come spend a few hours with you. Have you ever considered having a group over and charging for your time?
Thank you so much for you kind remark. I used to do local classes but it becomes a liability issue.
Can be keeping be done in harsh winter climates like up state NY?
Absolutely, people keep bees almost everywhere. You would need to take to a local beekeeping group or your state agricultural department to learn about any special measures you should take to protect them during winter. I think I have some NY beekeepers in my Facebook group
What are your thoughts on using a crockpot on low to melt, then screen to filter?
Absolutely fine idea.
And for heavens sake down wash them in your kitchen sink!
Is this not exactly what you want people not to do?
Its probably “don’t”
Dieter
LOL, opps thanks – darn auto correct – it was dont not down. Thanks for catching that. I learned early on to keep beeswax away from my drains as much as possible.
About open air cleaning:
Robbery is not the only reason. Spreading of deseases as for instance foulbrod will follow the honey and wax. That is why you never should feed with honey of any kind in open air..
I could not agree more. There are several reasons that open air cleaning can cause problems. If bees from a diseased hive intermix with non diseased bees, they sure could spread disease !