DIY Lip Balm with Beeswax & Coconut Oil
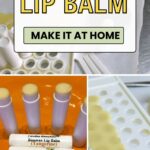
In this easy DIY recipe you’ll learn how to make lip balm at home using beeswax and natural oils (coconut oil, olive oil, etc). It starts with just a few simple ingredients to create a moisturizing balm that locks in hydration. No fancy equipment is required and it is practicly mess free. Let’s melt, mix and pour your way to the best natural lip balm you’ve ever used.
Making homemade lip balms is one of the easiest projects using beeswax that beginners can choose. In part because there is a lot of room for variations – (use one type of oil or another). Also, the process is very forgiving. If you don’t like it – remelt and try again.
The Magic of Beeswax in Lip Balm
Making your own balm is so easy – anyone can have success. And, it isn’t just a craft project – it’s a simple way to care for your skin using pure, natural ingredients.
Beeswax creates a protective barrier to seal in moisture while the oils add softness and shine. Together, they form the perfect base for homemade lip balm without a high price tag.
You can make several diy lip care products with beeswax for the cost of one commercial product (such as Bert’s Bees).
What You’ll Need
So what do you need for your beeswax lip balm recipe? Thankfully, not much. This easy recipe calls for only a few ingredients and tools you probably already have.
Basic Ingredients
- beeswax
- oils or butters (like coconut oil, olive oil or sweet almond oil)
- fragrance or flavor oils (optional)
Beeswax for Lip Balm
Beeswax is the star ingredient for any homemade lip balm recipe. It helps your balm stay firm and creates that natural protective barrier.
If you are a beekeeper, (or know one) pure raw wax from the hive works wonderfully. However, be sure to clean your beeswax first.
Another option – you can buy ready-to-use beeswax in bar form or pastilles. The smaller pieces melt faster and are easier to measure – but they do cost more.
Check the labels to make sure it is 100% pure beeswax and not a cheaper blend. And remember, beeswax alone won’t soften your lips (try rubbing a candle on them – it doesn’t work.)
We must pair it with nourishing oils to create the perfect balance and viscosity for the end product.
Oils and Butters
There are many different combinations of oils and butters used in making lip balm. Each one softens the wax and adds moisturizing power.
Coconut oil is one of the most popular choices. It melts easily, smells great and leaves lips silky smooth. (You can also use, olive oil, jojoba oil or sweet almond oil for similar benefits.) For years, I used palm oil but I have made the switch to coconut now.
If you want a richer, creamer lip balm (and heavier), consider using shea butter, cocoa butter or mango butter. (Be aware some folks are allergic to shea butter – so keep that in mind).
Everyone has a personal preference-and honestly it is about personal preference as much as anything. As one of my secret ingredients – I add a little caster oil to the recipe. It gives your DIY lip balm a soft glide without feeling greasy.
Fragrance or Flavor (Optional)
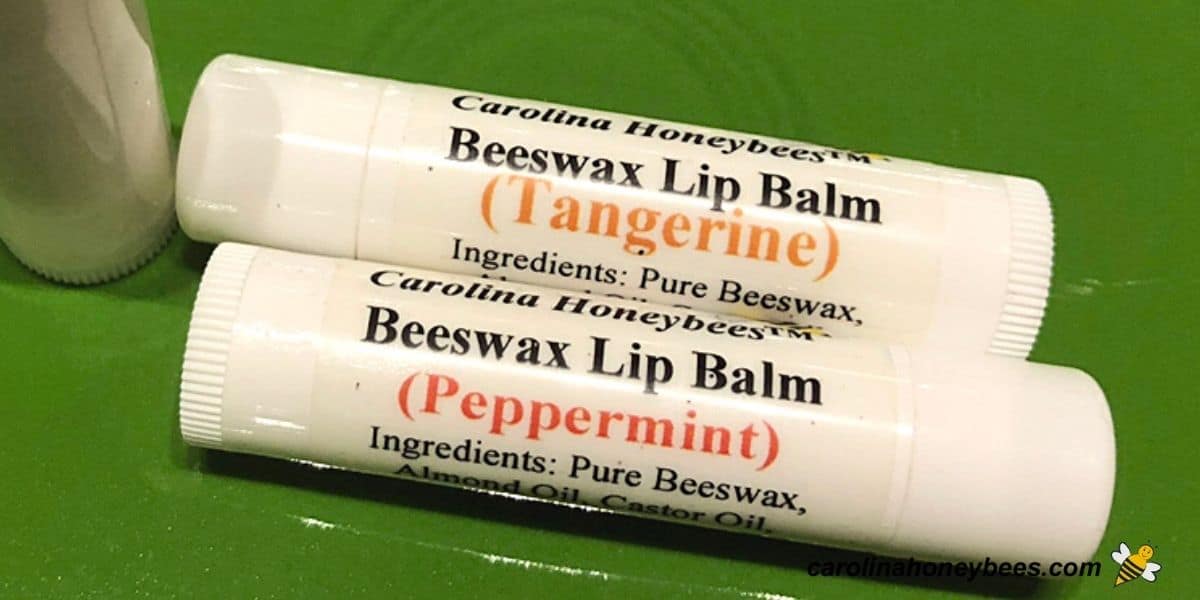
Adding a little scent or flavor can make your homemade beeswax lip balm extra fancy. But choose carefully – only use skin-safe essential oils or flavor oils made for cosmetic use. (I like – peppermint, orange, tangerine, lemon or vanilla.)
Avoid using candle or soap fragrances – they are not the same thing!
I do not add flavor oils to my diy beeswax lip balm – but you can. I feel that it tends to make you lick your lips more which can lead to dryness.
The Rule of Thirds for Homemade Lip Balm
Most recipe for natural lip balms are based on the rule of 3’s – a simple ratio.
- 1/3 beeswax – for firmness and protection
- 1/3 butters or oils that are liquid at warm temperatures
- 1/3 oils – that are liquid at any temperature
This formula gives a balanced lip balm that is firm enough to stay solid – yet soft enough to apply to your lips. Of course, the variations to this basic recipe are endless.
Equipment You’ll Need
You don’t need much equipment to make beeswax lip balm. A few simple tools are all it takes to melt, mix and pour your lip balm.
Basics:
- heat-safe container (like a glass measuring cup or double boiler setup)
- a spoon or stir stick for mixing
- lip balm tubes or tins for pouring your finished balm into
A note on containers:
If you like to apply lip balm with your finger, the sliding tins are nice. I use the common plastic tubes and caps. When made from the proper mixture of wax and oils, the tubes should not leak under normal conditions.
I would not leave them in a hot car during Summer. I can also testify that the washer and dryer are not good environments for these products.

Making Lip Balm Step by Step

1. Measure your ingredients. Now, it’s time to melt. Begin by melting your beeswax. I use a double boiler method to melt my wax. This may be a stainless steel double boiler or a glass measuring cup inside a pot of water.
Yes, you can melt it in the microwave but I don’t recommend it. With a flash point of around 490 °F beeswax can overheat and burn easily. Slow and steady using low heat is the best option.
2. Once the beeswax is melted, add the oils and/or butters and stir well until everything is liquified again. Now, remove it from heat and add vitamin E oil (if desired) and essential oils or fragrance oils. Stir.
3. If you have one of the special trays that hold lip balm tubes – they are wonderful. Pour the mixture into your prepared tubes. It is okay to run it over a little bit because as the wax cools you will notice dips in the top.
You can go back in a couple of minutes and pour a bit more material on the sunken spots if you wish. Let the balm cool completely.
4. Scrape off the overflow mixture on top – I save it to remelt and reuse. Then, remove the lip balm tubes from the holder and place a cap on each one.
Expert Tips
- Always begin with clean beeswax.
- Measure your ingredients using a scale. I prefer to use grams.
- Consider making a large batch without flavor and divide it into smaller individual parts
More Ideas
There are many cool projects you can make with a little beeswax.
Want to reduce the use of plastic in your home, these natural beeswax food wraps are great.
If you love the idea of homeopathic remedies, consider whipping up a batch of honey aloe vera burn salve -its great on small scrapes too.
For further skin pampering – try this beeswax body butter or this wonderful Natural DIY Face Moisturizer.
FAQs
Yes, but beeswax gives your balm structure and staying power. For a vegan alternative, try carnauba wax.
The idea sounds great but honey does not blend well with oils and wax. It may separate and spoil over time.
Store it in a cool, dry place and your homemade lip balm should stay fresh for at least 6 months – maybe 12 months if you add a little vitamin e oil.
In general, a chapstick (also a brand name) would be a harder, heavier mixture while lip balm is more moisturizing and glides on smoother. However, you will hear the terms used interchangeably.
Final Thoughts
One of the most important benefits of making beeswax lip balm – when you make your own products, you know what is in it! No unknown chemicals or preservatives. You can create a natural lip balm that feels great, lasts for months and makes thoughtful gifts too!

Lip Balm Recipe with Beeswax and Coconut Oil
This post may contain affiliate links. As an Amazon Associate, I earn from qualifying purchases.
Read my Disclosure.Supplies
- 27 grams Beeswax
- 31 grams Coconut Oil (or similar)
- 25 grams Sweet Almond Oil
- 7 grams Castor Oil
- 1/4 tsp vitamin E oil (optional)
- 6 drops Peppermint Essential Oil (optional)
- 16 pieces lip balm tubes
Instructions
- Melt the Beeswax: Using a double boiler is a safe way to liquify your wax. I can not express enough how much I love these light-weight double boiler inserts. I have several and find them so handy.

- Add in Other Oils: When most of the wax is melted, add the coconut oil, sweet almond oil and castor oil. Stir gently. Sometimes I use a microwave for these but you can just add them to your double boiler too. Once everything is liquid, mix well and remove from heat.
- Add Vitamin E (and fragrance oil if scent is desired)Now is the time to add a small amount of vitamin E. You may purchase liquid vitamin E from a craft supply. Or for a small batch, vitamin E capsules can be cut open and the content inside used. Vitamin E prolongs the freshness.If desired add a fragrance oil to the mixture. Use the ratios provided by the manufacturer with your fragrance oil and be sure that it is approved for cosmetic use. Honestly, I don’t use it.
- Pouring Mixture Into Tubes: Before the melted ingredients begin to cool too much, we must pour it into our tubes. The use of a special tray to hold the tubes is a very valuable aid. However, it is not a requirement and you can certainly pour them by hand.
- Filling tubes: Fill each tube.Don’t worry about a little over flow – the tray will catch it. And, it is easily cleaned up once cool.
- Cool and Clean: Let the tubes cool and they will harden to a semi-solid consistency.A flat scrapper can be used to scrape the excess ingredients off the tray and be stored in a container for use later.
- Cool and Set: After an hour – Remove the cool tubes from the tray and top with the provided caps. Your lip balm is ready for a label .


Notes
- This is a basic recipe for homemade beeswax lip balm. You can make adjustments.