Beeswax Candle Recipe
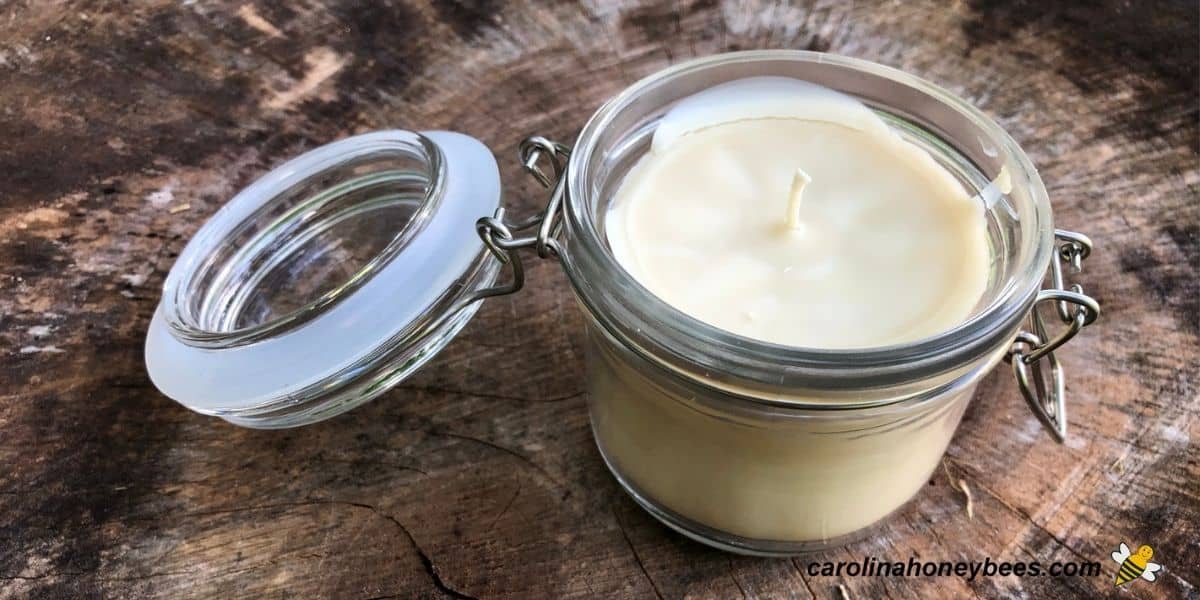
This tutorial provides an easy beeswax candle recipe that combines beeswax and coconut oil. This special blend enhances the candle’s performance. The coconut oil makes the wax easier to work with and creates a softer candle. With these step by step instructions, you can blend these two natural ingredients to produce a beautiful high quality candle.

Of course, you can learn how to make beeswax candles with many different techniques. But, the texture of a beeswax coconut oil blend is quite different than regular candles. Let’s get started.
Why Combine Beeswax & Coconut Oil
This beeswax candle recipe is worthwhile because in combing the two major materials – you bring out the best in both.
Beeswax is known for giving a bright, clean, long burn when used in candles. But, it burns a bit hot.
Coconut oil contributes a nice texture and helps control the heat – as it is not as “hot-burning” as pure beeswax.
Besides, candles are not cheap. Make your own for a fraction of the cost and choose the fragrances and materials that you prefer.

Materials
For this project I am using a jar container. Of course, you can use a tin or other heat safe container if you wish. Here are the major materials needed – of course you will need a heat source.
- beeswax
- coconut oil
- cotton wick
- containers
Beeswax
What kind of wax do you need? Beeswax comes in different natural colors. Expect various shades of beige-gold and yellow beeswax straight from the hive.
However, if you buy white beeswax, (or white store-bought candles) it has likely been bleached. This is okay. But, if you want the cleanest burning experience – go for raw unbleached wax.
You can purchase it online or buy from a local beekeeper. If you have your own hives, you probably have some wax left over from the honey harvest.
Beekeepers often use a solar wax melter (or similar process) to block up their raw wax. But, this is not enough for good candle burning – raw wax should be cleaned more than once.
You must have clean wax or your candles will not burn well. Clean your beeswax again before starting this project if you have any doubt.
Coconut Oil
When creating a container candle – the mix of coconut oil with beeswax promotes a cooler burn temperature than you would have with wax alone. Coconut oil is a favorite blend but some people use soy wax too.
Sometimes you can find coconut oil at the local grocery and save on shipping costs. However, it can be purchased online also.
I adore pure beeswax candles but there are some situations where adding another wax or oil has advantages.
Candle Wicks
Known for their long burn time, pure beeswax candles are virtually dripless when used in a draft free location. But, they require a larger wick size.
Even with the mix of coconut oil in the blend – I prefer to use the size 2/0 (medium size) cotton wick for jar sized candles (as shown in this tutorial).
Containers
This tutorial uses a small metal clip and hinge jar- I found some at Hobby Lobby. You can also use small canning jars.
Mason jars are homey looking and readily available. Try to choose one with a wider mouth – we need some oxygen to get down in there for a good flame.
My jars hold about 6-7 ounces of the beeswax candle recipe each. You will need to adjust your recipe to fit the size of jar you choose to use. Don’t panic – you can remelt and reuse the mix if you have too much or not enough.
How to Make Them

1. Begin by safely melting your beeswax. The safest method is to use a double boiler set-up. A small melting pot to hold the materials – inside a slightly larger pot of water. Go slow – allow the wax to slowly become liquid. Never leave it unattended and do not overheat your wax. We just want it to melt.
2. While the wax is melting, measure and prepare your wick. You need enough to reach the bottom of the container with some extra to wrap around the skewer or clip used to hold it at the top. Sometimes I “pickle the wick” by dipping it into the melting beeswax for a minute – sometimes I don’t.
3. Place the wick into the container with a little extra in the bottom and use your skewer clip or even a clothespin to hold the wick at the top.
4. By now your wax should be melted, it is time to add the coconut oil. Coconut oil melts really fast. In just a moment or so – everything should be liquified again.

5. Remove from heat and add any essential oils if you wish. Stir. Then, slowly pour your wax/oil mixture into the container.
Fill it to the desired level but remember that you do want to leave some room for a wax pool at the candle burns. After letting the candle cool completely – trim the wick to 1/4″.
Safety Precautions
This beeswax candle recipe is very easy to create but use common sense precautions. Never leave melting wax and oil unattended to prevent fires or burns. Perhaps, keep a little honey aloe burn salve on hand just in case.
Do not overheat the ingredients. Use wax paper or parchment paper to protect surfaces from drips as you work with the wick and pour the ingredients.
This post may contain affiliate links. As an Amazon Associate, I earn from qualifying purchases. Please read my disclosure.
Expert Tips
You can melt your wax in a microwave but I do not recommend it. It is much safer to use a double boiler set up. If you use the microwave – melt in small burst and stay with it!
Some crafters use wick stickers to hold the wick down into the bottom of the jar. I don’t usually need to do this because I prepare the wick (as shown in the tutorial below) in advance. Another option, is a bit of melted wax or a hot glue gun.
If you want to add a elegant twist to your creations, check out this tutorial for adding dried flowers to candles. They are different and have a special charm.
How to Use
When using your candle, it is always best to let it burn for a little while. Staying lit long enough for the top of the candle to create a nice pool of wax results in a better burning candle.
Many short burn times can create a tunnel in your candle with the area around the wick burning down lower than the rest of the body.
More Ideas
I am sure you will have a little wax left over! That’s great. Because there are many more projects to try.
For a seasonal theme and a great way to promote recycling – you can make egg shell candles with some wax and a wick. Kids love them because it so unusual.
One of my favorites is these diy seashell candles from shells collected on your last beach vacation. They make great gifts or a sweet way to brighten up an evening picnic.
The easiest candle project must be rolled beeswax candle tapers that are praised for their elegance and simplicity. Even children can make these.
You can even make Christmas Tree Shaped Candles with sheets of wax. But, rolled candles do burn quickly – they are really more for aesthetics than practical use.
Those left over essential oils are awesome in these adorable bee shaped beeswax soy tarts and they can be added to regular beeswax melts too.
But, there are more uses for beeswax than just candles. Make your own beeswax furniture polish – a little dab will do the job.
What about pampering yourself. Homemade beeswax lip balm is an inexpensive and fun diy project.
Also, beeswax body butter is sure to help everyone get through the dry skin months of the year. There is a lot you can do.
FAQs
Sure, essential oils or fragrance oils can be used in your candle recipe. Lavender, Eucalyptus, Peppermint, Pine and Orange are popular choices.
One of the benefits of beeswax candles is that they bright and hot. This is a great thing for candle tapers (even hand dipped beeswax candles).
But, the high burn temperature may be a bit too much for glass containers. By adding a bit of coconut oil or soy warm – we can still get a nice candle without having quite as much heat.
Yes, you can use refined or unrefined coconut oil in your beeswax candles.
To minimize air bubbles, melt the beeswax and coconut oil mixture slowly over low heat and stir gently to avoid incorporating excess air. When pouring the mixture, pour it slowly and evenly to reduce the risk of trapped air bubbles. Additionally, you can gently tap the container on the counter after pouring to help release any remaining bubbles.
Final Thoughts
You don’t need a complicated recipe for beeswax candles but some basic instructions can help your chances of success. Have fun and make the project your own.
By making your own candles, you can avoid exposure to possible carcinogens that may be present in paraffin candles. When you make your own – you know what is in them.

DIY Beeswax Candle Recipe Tutorial
This post may contain affiliate links. As an Amazon Associate, I earn from qualifying purchases.
Read my Disclosure.Tools
- small glass jars
Supplies
- 8 oz beeswax net wt
- 1/4 cup coconut oil
- 2 wicks cotton candle wick 2/0
- 1 bottle essential oil of your choice (optional)
Instructions
- Melt beeswax in a double boiler pot (or equivalent insert). It is always a good idea to have a pot dedicated to wax crafting.Using the double boiler method involved having water in the bottom pot with wax in the top. This makes melting beeswax much easier and safer.

- Once the beeswax is completely melted – add in the measured amount of coconut oil and stir.

- When making candles, I prefer to "pickle the wick". Prior to setting in the jar, I dunk the wick into the melting beeswax.

- Remove wick and stretch to a straight shape – let cool a minute or so. This makes it much easier to work with.

- Prepare your wick by wrapping one end around a wooden bamboo skewer, pencil or craft stick. The wick should hang down into the bottom of the jar – center it in the middle as much as possible.

- Remove the melted wax from heat and add the desired essential oil. About 50-100 drops . Lighter fragrances may require more for a stronger scent. This involves a bit of personal preference.

- Slowly pour wax into your prepared containers. Keep the wick centered as well as you can. If possible, the container should be on a counter space where they can be left undisturbed for a couple of hours to cool. Leave a bit of head space at the top of the container.

- Once candle is cool, trim with to 1/4". This allows for cleaner burning.

Notes
- I recommend warming the glass jars prior to setting the wicks.
- Once the wax is poured into the jar – leave is sitting still until the surface has cooled.


