How to Make Beeswax Soy Wax Tarts
Learn how to make beeswax soy wax tarts for a natural way to freshen up your indoor living space. With a wide range of fragrances and colors to use, it is easy to find something that pleases everyone. Scented wax tarts are a great way to enjoy the fragrance of a candle without the danger of a burning wick.

There are so many uses for beeswax, you will likely never try them all. But, there is a good reason it is such a popular crafting medium. It is easy to melt and combines well with many other waxes.
What is a Beeswax & Soy Wax Tart?
Now commonly called, wax melts, the term “tarts” originated with the candle making industry. Candle makers were looking for a way to use left-over bits of candle wax.
Because of the forms used, these bits and dabs of wax resembled “pastry-tarts”, hence the nickname began. Isn’t that funny-but it can cause some confusion at times.
This post may contain affiliate links. As an Amazon Associate, I earn from qualifying purchases. Please read my disclosure.
Materials
You only need a few items and some of them can be substituted.
- soy wax flakes
- beeswax
- mold or form
Soy Wax
Choose a high-quality soy wax. It is often sold in blocks or bags of flakes. Flakes are much easier to measure and melt.
Beeswax
Likewise, purchase beeswax from a reputable source. Any color of beeswax will work the same – however, the lighter colors (white, light yellow etc) usually look best for tarts and melts. Avoid dark colored wax – they just don’t look nice.
If you have raw beeswax from your own hive or a local beekeeper, it is important to clean your beeswax before using it for projects. It is a quite simple process.
Mold or Forms
Of course, you need some kind of mold of form to hold the beeswax and soy tart mixture as it cools. Bee shapes are fun but you don’t have to buy a fancy mold. You can also use simple cupcake liners like I did for these beeswax wax melts.
Using Colorants and Scents
The simplest way to add color and aroma to your homemade wax tarts is by using candle dye and essential oils. The amount of each you need varies greatly depending on the individual product and manufacturer.
The best advice I can give you is to find a color or scent that you like and experiment a bit. For scent, whether using essential oils or fragrance oils, start with a reasonable amount and make a small batch of wax tarts.
Continue to experiment adding more of the product until you get the effect you desire. In general, most crafters use 1 oz of essential oil for each pound of wax.
A word of caution – If members of your household have allergies or are sensitive to scents, proceed carefully. This includes your pets too! Some people and animals react poorly to strong odors even from a wick-less wax tart.
The Process – Melt & Combine

1. Begin by melting your waxes. I start with the beeswax because it is slower to melt. The safest way to melt beeswax is using the double boiler method.
2. Being a bit impatient and lazy, I melt soy flakes in the microwave. After measuring out the correct amount, place in a microwave safe container and melt in short bursts. Stir along the way to help the process. (Of course you can just pour the soy flakes in melted beeswax and stir.)
3. Combine both melted waxes and stir to combine. Remove from heat. Now is the time to add any essential oils, fragrances or colorants.
4. Pour the mixture into the form of your choice. If you use a silicone mold, you don’t really have to use mold release spray – but if you have it I would use it anyway. Leave to cool before removing your beeswax and soy tarts.
Expert Tips
- it is a good idea to protect your table or counters from splashes
- don’t over-heat your waxes. Do not leave them unattended. They do not need to be very hot – just melted.
- remember to go light with the added scents until you are comfortable with the end result.
- a wonderful thing about this beeswax gift idea is that if you are not happy you can melt it all and try again.
- work carefully to avoid burns – the materials are flammable if exposed to flame or intense heat
Making your own wax tarts are a great way to enjoy fragrance in your home without the fire dangers of candles.
Using and Storing
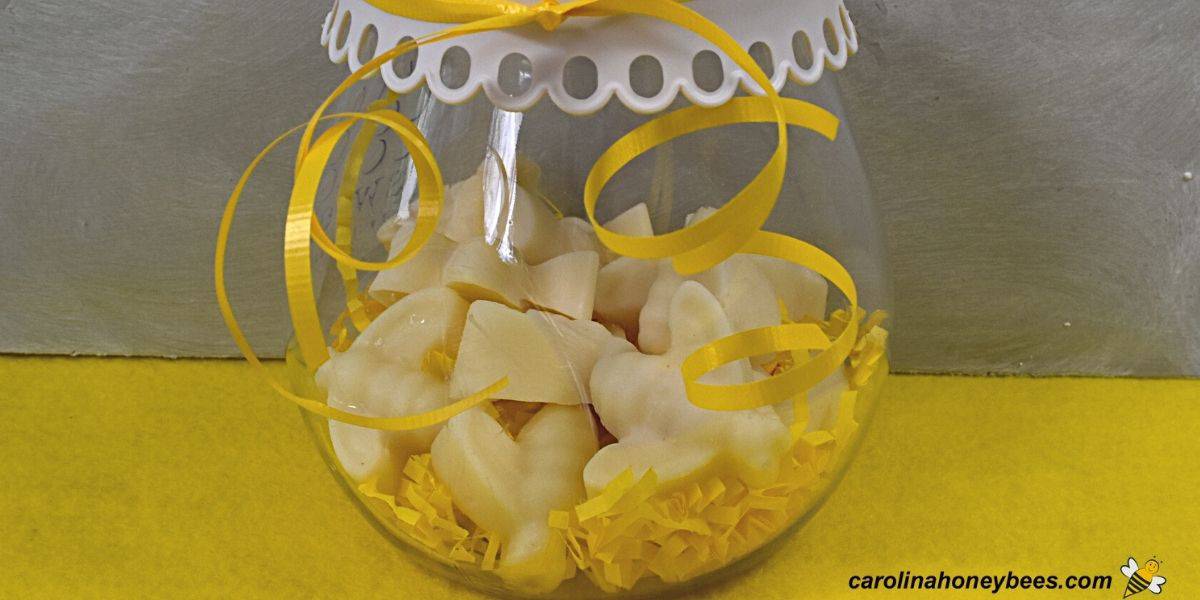
Store your set and cool beeswax and soy tarts in a sealed jar and store in a cool place.
Tarts, like melts work with various wax melters. These units are available in many different styles to fix any taste or décor.
Some are electric and make use of a small light bulb to melt the tart. Others have a solid warming plate above a tea light. This is a simple and fun way to use beeswax and soy to create a nice home product or gift.
Benefits of Beeswax & Soy Blend
There are many advantages to crafting wax tarts made with a blend of beeswax and soy way. The combination enhances the properties of both and results in a high quality wax tart.
Soy Wax
Soy wax is a popular material for making container candles but it also works well for creating scented tarts or melts.
It is often blended with paraffin and other waxes, such as beeswax, to create a soy blend best for a particular project.
Soy is cleaner burning than paraffin (when used for candles) and is a renewable resource. However, it is not without its challenges. As a soft wax, it can be harder to remove from a warmer or tart melter.
Beeswax
Beeswax is a wonderful natural wax made by honey bees. Bees use it to build the sheets of honeycomb inside the hive.
After every honey harvest, some beeswax is left over for the beekeeper to use or sell. It is a valued hive product – more profitable even than honey.
This natural wax is highly valued for making beeswax candles. Alas, beeswax and honey are not considered vegan. However, responsible beekeepers can harvest excess wax with minimal impact on the colony.
Beeswax is a clean burning, renewable resource that has a low melting point and lends well to mixing with other materials.
Mixing Beeswax and Soy-Ratio
In it’s solid state, beeswax is harder than soy wax. This makes it a perfect material to blend with soy for making wax tarts. The soy adds softness to the mixture and the beeswax helps the tart last longer.
A 25% mixture (1 part beeswax to 3 parts soy) is common but you can use any percentage. The more beeswax you add – the harder the finished tart and the slower it will melt. You may need to experience a bit to get the blend that works best with your style of melter.

More Ideas
Of course this is just one of many ways of creating with beeswax. There are hundreds of things to try. You can make beeswax candles with molds – they are so easy to do.
If you have young ones or small grandchildren, create a natural experience with this tutorial for making beeswax crayons. While not as vibrant as the commercial varieties – they are not filled with toxic chemicals either!
With a little of that left over beeswax, how about whipping up a batch of beeswax spoon butter! Its great for protecting cutting boards and wooden spoons.
And for a special, fun project – try these beeswax lanterns or luminaries. They provide a special touch to any table setting.
FAQs
A wax tart is a scented piece of wax (soy) that has an added fragrance. When melted in a special melter, fragrance is released.
Their really is no difference between wax melts and tarts. They are both the same thing.
Yes, soy and beeswax blends are safe to use for making wax tarts. Both are natural, sustainable products.
Final Thoughts
Crafting unique wax tarts with a beeswax and soy blend is a fun journey into the world of making natural things. You don’t have to be a crafting genius to have success. Remember, it is supposed to be fun.

Scented Beeswax Soy Tarts Tutorial
This post may contain affiliate links. As an Amazon Associate, I earn from qualifying purchases.
Read my Disclosure.Supplies
- 8 ounces Soy Wax Flakes (net wt)
- 2 ounces beeswax
- .5 ounce Essential Oil (I used Lavender)
- 1 piece Silicone Mold – Small Bee Theme
- 2 pieces wooden stir sticks
- 1 can Mold Release Spray
Instructions
- Beeswax takes longer to melt than soy – so you might want to begin with the beeswax. The safest method for melting beeswax is by using the double boiler method.This is basically a medium sized pot with water that holds a smaller pot with your beeswax. I have several of these little metal candy making pots for beeswax crafting.Measure your 2 oz of beeswax and place it in the melting pot. Small pieces or beeswax pastilles melt faster but a chunk of block melts too!

- Weigh your soy wax flakes and put into a suitable melting pot or double boiler. Instead – Soy can be melted in the microwave. Just heat it in short bursts – checking until it liquifies.

- Mix the melted soy wax and beeswax together and stir with a craft stick to blend. Let the mix cool for just a minute.

- Add the desired essential oil or fragrance. The amount needed depends on the oil used. Begin with manufacturers advice. Stir to blend.

- Pour the hot mixture into your silicone molds. I usually spray my molds with mold release spray first but this is usually not needed with soft silicone molds. You can find many types of cute molds that work well for making beeswax and soy tarts. I choose bees but any small candy mold will work.

- Leave the wax tarts to cool on the counter. Do not move the mold until the top has cooled enough to skim over well. If you are in a big hurry, you can then place them in the freezer for a few minutes. Otherwise, leave them to cool on the counter for a couple of hours.

- Once the tarts are cool and set, they will readily pop free of the mold. They are ready to use.


