Make Your Own Wooden Spoon Butter

There is just something special about cooking with a wooden spoon. However, you need to give them special care. Now you can learn how to make a beeswax spoon butter that will ensure a long life for your favorite wooden utensils. No, you shouldn’t just throw them in the dishwasher. (I learned that the hard way). Extend the life of your favorite cutting board or wooden spatula by giving them a bit of a spa treatment with some homemade wooden spoon butter with beeswax.

If you are not familiar with all the many ways to use beeswax – well, where have you been? This is marvelous stuff that has so many applications – you will likely never get to experience them all.
What is Spoon Butter?
Before you learn to make spoon butter, let’s really understand what it is! Spoon butter is a homemade concoction created by mixing oil and wax. It is often called wood butter because it can be used on any wooden utensil.
Quite often, the oil used in spoon butter recipes is mineral oil. But, this recipe combines beeswax and coconut oil. This simple method of protecting wooden utensils has been used for centuries. So we know it works – why fix what is not broken.

Ingredients
- beeswax
- coconut oil
- vitamin E oil (optional)
This simple recipe does not require a lot of fancy ingredients or materials. Equipment – not really. You need a heat source, something to melt the wax in and a jar to store the finished product. Melt the beeswax first, add the coconut oil – viola.
Beeswax
Any clean beeswax is suitable for making this spoon butter. Raw wax from the local beekeeper, bars or even beeswax pellets purchased from a commercial company. There is no need to pay extra for light colored beeswax – darker versions work just fine.
Beeswax is solid at room temperature. You may have to experiment just a bit to get the ratio of beeswax to oil just right for your desired consistency.
Beeswax is a great ingredient to use in moisturizing recipes. We even use to to make things like this beeswax body butter for our skin. So, it only makes sense that your favorite wooden spoon would love a bit of spoon butter too!
Coconut Oil
While some people use mineral oil for spoon butter recipes, I would rather avoid using it or petroleum products. Instead, food-grade coconut oil is readily available and lends well as a beeswax partner.
It also lasts longer without becoming spoiled or rancid like olive oils or vegetable oils will do. If you do not want to use coconut oil, sunflower seed oil, or grapeseed oil is a nice substitute.
Vitamin E Oil
Sometimes, I do add a few drops of vitamin E oil to extend the freshness of the recipe oils but that is optional. I tend to keep some on hand for when I am making my natural salves (homemade dandelion salve or this plantain salve.)
But, you don’t really need it. Some folks include a few drops of essential oils – such as lemon grass etc so that is an option.
Safety Precautions
Beeswax is very easy to melt and use in craft projects. However, hot wax can burn your skin! Be careful to safely melt your beeswax in a double boiler or similar method.
Never leave melting wax or oils unattended to prevent fires.
Expert Tip
If your finished beeswax spoon butter is too thick or hard to use easily – perhaps you need to add a bit more coconut oil. Remelt your ingredients – add a tablespoon of coconut oil to the mixture and let cool to try again.
How to Use
Once your beeswax spoon butter is cool and set, it is ready to use. Use your fingers to scoop a bit out of the jar and rub it thoroughly into your wooden utensil.
Apply a good coat to all your wooden utensils, cutting boards, wooden salad bowls or any unpainted wooden parts. Let the items sit overnight-or for a few hours .
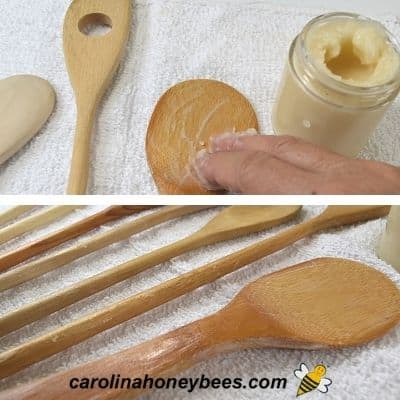
This lets the wax and oils soak into the wood spoon and create a bond. Next morning, take a clean soft towel and rub off the excess spoon butter – polish your wooden tools to a shine.
Your wooden spoons, butcher blocks or wooden cutting boards are now moisturized and protected – ready to use.
When to Reapply
Once your spoons begin looking dull and dry, its time to repeat the process. A common recommendation (I don’t know who said it) is:
Once a day for a week, once a week for a month, once a month for a year, once a year for life. Choose the schedule your utensils need.
FAQs
Store your spoon butter in a cool, dry place in an airtight container. This helps maintain its consistency and extends its shelf life. It should last between 6 months to a year when stored properly.
Yes, you can add a few drop of essential oil to your spoon butter. But why? Be careful of your choice or you will end up with something that may give your wood an undesirable smell or taste.
Yes, you can use other food-grade oils such as sunflower oil, grapeseed oil, or walnut oil as alternatives to coconut oil. Just ensure that the oil you choose does not go rancid quickly and is safe for use on wooden utensils.
Benefits of Homemade Wooden Spoon Butter
Wood is a wonderful natural product but it does dry out over time. Leaving your wooden utensils looking a bit parched or dry – even cracking. This makes it harder to keep your wooden spoons clean.
Regular application of spoon butter helps moisturize the surface. The beeswax adds a protective coating and a bit of waterproofing to your wooden ware. This helps prevent cracking or splitting and adds a nice new luster.
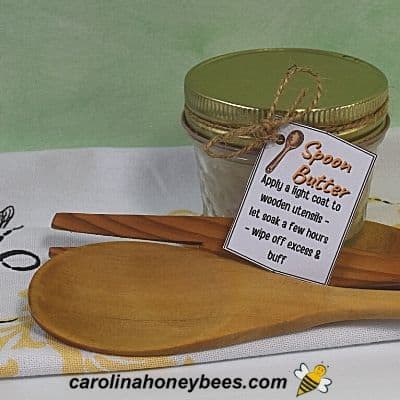
Spoon Butter Makes a Great Gift
Now that you know how to make your own homemade spoon butter, don’t keep this magical elixir to yourself.
Make a larger batch of spoon butter. What a wonderful gift idea for a beekeeper or small stocking stuffer for Christmas, weddings etc.
Pour into pretty jars and add a label to create the perfect homemade gift. Feel free to use these gift labels and print them on card stock.
The beauty of making spoon butter as a gift is that it can be used in many other ways too. It adds luster to any wooden surface.
If you are giving then during the holiday season, make some beeswax dipped leaves to add to use as a gift tag.
More Ideas
There are so many ways to use beeswax in and around your home. It can waterproof your old hiking boots, as well as, protect your wooden furniture with this DIY beeswax furniture polish recipe.
If you love creating natural products, be sure to check out these gift ideas: natural wax melts, beeswax balm for your feet or beautiful herbal wax sachets. It is so easy to have fun with a little beeswax. And in most cases, if you mess up you can remelt and try again!

Beeswax Spoon Butter Recipe
This post may contain affiliate links. As an Amazon Associate, I earn from qualifying purchases.
Read my Disclosure.Supplies
- 4 tablespoons beeswax (2 oz net wt)
- 8 ounces coconut oil (fluid ounces) (7.69 oz net wt)
- 3` drops vitamin E oil (Few Drops or 2 capsules)
- 1 piece small wide-mouth container
Instructions
- Melt beeswaxThe safest way to melt beeswax is using the double boiler method. I use a small boiler insert to melt wax. It is inexpensive and easy to use for all my wax projects.Measure your beeswax and add it to the double boiler pot. Slow and steady is the pace. Do not heat the water in the bottom pot to a boil – just a good simmer.

- Add coconut oil.Once most of the beeswax is melted, add your measured coconut oil. This oil will melt very quickly. Slowly and continuously stir to combine the beeswax and oil.
- Add Vitamin E Oil (Optional)Remove the pot from heat and add 1 capsule of vitamin e oil or 3 drops of liquid vitamin e oil. This is optional but it will help keep the oils in your recipe from going rancid for a longer time. Stir.
- Pour into containers. Before your mix starts to cool, pour into small containers to be used or given as gifts. Be sure to choose a container with a wide mouth to make getting the wooden spoon butter out easier.
- Set aside to cool.Let your homemade spoon butter cool and then seal the container. Even for home use, adding some type of label is a good idea. Your spoon butter should last 6 mos to a year.


