How to Clean A Bee Smoker

To ensure your tools consistently perform at their best, it’s crucial to understand the process of how to clean a bee smoker. The gradual buildup of residues can compromise the functionality of your smoker over time. Removing this buildup is essential to enhance the effectiveness and ease of use of your smoker.

One of the first things we realize as new beekeepers is the importance of the bee smoker. By releasing a controlled stream of cool smoker, the colonies are calmed and easier to manage. But, any tool must be in good order to work properly.
Give Your Bee Smoker a Yearly Cleaning
Because we burn combustible materials inside, this beekeeping tool can become a sticky, stinky, sooty mess. This makes it more difficult to use and even makes lighting your bee smoker more difficult.
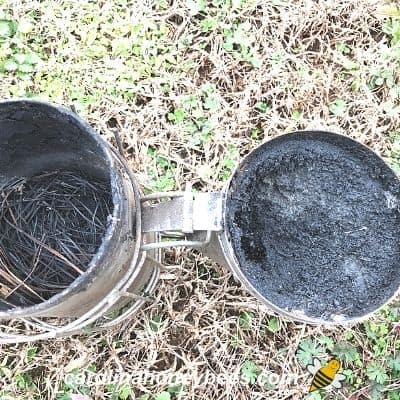
Over time, soot and tar residues build up inside the smoker and in the top and spout. This is no surprise, where there is fire and smoke -there is residue.
How Often a Bee Smoker Needs Cleaning?
How fast buildup becomes a problem depends on several factors. If you use your smoker often, it will require more frequent cleaning. Your choice of bee smoker fuel contributes to the issue too.
In my region, many beekeepers use dry pine needles for fuel. They are readily available and produce a nice white smoke that calms bees but they do leave more resins behind.
If you do not clean your bee smoker, it may become so clogged up that no smoke will come out! This has happened to me and at the most inconvenient times.
A good rule of thumb is to inspect and clean your beekeeper’s smoker at least once a year – either before storing your beekeeping equipment at the end of the season or at the beginning of the year.
Cleaning Methods
There are 2 common methods for cleaning a bee smoker. One method uses fire and the other a water/vinegar soak. As with most things you purchase today, smokers are not as heavy duty as they once were.
- water and vinegar
- fire
**I accept no responsibility for any damage resulting from the use of practices in this article. I am sharing with you what works for me and other beekeepers that I know. Proceed at your own risk.**
I suggest you attempt to clean your smoker with the soak method first and then you can judge if you need to go farther.
Dump Out Loose Material
Regardless of the method you use, the first step is to dump out any leftover smoker fuel or ashes from the fire chamber.
It is common to leave some material in the chamber because your smoker may still contain sparks when you are done with it. Some beekeepers place a cork in the spout to smoother out the fire when finished.
I used to do this but most of mine have become too beat up to do so. Even a good smoker can only take falling off the ATV so many times without showing wear.
Once the loose material is removed, you will still have sticky burned residue to contend with this is usually creosote.
Take your hive tool and scrape away all of the stuck on crud that you can. Pay special attention to the rim where your lid fits onto the smoker base.
If your bee smoker is very new, this may be all you have to do. However, most smokers that have been in use for a couple of years can benefit from some serious Spring cleaning.
Water/Vinegar Soak Method

1. After removing any loose residue. Use a screwdriver to remove the screws and take the bellows off of the smoker.
2. Inspect the bellows for any tears and make sure the small hole near the bottom (where air flows through) is open and not clogged with residue.
3. In a clean bucket, soak the metal parts in 1 cup of vinegar and enough water to cover the unit. Let soak for at least 6 hours – maybe overnight.
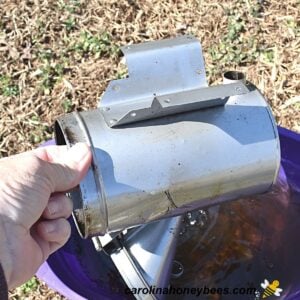
4. Remove smoker from water and wipe away any loose material. Rinse very thoroughly and place outside somewhere to drain and dry. If things looks okay – put the bellows back on – you are done.
Fire Cleaning – Baked on Creosote
Beekeepers that have a heavy duty or older smoker that has seen several seasons of use may go a step farther. Years of baked on crud may not respond to water and vinegar.
SAFETY PRECAUTIONS
For this project, some beekeepers break out the propane torch. This is also good way to get burned if you are not extremely careful. It must be done outside with all precautions to prevent fire or burns to yourself.
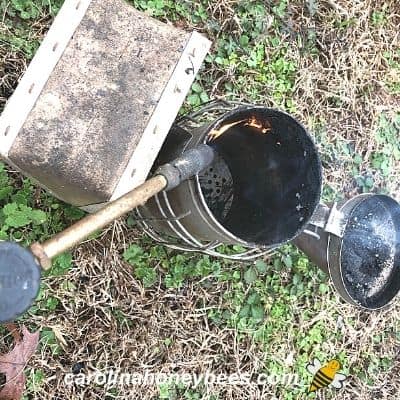
A lighted torch is used to apply flame to stuck on crud inside the fire chamber and in the lid. If you have a love for fire, you may find this very beautiful. Take care to protect the bellows portion of your smoker from flame – otherwise it will be ruined.
The sooty material inside will often begin to burn of its own accord. That’s okay but stay close by to ensure everything is safe. Once the flame goes out, leave the smoker to cool.
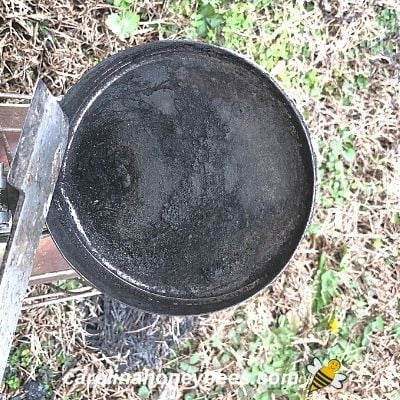
When the smoker is completely cool, use your hive tool to scrape out any left over residue. With the plant resins burned away, most of the material will come out easily. Or, at least enough of it to make the smoker functional.
FAQs
Frequency of cleaning a beekeepers smoker depends on how often it is used and the type of fuel used. A good rule of thumb is yearly.
Cleaning the outside is not as important to the function of the bee smoker. However, it might help you avoid getting soot or other residue on your hands or gloves.
If your smoke only shows light residue, a paste of baking soda and water may clean some of the less baked on residues away.
If you notice a reduction in smoke produced, weird smoke patterns, difficulty pumping the bellows or a top that will not close easily – it may be time to clean your smoker.
Final Thoughts
Take care of your smoker and keep it functioning properly and it will give you years of service. If the air bellows part wears out, you can replace only that portion. Once the whole thing becomes worn -you may decide it is time to buy a new model.
Beekeeping is more enjoyable when you have the tools and equipment you need. Oh and don’t forget, do you need to wash your beekeeping suit? Don’t go to the bee yard smelling like a stinky bear – the bees will not be impressed!
How to Clean a Bee Smoke with Vinegar and Water
This post may contain affiliate links. As an Amazon Associate, I earn from qualifying purchases.
Read my Disclosure.Tools
- Propane Torch
Supplies
- 1 bottle White Vinegar
- 1 gallon water
Instructions
- Remove Loose Crud from Smoker LidDump any left over contents out of the smoker fire chamber and use your hive tool to scrap away material around the lid. Pay special attention to where the lid fits on the base.

- Remove Bellows from Smoker BaseMost smokers have removeable bellows. This soak method is easier if you locate the screws holding the bellows on the base and remove them.If you can not do this, you can use cord or wire to hang the smoker in the water but keep the bellows (out of the water). We don’t want water to enter the holes in the bellows.
- Check Air Flow HoleYou will find a small hole near the bottom of the bellows back plate. Sometimes this can get clogged with soot – check it and open with a screw driver if needed.It’s also a good idea to temporarily store those little nuts on the screws of the bellows until you are ready to reassemble.
- Vinegar Water SoakPour 1 cup of white vinegar in a bucket and add enough water to cover the metal parts of the smoker. Let this soak overnight or at least 6 hours.
- Remove the smoker from the soak and use a rag to wipe away the loosened material. It may not look new but much of the baked on material will wipe off.
- Thoroughly rinse the smoker of all vinegar water and residue and hang it up somewhere to dry.
- Reassemble your smoker and you are ready for a great season of beekeeping.


I use fire it works for me I clean my smoker evry year.
I try vinegar this time .
I have used fire too it works good depending on what type of fuel you use most.