How to Make Honey Sticks (with Pictures)
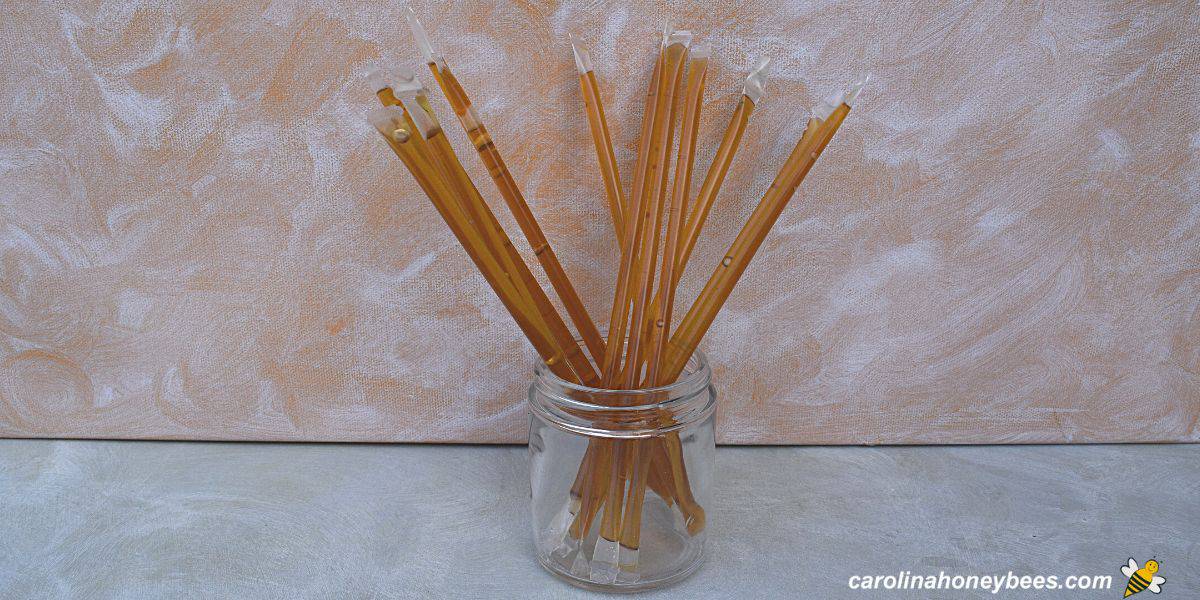
When you learn how to make honey sticks at home, you can be sure that they were made using the very best ingredients. As a natural sugar, honey is applauded for being a high energy snack. But, who wants to carry around a jar of honey in your pocket? No one. That is why having a small serving in a portable pack is so appealing.

Why would anyone want to go to the trouble of making honey sticks at home? Honestly, they do require some time and effort. It is the appeal of knowing for sure that your sticks (sometimes called “honey straws” are filled with only pure raw honey.
Homemade Honey Sticks
Of course, nothing is wrong with buying commercial honey straws to enjoy. Just understand that most of them contain other additives and flavors beyond those that come from a beehive. Be an informed consumer and read the labels before you purchase.
“Honey sticks or honey straws” call them what you will-are one of the best ways to make a small bit of honey portable.

This post may contain affiliate links. As an Amazon Associate, I earn from qualifying purchases. Please read my disclosure.
Equipment
In this project, honey is sealed inside plastic straws. So, you will need some type of sealer. It will melt the plastic ends of the straws enough to lock in the liquid – yet not get so hot as to destroy the structure of the straw.
My favorite is an impulse sealer – mine has lasted for years and is still going strong. It is a larger model because I made a lot of honey straws at one time. A small one will work too.

Materials
Beyond your sealer, you need only a few items. Of course, how many of each depends on how many homemade honey straws you want to make.
- honey
- straws (bulk clear .23″ diameter or similar) & a few (slightly smaller diameter)
- plastic condiment bottle
Honey
There is no need to buy a large container of honey – even a small jar will make a lot of honey sticks. It should be totally liquid with no signs of honey crystallization in the jar or container.
If you do see crystals, it is best to fix the honey by using a de-crystallization process before making your honey straws.
Regular raw honey works great but if you want different taste experiences – you can also use other varieties or types of honey.
Straws
I use two different sizes of straws in this tutorial. Normal sized clear drinking straws are used to make the actual honey sticks – these are the ones that hold the honey. They have a diameter of .23″ .
If you can get some that are not wrapped, that makes things easier – because unwrapping hundreds of straws is a bigger pain than you might think.
You also need a few small straws (I usually find striped ones locally that have the bendy elbow on them.) I used a smaller straw with .20″ in diameter – it fits closely inside the larger straw.
It does not matter about straw size – only than one is larger (in diameter) and the other is just a bit smaller. One fits inside the other.
Condiment Bottles
Plastic squeeze condiment bottles are my favorite reservoir for filling honey straws. They can be found almost anywhere and are inexpensive. Get a couple because they don’t hold up very well but I like the cheap ones because they are easy to squeeze.
Filling Honey Straws

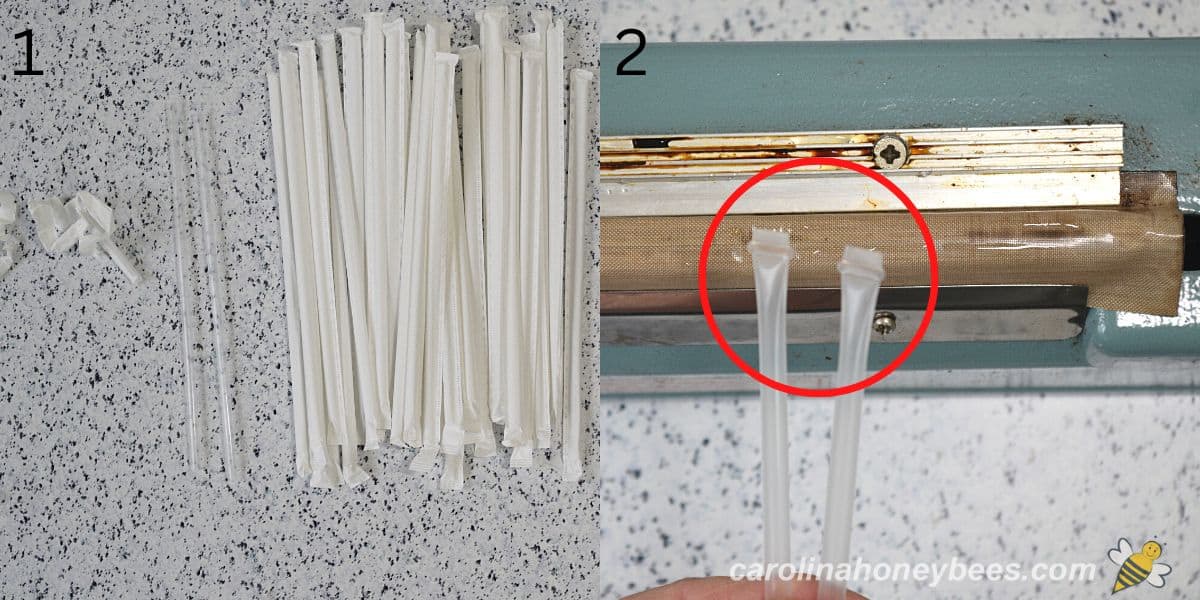
1. Once you have chosen the size straw you want to use it is time to prepare them. If your straws are wrapped in paper, the first step is to get those papers off. Do a bunch of them at one time – before your hands get sticky.
You can cut straws to make your honey sticks shorter but it is easiest to just use the regular straw length. If you cut them to a special length, that adds a step to the process.
2. Use your sealer (which ever sealing mechanism you choose to seal one end of the straw. Let it sit for a few minutes to cool. Now, you should have a bunch of unwrapped clear straws that are sealed on one end.

3. Now, it is time to prepare your filling bottle – the bottle that will hold and dispense the honey. Let’s begin with the lid or spout.
Use scissors to cut a tiny end of the tip off of the end of the lid for your condiment jar. Insert one of the smaller straws into this opening. I find it easier to push the straw through from inside the spout.
You want a tight fit. If you cut too much of the tip off , you will have leakage between the spout end and the straw.
4. Preparing your honey. We always want to avoid heating raw honey. However, this process requires that the honey be warm and have a liquid viscosity.
Viscosity deals with how honey tends to flow slowly and cling together (that why a honey dipper works so well). But, that works against us in this case-we need to gently warm our honey.
Fill the condiment bottle about half full of honey – attach the lid-with the smaller straw protruding from the spout.
Then, set the whole thing in a cup of very hot water (not boiling). After a few minutes, you should be ready to proceed with warm honey.

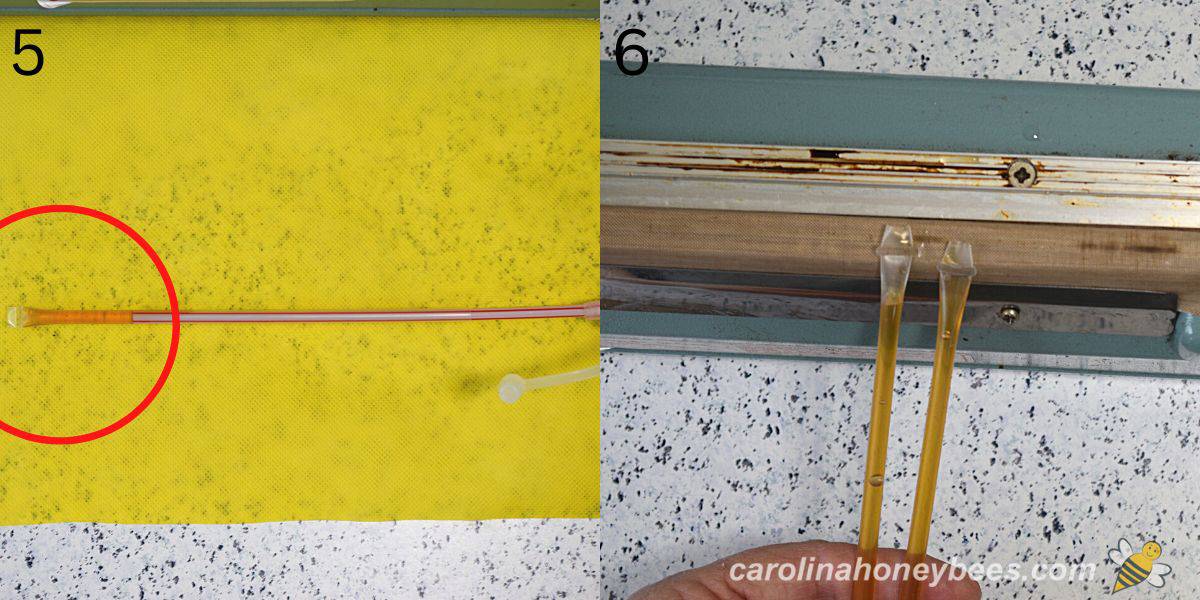
5. Pick up a straw that is sealed on one end. Insert your condiment bottle straw deep into the sealed straw. Now, gently squeeze as you pull the bottle straw out. (Think of this as you are gently placing honey inside the larger straw.)
If your honey is the right viscosity and your technique steady – you will leave behind a straw full of honey. Leave just a bit of space empty at the end because now we have to seal this end.
6. Use your sealer to seal the second end of the straw. Its okay if there is a bit of honey in the way – especially if you are using a sealer like mine. Be careful to avoid burns, but you can wipe the excess away with a damp cloth.
Now place your newly created honey stick in a pan. They will need to be rinsed well with cool water to wash off any sticky residue.

How to Use Honey Sticks
Okay, now you have a bunch of homemade honey sticks – what can you do with them? It is really easy to toss a couple into your purse and take them to work. Cut off the ends and enjoy a nice warm cup of coffee or tea with honey.
Easily portable, honey sticks are a favorite of hikers, campers and joggers. A great way to take along some natural energy.
If you are a beekeeper, hopefully you enjoy harvesting some honey from your own hives. Whipping up a few honey sticks is a great way to give (or sell) customers a sample.
Many times while selling honey at an event, those who bought honey straws can back for a bigger jar.
Honestly, other than the sealer – this project is very inexpensive in regards to materials. But, it is time consuming so if you plan to sell them – keep this in mind.
When I used to sell them, my honey sticks were 25 cents each. Another option that works well and makes it easier in regards to having change on hand – sell them 4 for $1.
I have made and sold thousands of honey straws – just a few hundred at a time. It is a great way to market your honey as you are allowing people to have a small sample for a small price.
FAQs
Likely, your honey is difficult to squeeze out because it is too cool. Gently warm the honey and try again.
Absolutely, it is natural for honey to crystallize and small quantities often change form faster. If this happens, just soak the honey sticks in a cup of very warm water.
If you attempt to fill the straw too fast – air pockets will form when you are removing the small straw faster than the honey comes out into the larger straw. Go more slowly.
Final Thoughts
People love honey sticks but so many of the commercial ones contain sugar water and unnatural flavors. When you know how to make your own honey sticks, you can be sure they contain nothing but 100% pure raw bee honey.
If honey is stored properly, it never spoils and that is a good selling tip to share with others. Everyone loves the idea of having a honey energy boost in their pocket. A little sweetness that goes a long way. This is only one of many unique honey snacks you can make for your family.

