
How to Dehydrate Honey
Have you ever wondered how to dehydrate honey? It’s a simple process that removes moisture from liquid honey, leaving behind a concentrated form that can be ground into honey powder or broken into crystals. With a good food dehydrator and a little patience, you can make your own at home.

Honey is a wonderful ingredient to keep on hand, and there are many ways to enjoy it beyond eating it straight from the jar. If you enjoy experimenting with honey, you’ll find even more ideas in my collection of honey recipes.
Making Honey Powder at Home
Yes, honey can be dried to a powdery form by removing most of the moisture content.
Dehydrated honey may be called honey powder, dried honey or honey crystals, depending on the final texture.
One important thing to understand is that honey naturally attracts moisture from the air. Once it is dried, you need to work quickly and store it properly to prevent it from becoming sticky again.
This post may contain affiliate links. Carolina Honeybees earns a tiny commission when you shop from our links. See our privacy policy for terms.
Materials Needed
You only need a few basic supplies to dehydrate honey at home.
Honey: Any type of variety of honey can be dehydrated. I prefer to use good-quality raw honey when possible.
Food dehydrator: A dehydrator with adjustable temperature settings works best. In my experience, a model with the heating element and fan in the back works much better for honey than one that heats from the bottom.
Solid dehydrator sheets: Silicone sheets or the solid sheets made for your dehydrator work well to hold the honey while drying.
Spatula: A silicone spatula makes it easier to spread the honey into a thin, even layer.
Food processor or grinder: Once the honey is completely dry, use this to grind it into a fine powder.
Food desiccant: Optional but a big help with storage
Choosing Honey
There are many varieties of honey to consider for your dehydration project. The color of honey and flavor is determined to a large degree by the plant nectar source used by the bees.
If you use a specialty variety: such as Sourwood Honey, Clover Honey or even Orange Blossom – it does affect the flavor of the finished honey powder.
Dehydrating Honey Step by Step
Dehydrating honey is not difficult, but it does require patience. Drying time varies depending on the dehydrator, the thickness of the honey and the humidity.
1. Prepare the Dehydrator Trays
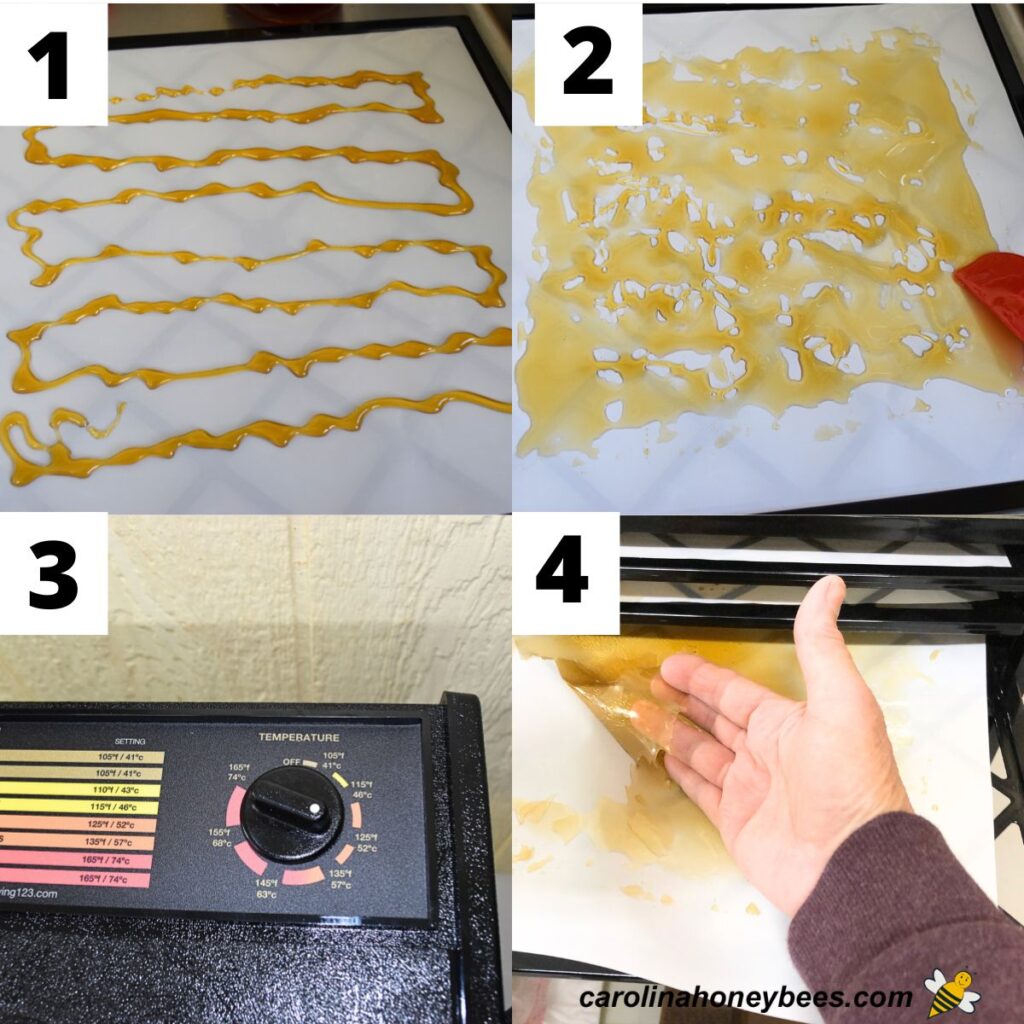
Place solid dehydrator sheets on the trays. Honey becomes very runny as it warms, so make sure you are using a solid surface with no holes for it to drip through.
2. Spread the Honey
Pour honey onto the dehydrator sheet and use a spatula to spread it into a thin, even layer. Don’t make the layer too thick or it will take much longer to dry.
3. Set the Temperature
Set the dehydrator to 120°F (49°C). Allow the honey to dry for 24–48 hours. Drying time will vary depending on your dehydrator, the thickness of the honey layer and the humidity.
4. Check for Dryness
The honey is finished when it is hard, crisp and no longer sticky. If it is still soft or tacky, give it more time in the dehydrator.
5. Break or Grind the Dried Honey
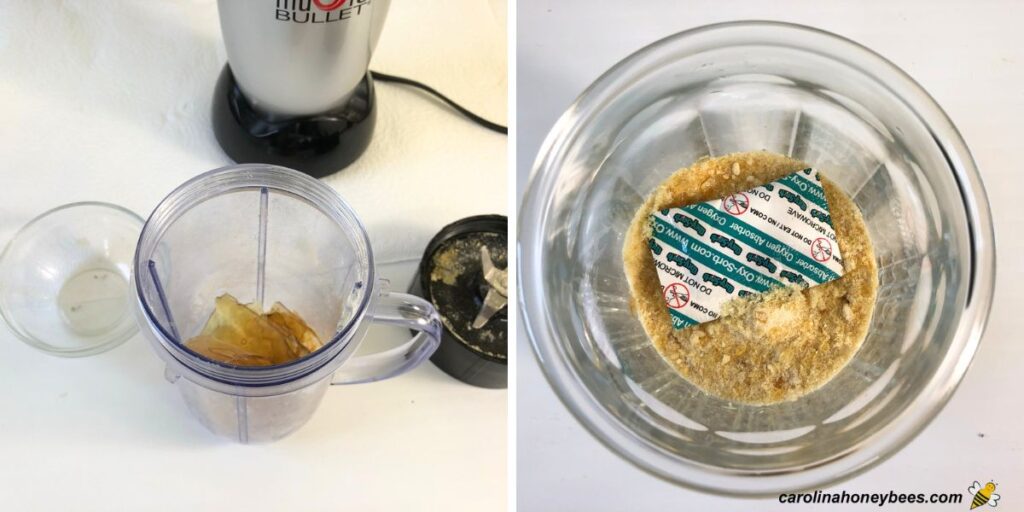
Once completely dry, remove the honey from the dehydrator. Break it into pieces for honey crystals or grind it in a food processor or grinder to make honey powder.
Work quickly because dried honey readily absorbs moisture from the air and can become sticky again.
6. Store Immediately
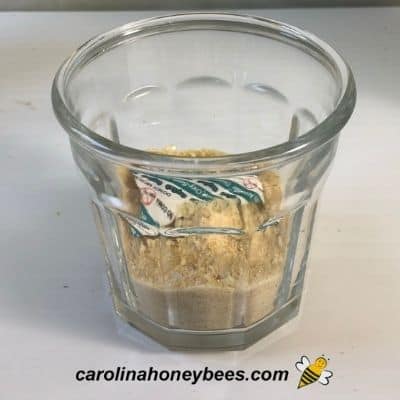
Place the finished honey powder or crystals in an airtight container as soon as possible. Keep the container tightly sealed and store it in a cool, dry location.
Don’t Have a Dehydrator?
There is another option for making dried honey crystals without a dehydrator. However, this method uses high heat rather than the slow drying.
Heat the honey in a heavy saucepan until it reaches 300°F (148°C), or the hard-crack stage. Watch it carefully because hot honey can bubble and foam.
Pour the the hot honey onto a silicone baking mat or parchment-lined baking sheet and allow it to cool completely. When hardened, break it into pieces or grind it into a powder.
I have not personally used this method, I prefer using a food dehydrator. Keep in mind that heating honey will change some of its natural characteristics.
What Worked for Me
I have experimented with dehydrating honey several times, and I learned a few things along the way.
My first attempt was with a round dehydrator that had the heating element on the bottom. Even after four days, the honey was still sticky and had not dried properly.
I had much better results using my Excalibur dehydrator, which has the heating element and fan in the back. With better airflow across the trays, my honey dried in about two days.
I also learned to use solid sheets on the trays. Honey becomes very runny as it warms, and you certainly don’t want it dripping down through the machine. Ask me how I know. 😉
Humidity matters too. Honey naturally absorbs moisture from the air, so drying can take longer during humid weather.
How to Store Honey Powder
Place dried honey in an airtight container immediately. Otherwise, your nice dry powder can quickly become a sticky mess.
Store in a cool, dry location and keep it tightly sealed between uses. You can also add a food-safe desiccant packet to help control moisture.
If the powder begins to clump, moisture is usually the culprit. The clumps can simply be broken apart or ground again.
Ways to Use Dehydrated Honey
One of the biggest benefits of honey powder is that it provides sweetness and honey flavor without adding extra liquid to a recipe.
Sprinkle it over oatmeal, cereal or yogurt, or use it to sweeten tea and other drinks. It can also be added to dry mixes, spice blends and rubs.
Honey powder is especially useful in baked goods when you want honey flavor without additional moisture. Honey crystals can also be sprinkled over desserts or used as a sweet topping.
Dehydrated honey is easy to measure, store and take along when liquid honey would be messy or inconvenient. And, of course, you can always experiment. That’s half the fun of making your own.
FAQs
In my dehydrator, honey generally takes about 24–48 hours to dry completely. However, drying time varies depending on the thickness of the honey layer, your dehydrator and the humidity in your home.
It probably needs more drying time. A thick layer, poor airflow or high humidity can slow the process.
I use a low temperature of 120°F (49°C) to slowly remove the moisture.
Yes. Gently warm crystallized honey until it becomes liquid enough to spread in a thin layer on your dehydrator sheet.
Essentially, yes. Dried honey can be left in larger pieces or crystals or ground into a fine powder.
A Final Word
Making dehydrated honey is a fun project. But, it is not extremely easy or fast – it can be a challenge. But the process is simple once you get the hang of it. Whether you make honey powder or crunchy crystals, it’s another fun way to enjoy and use honey from the hive.

How to Dehydrate Honey Tutorial
This post may contain affiliate links. As an Amazon Associate, I earn from qualifying purchases.
Read my Disclosure.Tools
- large spoon
Supplies
- 1 jar Honey
- 1 pkg Food Grade Desiccant
Instructions
- Prepare Silicone Sheets or Paper for trays. What you choose will depend in part on the type of dehydrator you have.You can use special silicone sheets that fit your dehydrator trays or parchment paper or freezer paper.If using paper, cut the sheets to fit your trays and place them in. Make sure your dehydrator is sitting on a level surface.

- Pouring honey on sheets. Work with one tray at a time. Pour honey onto the sheet. You can pour it in the middle and spread outward or drizzle a pattern across the sheet-then spread. This can be aggravating because honey is naturally sticky!Start small, you can add a bit easier than you can get it off. If you want to add any flavors such as cinnamon or ginger -now is the time.
- Spread product evenly. Use a spatula or large spoon to spread the honey across the sheet.It must not be thicker than 1/8” and it is best if it is spread uniformly. Avoid puddles and thicker spots as much as possible.Warming the honey a bit may help in spreading it across the sheet or paper. I hold one side down with a finger and use the spatula to spread the honey moving away from the held down side.
- Set the dehydrator to 120” F / 49° C. Now for the part of that requires a lot of patience. Run the dehydrator until the honey is hard and crisp.How long it takes depends on your dehydrator, the humidity in the room, and the water content of your honey : 24-48 hours is common.Check it every 6 hours or so during the day to make sure it is not becoming burnt. It is finished when it is set and no longer sticky.
- You want to have everything ready to crush and store as soon as the honey cools a bit. Do not leave it sitting around it will absorb moisture.If you are using Teflon dehydrator sheets , the dried honey will pop right off. Otherwise use a spatula to remove the chips of honey from the paper.
- Grind to desired consistency. Grind using a food processor, (mortar and pestle) or I used my Magic Bullet. Any tool to get it to a granular or powdered consistency.
- Storing dehydrated honey. Immediately, place in a tight sealing jar and toss in a food grade desiccant package. This helps prevent clumping – but clumping will occur. This is raw honey. Honey powder that you buy already made has other ingredients to help it flow.


Notes
- For me, drying honey works best with a strong dehydrator. I am not saying that you can not use a small one – but it may take days…
Would this work using the oven instead of a dehydrator?
My guess is – no I don’t think it would work well. A dehydrator has moving air that I think is just as important as the heat factor.
Very helpful article, thank you for sharing 🙂
Thank you, it is a lot of work but I think it is very interesting too.
If I were to add dehydrated honey powder inside a tea bag would it actually sweeten the tea or just create a gummy mess inside the tea bag?
Well, if the tea was warm – it would dissolve like any honey product. You might have to stir or swish is around.