Easy Honey Bath Bombs

If you love luxurious baths and fun homemade projects, my honey bath bombs recipe is sure to please. Drop one in the bath and have your own personal spa experience. Honey bath bombs combine the soothing properties of a warm bath with the natural benefits of honey In this tutorial, I will guide you through the process of making your own bath bombs with honey and other simple ingredients.
So often, we think of honey only as a food product – and it is great to eat. However, there are many honey uses that do not involve consumption. Be sure to check them out.
DIY Honey Bath Bombs
Whether you want to pamper yourself or create some wonderful gifts, bath bombs are an intriguing project. One of the major benefits of making homemade beauty products is that you know for sure what you are putting on your skin. Or in the case of a bath product, you can know what you are soaking in.
The magic of these bath time beauties is the delightful fizzing effect. This is possible because of the simple chemical reaction between citric acid and baking soda in a tub of water.
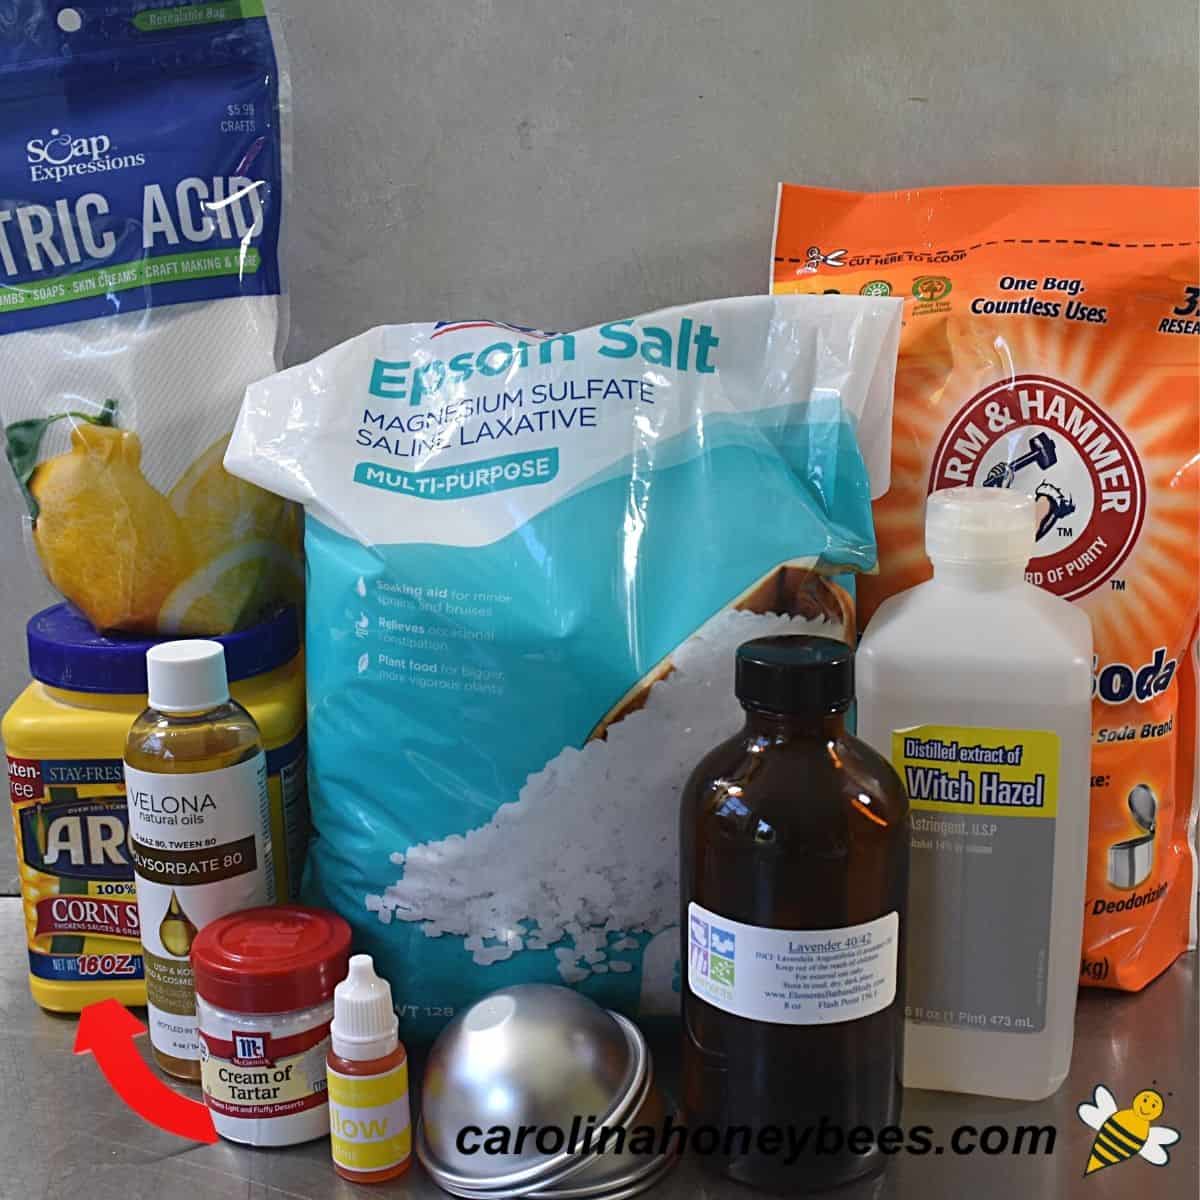
Ingredients
When creating a bath bomb recipe from scratch, the common ratio of baking soda to citric acid is about 2:1. In other words, twice as much baking soda as citric acid.
Sometimes, you can go a bit further and add little more baking soda (it is less expensive) but be careful. (Full measurements in recipe at bottom of post.)
- baking soda
- citric acid
- salts (sea salt or table salt – my favorite Epsom salt)
- witch hazel
- cocoa butter
- coconut oil
- honey powder
- cream of tartar (or corn starch – not both)
- polysorbate 80
- fragrance (optional)
- colors (optional)
- molds
Baking soda: I use Arm & Hammer Baking Soda for everything possible here on the farm. Of course, you can use any name brand – it is inexpensive and easy to find at your grocery.
Citric Acid: This is a weak organic acid found in many citrus fruits. It is used extensively in the kitchen for preserving, flavoring etc.
Salts: Most bath bomb recipes include salt as an ingredient. Sea salt or even table salt will work. They make the bath water feel more relaxing and soft. I like to use good old Epsom salts – it works well, is readily available and doesn’t cost a lot.
Witch Hazel: Of course we need some moisture to stick all these wonderful ingredients together. You can use 91% isopropyl alcohol to get the job done and it is much cheaper than witch hazel. But, I use what I have on hand and I normally have a bottle of witch hazel.
Regular rubbing alcohol has more water and it might work but I’ve always been afraid to try. Too much water in the mix will cause the produce to start “reacting” or fizzing prematurely.
Cocoa Butter: This butter is high in fatty acids which makes it a great moisturizer. It is also known for having antioxidant properties.
Coconut Oil: Coconut oil is a popular ingredient in skin nourishing products. You can buy it at the grocery store and use it for many other things – even cooking.
Honey powder: The dried powdered form of honey is easier to use in this type of product than liquid honey. Yes, you can make your own honey powder. But, if you don’t have the time – you can also buy it ready made.
With powder, you do not have to worry about discounting the water content of honey – and powder is easier to blend.
Cream of Tartar – Look for this one in the baking section of the grocery. Cream of Tartar has a long reputation of use in the kitchen. In our recipe, it helps to harden the final product.
Some recipes call for corn starch to help harden the end product. That works too but once I started, I decided not to use it because it didn’t work as well for me. Use one or the other – not both.
Polysorbate 80: This product is a synthetic emulsifier that helps blend the oils and butters through out the tub water. We don’t want to create an “oil slick” in the tub-even if they are essential oils.
It also helps reduce or prevent staining of your bathtub. Makes cleanup much easier. While it is not “natural” it does the job better than anything else I have used.
Fragrance: What would a honey bath bomb recipe be without fragrance? When choosing the fragrance for your recipe, make sure it is a skin safe product. Yes, even if it is a natural essential oil not every one is okay for skin use.
If you are making these for other people, also keep in mind that some people are more sensitive to fragrance than others. Never use over a 3% fragrance ratio. Some people use a little Vanilla extract instead of fragrance oil!
Coloring: As you create, remember that not all colorants are the same. Some soap colorants are not recommended for bathtub use where you will be sitting in a tub of water. All of your “soft parts” exposed.
Be sure to choose skin safe colorants. Some recipes recommend using food coloring to tint you bath bombs. That will work as well. I chose to use a colorant pack that it designed for the project.
Materials
Little equipment or materials are needed in addition to your ingredients.
- small pot and heat source
- large bowl
- gloves
- muffin pan (optional)
- molds
Gloves, a large bowl, a small pot to melt the butters and oils. I used one of my muffin pans to hold the honey bath bombs while drying.
Molds: Special molds are available for purchase and they do make things easier. If you don’t want to buy them there are other things you can use: plastic easter eggs and clear Christmas ornaments are two favorites.
Step by Step Making Bath Bombs

1. While the liquid ingredients and butters are melting in double boiler (or similar), combine all the dry ingredients in a large bowl. When liquids are melted, stir well and pour into the bowl with dry ingredients.
2. Using gloves, if you value your manicure – combine the ingredients by mixing with you hand until all are well blended. You want a consistency similar to wet sands with no lumps or clumps.
3. Pack your bath bomb molds with your mixture. (More tips on that is the recipe card below). Be gentle but firm – these molds are normally not very sturdy.
4. If you are using my favorite – muffin pan technique- cover the pan with some plastic wrap – it makes removal and clean up much easier. The wrap should only be tight enough to “cradle” the bath bomb.
Expert Tips
If your honey bath bombs are experiencing a lot of cracking, your mixture is too dry to stick together. You can add just a splash of rubbing alcohol to the mixture and incorporate it well.
If your bath bombs are ending up with flat bottoms – and who wants a flat bottom? It is possible that your mixture is too damp. Add a bit more dry ingredients such as baking soda.
Molding tip: Don’t pack the mixture too firmly into the molds, especially if you are using hard molds make of metal. Also, don’t twist the mold. You may want to – I do!! But don’t twist after closing the mold.
Caution on Colorant Additives
If you want to add some extra sparkle to your honey bath bombs, you can roll them in a bit of sparkle mica after removing them from the mold. This is a beautiful effect but can be rather messy – it is much like playing with glitter as a child.
Many mica powders are great to use in bath bombs and other bath products. They are much easier to control the spread of the color though the mixture.
However, they are not water soluble and very well may leave a lovely ring around your tub. This is especially true if you do not use the emulsifier (polysorbate 80).
If this is your first time making bath bombs with honey or without, I suggest you half the recipe and try a small batch first.
Humidity Affects Performance
Bath bomb creation can be a bit of a finicky project. Humidity and bath bombs creation are not perfect partners – a big problem here in the humid South.
High humidity slows down drying and can lead to problems getting your honey bath bombs out of the mold-as well as them having a warty look the next day.
If you live in an area with lots of humid days (I do) – plan to work on your creations with a dehumidifier going. Certainly wait until you do not have a rainy day.
Storing
These products will absorb moisture from the air. Once they are completely dry, store them in an air tight container. Not dust tight but “air-tight”. I use 2 zip lock baggies. They will keep for several months when stored properly.
More Ideas
For those of you interested in wading into soap making, try this recipe for homemade goat milk and honey soap without lye. They are very nice and even older children can make them with supervision.
Another popular and very gift-worthy craft is homemade beeswax lotion bars. The recipe is super easy to make and you can use different mold shapes.
If moisturizing and exfoliation is your thing – whip up a batch of this diy salt and honey scrub, it is nice for rough skin. For your face, I would stick with a honey face moisturizer.
If you want to have even more fun, try your hand at this beeswax body butter – it is awesome. Your friends will think you worked hard for days to make these homemade projects. Shhh…. I won’t tell.
A Final Word
I love making homemade things for myself, my family and a few worthy friends. My products are not perfect, but I am not selling them either. And, it is a lot of fun and gives me a feeling of accomplishment.
Creating beautiful, stylish perfect bath bombs is an art that takes some time and skill to perfect. That is not the goal of this tutorial but rather to guide someone who want to try.

Honey Bath Bombs Tutorial
This post may contain affiliate links. As an Amazon Associate, I earn from qualifying purchases.
Read my Disclosure.Tools
- large bowl
- 4 cup measuring cup
- Muffin Pan
- gloves
Supplies
- 37 oz Baking Soda (1049g)
- 16 oz Citric Acid (454g)
- 4 oz Epsoms Salts (113g)
- 1 oz Honey Powder
- 1 oz Cream of Tartar (28.3g)
- 2 oz Cocoa Butter (56.7g)
- 1 oz Coconut Oil (28.3g)
- 1 oz Polysorbate 80 (28.3g)
- 2 oz Essential Oil (I used Lavender) (56.7g)
- 2 oz Witch Hazel (56.7g)
- 1 bottle Colorant – 15 drops (optional)
Instructions
- Get a large bowl and mix the dry ingredients together. If there are any lumps, use a spatula or spoon to break them up. You can use your fingers but the citric acid may ruin your manicure. (Gloves?)This needs to be a large bowl because we will need to mix these ingredients well.

- Melt the cocoa butter in a small double boiler or in a microwave safe container.
- Combine cocoa butter, coconut oil, polysorbate 80 , liquid colorant, and fragrance oil together. Gently stir to mix all the liquids together.I used 15 drops of the yellow colorant in the mix.
- Once the liquids are combined, add them to the dry ingredients. I like to use my hands to thoroughly mix all these together. We want a smooth mixture with no lumps or clumps.You can just sprinkle the honey powder across the mixture.
- Getting the just right consistency can involve a bit of trial and error. Pick up a handful and gently squeeze. We want it to feel like wet sand and hold its shape when we release our fingers.
- Once the proper moisture level is achieved, it is time to work with the molds. Each mold has 2 parts so you can create the round ball shape. Fill the two halves with you honey bath bomb recipe mix, gently press it into the mold but do not pack.In the center section of each mold half, mound up a little extra mix. Clean the seams along the edges of the mold parts to wipe away any crumbs.
- Now it is time to gently push the 2 halves of your bath bomb molds together. Do not put pressure on the round parts of the mold. These things are sometimes rather delicate. Instead, put pressure on the edges or seams to fit them together. You do not have to use a lot of force.
- There are 2 different ways to handle the time in the mold.(Option #1) Fill all the molds. Allow them to sit and harden in the mold for at least 24 hours. You can use rubber bands to hold them together.(Option #2) Some crafters prefer to leave the bath bombs in the mold for a much shorter time – either a few minutes up to an hour. Then they remove them and gently place in a lined muffin tin for complete drying. I prefer this method as it can be "a pill" to get them out.


Notes
- After your honey bath bombs are dry. Store them in an air tight bag of container – they will absorb moisture.
- For the best product – let them dry for several days before use.