How to Make Beeswax Lotion Bars

Looking for a natural wax to nourish your skin? These homemade beeswax lotion bars are a great alternative to liquid moisturizers. They are also very easy to make. When you make your own – you know what is in the recipe – no nasty chemicals with unpronounceable words. If you like making natural products, you will love this tutorial on how to make beeswax lotion bars. You may like them so well – you never go back to store-bought.
Whether you want a natural skin moisturizer or need a hand-made gift option, this DIY project is a great way to use beeswax. Don’t throw it out. Make something wonderful.
DIY Lotion Bars with Beeswax
One of the great things about a beeswax lotion bar is that you can ditch the plastic bottle. No more using a plastic bottle to add to the landfill or a pump that wont… well.. pump.
No worries about the compounds found in commercial lotions: para-aminobenzoic acid (PABA), petroleum, formaldehyde, and others. Your homemade lotion bars are all natural. And they can be darn cute too!
What is a Lotion Bar?
Lotion bars are made using a blend of oils, butters and waxes. In some ways, they perform much like any lotion – moisturizing and protecting your skin.
But, lotion bars stay solid at room temperature or lower. Only when you take the bar in your hand and rub it – does the heat from your skin rub off a bit of lotion.
This post may contain affiliate links. Carolina Honeybees earns a tiny commission when you shop from our links. See our privacy policy for terms.
Ingredients Needed
The ingredients used for making beeswax lotion bars are generally divided into three types (hard, soft and scent/therapeutic). The amount of each varies a bit with the specific recipe.
- beeswax (hard)
- carrier oils (coconut oil – cocoa butter etc.)
- essential oils (optional)
- molds
Why Use Beeswax?
The benefits of beeswax for skin care are well known. You will find it listed in the ingredients for expensive creams, salves and cosmetics.
It is a natural humectant that acts as a barrier to prevent moisture from leaving your skin. Beeswax can also protect your skin from toxins in the environment.
It is popular in many liquid lotion recipes. In fact, you can use my recipe to make your own liquid beeswax lotion if you wish.
And, because beeswax is made by bees – it is a renewable resource. A by-product of the honey harvest – taking some does not harm the colony.
If you purchase beeswax pellets from a store, they are likely ready to use. If you are using raw wax from a beekeeper – make sure you clean your beeswax before using it in body care products.
Carrier Oils & Butters
Naturally, a hard piece of beeswax is not going to serve as a lotion bar on its own. It must be melted and combined with a softer or liquid product. This gives us the perfect consistency – not too hard – not too soft.
In this recipe, we use coconut oil and cocoa butter – both of which have impressive skin nurturing properties. You can certainly substitute other soft butters or oils (palm oil, shea butter, etc.).
Essential Oils
Many body care products add essential oils to the recipe. They can have therapeutic benefits or possibly just be for fragrance. When you use them, be sure to buy skin safe essential oils.
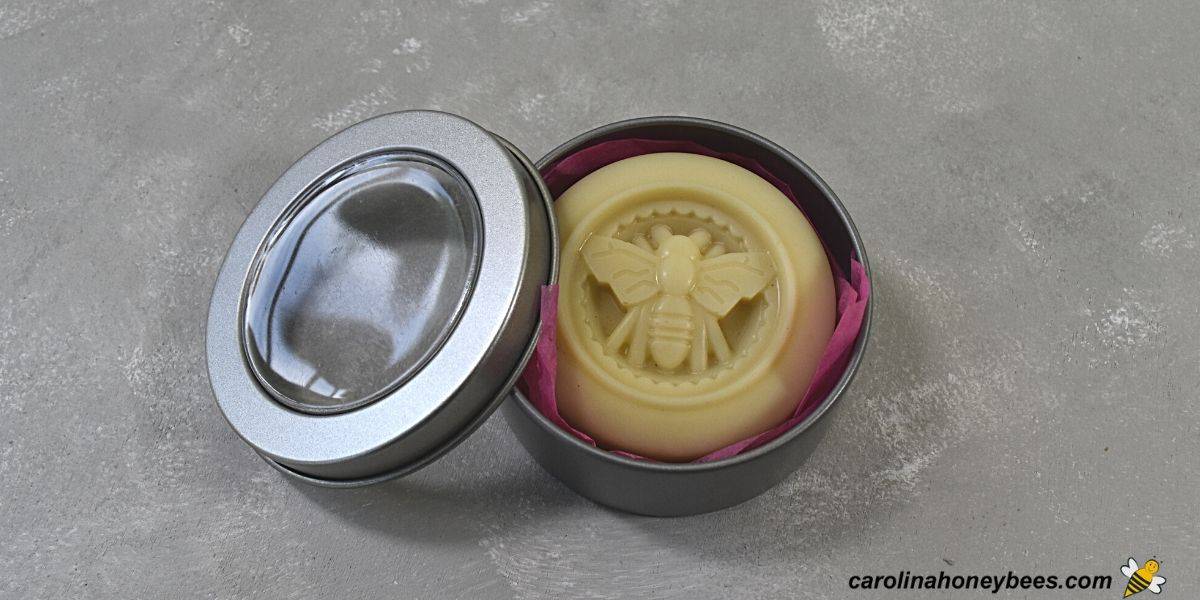
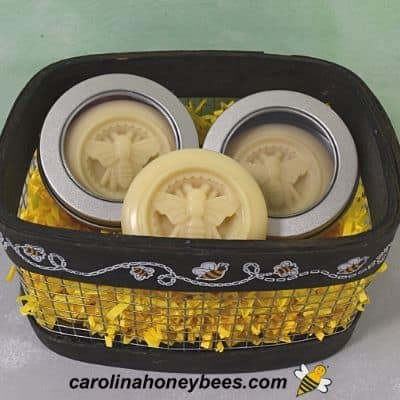
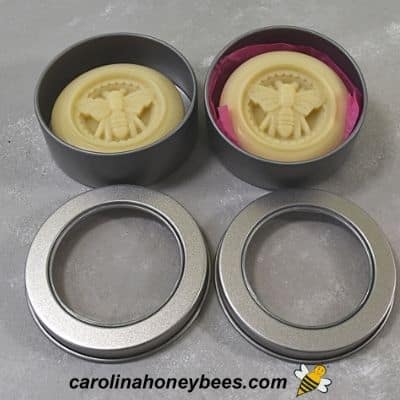
Molds for Lotion Bars
You will find many different molds that can be used for lotion bar recipes. I’m a beekeeper and since this recipe uses beeswax – of course I opted for a bee theme. (Link for mold and tins in card at bottom of article).
Step by Step

1. Melt the beeswax, butters and oils in a double boiler. I like to start with the beeswax because it is slow to melt – then add the cocoa butter and coconut oil. Heat slowly – stir gently.
2. Once all is melted, remove from heat. This is the time to add a bit of essential oils or fragrance if you wish. Stir gently to distribute.
3. Pour the ingredients into silicon molds of your choice. It is a good idea to protect the table surface underneath in case of spills.
4. Leave to cool. The time required will depend on ambient room temp etc. When completely, solid – they should pop out of the silicone mold.
Storage
It is not necessary to keep your lotion bars in the refrigerator – though some people do. It only takes a few moments more to warm them up and use them. But, refrigeration is not necessary.
Other options include, wrapping the bar in parchment paper, wax paper or a clean dry cloth. And as in this article, you can wrap them in a piece of cute cloth or paper and store in a tin. What great beeswax gifts they make.

Expert Tips
These instructions allow for a lot of substitutions in order to achieve the end product that suits your preferences. Here are a few tips to consider as you create your beeswax lotion bars.
- you can substitute shea butter for the cocoa butter
- raw cocoa butter has odor – use unscented or essential oils to disguise the scent
- set your silicone mold on a sturdy tray (or clipboard) for stability
- not required – but placing the filled mold in refrigerator speeds up the finish
- because lotion bars contain no water, no major preservatives are needed. They will last up to 6 months.
How to Use
As far as your skin is concerned there is not much difference between liquid lotion and lotion bars. However, they are used differently.
A lotion bar works using the warmth from your hands to soften the oils in the bar. Rub the bar between your hands just like a homemade bar of soap.
Some of the bar will melt on your hands. Now, rub the melted lotion into your areas of dry skin. After use, place the beeswax lotion bar back in a container or wrap.
Lotions bars last for several uses depending on how much you apply each time. They can be used on any part of the body.
But, be careful if you apply to feet or any area that may cause you to fall. It can feel slippery until the lotion is absorbed.
More Ideas
Everyone has a different opinion on the qualities of the perfect lotion bar. You may need to tweak the recipe just a bit to get the non-greasy, hard beeswax lotion bar that you desire.
That is one of the joys of making beauty products with this natural wax. You can re-melt and try again. If you love your lotion bar, consider trying this beeswax body butter too – it is marvelous and so creamy.
If you need a simple soap project, try this recipes for homemade goatmilk and honey soap – no lye. You can add real raw honey to the recipe – but only a little.
And, don’t forget to show your face a bit of love with this recipe for a DIY face moisturizer with beeswax and honey.
If you seek a natural product good for minor burns and scrapes – whip up a batch of natural petroleum free jelly.
FAQs
If your lotion bar feels too sticky, you probably have too much cocoa butter in the mix. In contrast, bars that feel greasy need to use less oil (coconut) in the recipe. Add just a bit of the one you need and try again.
Unlike regular lotion, lotion bars remain solid at room temperature. This makes them more portable and not subject to leaks.
Sure, you can use any skin safe essential oils in your lotion bars. Some common choices are: lavender, rose, citrus and peppermint.
Final Thoughts
I love creating things with beeswax from my hives and hope that you will too. You don’t have to be a beekeeper to enjoy all the gifts from the hive. Find a silicone mold that you love and whip up a batch of beeswax lotion bars.

DIY Beeswax Lotion Bars Recipe
This post may contain affiliate links. As an Amazon Associate, I earn from qualifying purchases.
Read my Disclosure.Tools
- wooden stir stick
Supplies
- 4 oz Cocoa Butter (net wt)
- 4 oz coconut oil
- 4.25 oz beeswax
- 1.5 oz Essential Oil (I used Lavender) (your choice of type)
- 1 jar vitamin E oil (optional – few drops or 2 capsule contents)
- 1 piece Round Honeybee Silicone Mold
- 6 pieces Metal Tins 2 ounces with Clear Lid
Instructions
- In most beeswax recipes, it is a good idea to start melting your beeswax first. While it is very easy to melt beeswax, it takes a bit longer than oils and some butter.For safety sake, melt your wax in a double boiler or similar container.

- Once the wax is melted, it is time to measure and add your cocoa butter. Use a wooden skewer or similar to gently stir.
- Now – add your measured coconut oil to the mix. It will liquify rapidly if not already liquid. Coconut oil is liquid at warm room temp and solid if it is cool. Gently stir.
- I always add a bit of vitamin e oil to my beeswax recipes – but this is optional. If you wish to do the same, add 8 drops or about 2 capsules of liquid.
- You do not have to use essential oils – you may prefer unscented lotion bars. But, if you want to add some scent – now is the time. Be sure to use a skin-safe EO such as lavender.
- Now it is time to pour your beeswax lotion bar recipe into the selected molds. If using silicone, they should be easy to remove. If you are using plastic molds, you may consider some mold release spray.
- Leave them on the counter to cool. In a few hours, you should be able to pop them out!


Is it possible to color or tint your lotion bars and not leave color on skin?
I’m sure so but I have never added color to them – preferring the natural color. I would ask someone like Brambleberry what they recommend.