DIY Bee Garden Art Pole
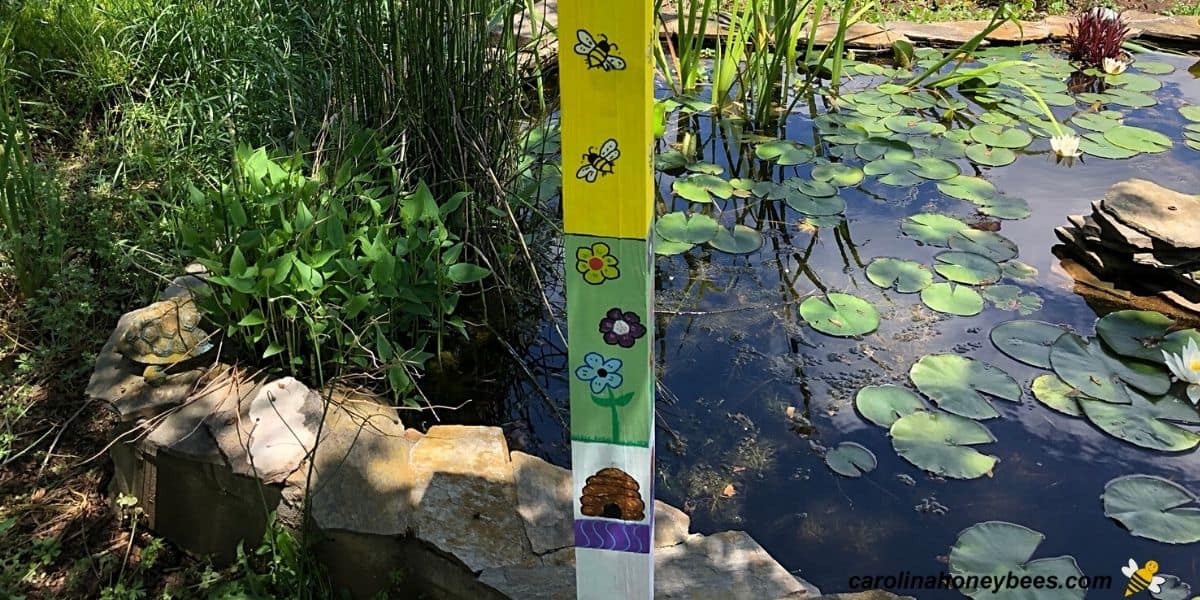
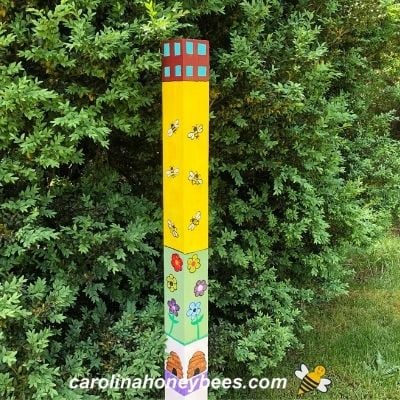
As a beekeeper, I love adding bee “things” to my landscape. Today, I will show you how to make a bee garden art pole for your yard. Garden Art Poles, have become a favorite and come in every size and design imaginable. They can be very simple or astounding works of art. Most of those you see for sale are handmade and require a lot of lead time to produce. Rather than pay for one, you can make your own.

Honey bee crafts can be a lot of fun. And, there are so many to choose from – you will likely never get through them all. The beauty of the garden art pole is that you don’t have to be an artist to be successful.
DIY Garden Art Pole Design
The colors and designs possible with your garden art pole are infinite. This may make the project more difficult in some ways. Too much to choose from can be as difficult as a lack of information.
Some things to consider:
- where do you plan to place your bee garden art pole?
- will it be outside in a shady spot of your bee friendly garden?
- or spend a lot of time in the sun?
Maybe you have a covered location such as a gazebo and your creation will serve as a small table? If so, then you don’t have to worry as much as protection from sun and rain.
Size becomes a factor as well. Many of the purchased garden poles are 5’ tall. If you want to put a birdhouse on top of one – that’s fine. However, if you wish to put a solar light cap on top – a shorter art pole may be more practical.
As you design your project, it can be bright and bold or something subtle that blends into the background.
Will you place your pole in an area with flowers that bees like? What color will those flowers be? You might consider that as you choose a design.
Materials Needed
- wooden pole
- wood filler (possible)
- kilz sealer
- acrylic outdoor pain and paint pens
- stencils (optional)
- acrylic spray sealer (optional)
Choosing a Wooden Pole
The most popular type of wooden pole is a simple 4×4 designed for outside use. These generally come in 6′ lengths, but the nice folks at the store will cut it for you.
Because the wood is often treated it may feel damp or “green” to the touch. If you get a greenish pole, lay it flat in a shady location for a month or more and let it dry.
This will help your paint adhere better. If you are lucky enough to find a dry wooden pole, that is even better. You do not have to use treated wood but if the pole will be exposed to weather – treated wood does last longer.

Paints & Pens
I like to spray the entire dry wood pole with Kilz (or similar) sealer and let it dry before beginning with colors. If your pole has huge cracks (sometimes they do) – you need to seal those with wood filler first.
As for paint, any outdoor rated acrylic paint and paint pins will work. If you wish to continue with your bee theme, be sure to include some colors that signify bees. Yellow, black, white and some pretty flower colors.
Bee Stencils
If you have artistic talents – you can skip the bee stencils. Sadly, I do not have drawing talent so they are a must for me.
Final Sealer
Once everything is dry and finished. A few final coats of clear acrylic spray sealer is a must if you want to use your bee garden art pole outside.
Equipment
Assuming you had the wooden pole cut to the desired size at the store, you don’t really need any equipment beyond paint brushes and perhaps a ruler/square.
Painting Your Garden Pole
Painting on wood designed to be put outdoors is not for the faint of heart. I have a little OCD and I love crisp straight lines. That’s almost impossible on a wooden pole with lumps, bumps and cracks.
So, cut yourself a little slack here. You can fill any large cracks with wood filler. But remember that you are looking at your painted garden post from a much closer vantage point than will normally be the case.

1. After filling major cracks – paint a base coat on all sides of the pole with a Kilz type sealer. (Help from a black cat is optional).
2. I used a ruler to mark off the sides of the post into sections. Using brushes to apply the large areas of color and paint pens to outline worked best for my less than steady hand.
3. Stencils are used to trace a rough design on each section. It is then painted with color and outlined with black paint pens.
4. Once finished with the art work, a few light coats of outdoor sealer gives added protection.
Stencils and Tracing Tips
There are many possibilities for design when making a garden art pole. If you are blessed with artistic talent, the sky is the limit.
However, most of us are not and we are faced with the problem of how to get designs on the pole. Because these are often made with a folk art design, simple shapes and colors are suitable.

You will find many beautiful stencils to use on your art pole. Personally, stencils hate me. Seriously, and I have tried every method out there to prevent bleeding – just could not get it work on lumpy, bumpy wood.
However, if you have the touch required to make good use of stencils, they can help you create a beautiful design in a short time.
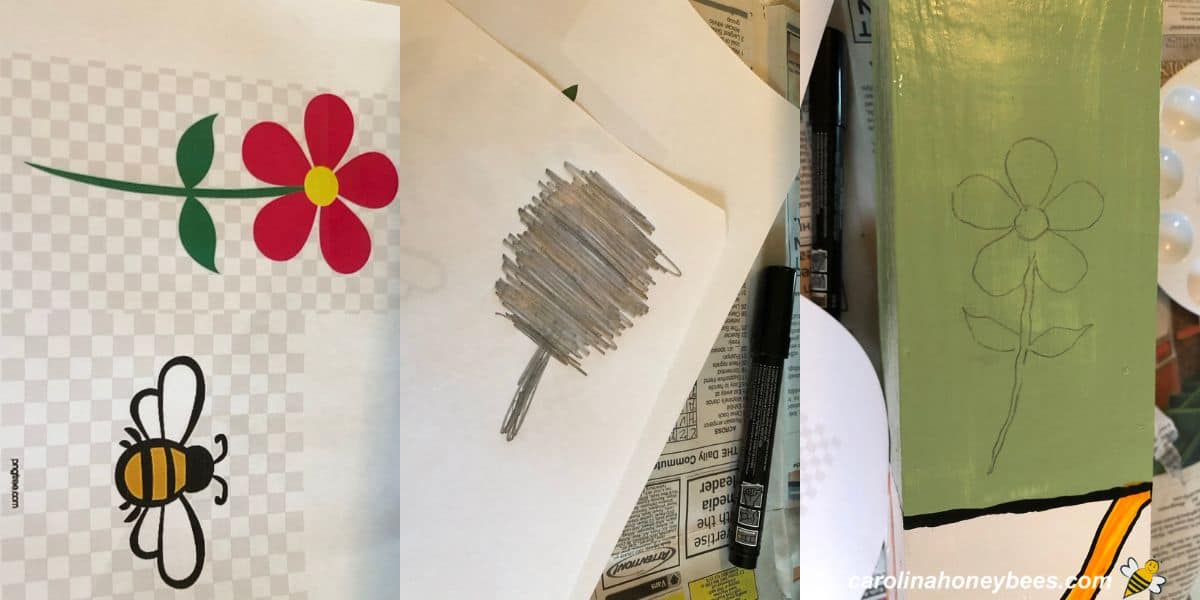
Tracing worked better for me. After printing out some simple designs on paper, the back was coated with pencil lead.
Then, I could trace over the image and leave a slight imprint on the wooden pole. From there you can proceed with painting and outlining as you wish.
Using Your Bee Garden Art Pole
Once you have created your masterpiece, what are you going to do with it? You know I feel that way often when I return from the plant store.
If I see a wonderful flowering bush or shrub for bees and buy it- then get home and think – now what!
You can use your project anywhere you wish. A decorative cap for the top and a nice wooden base will finish if off nicely. Perhaps, a post cap with a solar light for a walkway area.
You can simply drill a hole about 6″ deep in the bottom of the pole and use a piece of rebar (or conduit) to anchor it. Or, you can make it a little longer and use concrete post mix to set it permanently.
More Ideas
Once your garden is decorated with the art pole, you might consider adding another bee craft – this clay pot honey bee would love to visit your garden.
And, it is always a good idea to set up a bee watering station for thirsty pollinators.
For an inside display, consider these easy to make mini beehive skep crafts. You can find all the materials at a dollar store. They are very inexpensive and offer a unique display.
Another easy project, this DIY bee candy dish is great for wrapped candies and sure to bring a smile to any bee lovers face.
If you have a lover of gnomes in your family, perhaps you should create your own honey bee gnome! So many fun crafty things to do and so little time!
This post may contain affiliate links. As an Amazon Associate, I earn from qualifying purchases. Please read my disclosure.

DIY Bee Garden Art Pole
This post may contain affiliate links. As an Amazon Associate, I earn from qualifying purchases.
Read my Disclosure.Tools
- Square Ruler
- Paint Brushes Asst
Supplies
- 1 piece 4×4 wooden pole of desired length (36" to 52" common size)
- 1 pkg wood filler
- 1 can Kilz Sealer
- 4 bottles Acrylic Outdoor Paint (colors as desired)
- 2 pieces Paint pens (optional)
- 1 pkg patterns or stencils (optional)
- 1 can acrylic spray sealer (optional)
Instructions
- Prepping the wooden pool. Most likely, the pole chosen will have some cracks. Take the time to fill any major cracks with wood filler.After drying for the required time, use sandpaper to smooth off excess wood filler and other major wood imperfections.

- Paint wooden pole with base coat. To ensure the best chance of a good painting surface, spray all sides of your pole with a good sealer. Kilz or a similar spray works well. (Black Cat helper is optional).

- Use ruler or square to keep design straight. Because the pole has 4 sides, you may find a ruler or square very helpful. Of course, no one says you have to have the sides line up – but if you plan a stripe of color around the pole – this tool is handy.

- Paint background colors and sections.If your bee garden art pole features several sections with different background colors, now is the time to do so. Mark off the sections for different colors and get to painting.

- Add small designs. Freehand, stencils or trace. Now is the time to add small design elements. Use stencils if you can. Other wise, print simple images, coat the back with pencil lead and trace the image on your project.

- It's okay to start over if you don't like something. Be prepared for some over painting – something it looks like a good idea until it isn’t. Acrylic paint is very forgiving.

- Cure and seal. Once you are pleased (or as please as you are going to be) with your design, let the project dry for a day. Then, it is a good idea to spray with a good coat of acrylic sealer. If your post will be exposed to really harsh weather, you can use marine sealer or something similar for increased protection.


