Using Beeswax for Sewing
The use of beeswax in sewing is a centuries old tradition. It is like having a good friend right there with you helping stitch things together. For instance, if you are making a quilt for your bees – using beeswax on your thread helps make those stitches extra strong. And, a little goes a long way. You can use a chunk of raw beewax. But, I will show you how to make a cute beeswax cake for your sewing toolkit or to give a friend
Compared to some other uses for beeswax, using beeswax for sewing projects serves a practical purpose. Waxed thread is stronger and contributes to a high quality product.
How Beeswax Can Transform Your Sewing Skills
There are several reasons that you should consider having a cake of beeswax for your sewing basket.
No matter how hard we try, our sewing projects don’t always go smoothly. Thread and fabric sometimes seem destined for conflict and that causes frustration.
A light coating of beeswax strengthens your thread. Strong thread is more durable and less likely to break when you are sewing or even later during use.
It also helps prevent fraying. Thread is made of many fibers joined together. A coating of beeswax on your thread reduces friction and makes sewing smoother. This helps prevent the thread from unraveling.
It’s all natural! Beeswax is a natural wax, made by honey bees. It is non -toxic and hypoallergenic. This means it adds no synthetic substances to your projects.
This post may contain affiliate links. Carolina Honeybees earns a tiny commission when you shop from our links. See our privacy policy for terms.
DIY Thread Conditioner
Why make a beeswax block? Can’t you buy thread conditioning blocks? Yes, but pure beeswax blocks are so much better than the commercial wax blocks found at most sewing stores. In fact, once you experience the real thing – you’ll likely never go back.
Wax adds strength and reduces fraying on all thread types and reduces static cling. But, it is especially useful for some types of embroidery materials such as metallic thread.
Cotton and silk thread should always be waxed before sewing but even polyester thread can benefit from a light coat of wax. Depending on the application, you can apply wax to the whole length of thread or just the ends.
This is for hand sewing only (not machines) and helps reduce knots and tangles. But – Never put waxed thread in your sewing machine – it will not end well!
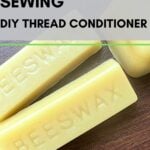
Making a Beeswax Cake for Sewing
Let’s look at the simple steps involved in making a beeswax cake to use in sewing. Remember, you don’t have to do anything special – you can use a chunk of clean beeswax. But, let’s assume you want something nicer.

Materials
- beeswax
- some type of mold
- mold release (optional)
That’s it. These three items and a heat source is all you need.
Beeswax
Beeswax is available in several forms: pellets, pastilles, bars, chunks tec. Regardless of whether you use a hunk of raw wax or fashion it into a beautiful block, it should be clean.
Clean beeswax is free of excess honey, trash or dirt. If you acquire raw beeswax from a beekeeper (or your own hive), you may need to clean the beeswax again.
Molds
Anything that can take a little heat can serve as a mold for your beeswax sewing cake. Of course, in this tutorial I used a purchased bar mold. But, you can also use ice cube trays, silicone cup cake wrappers etc.
But as you plan to make your beeswax sewing cake-think about shape and size. Will it fit well in your hand? It should be large enough to use with east but small enough to not take up too much room.
Mold Release Spray
Being a beekeeper, I make beeswax candles often so I always have a can of mold release spray on hand. It is not a must have but it is very useful.
For a soft mold like a silicone cup cake wrapper you can skip the mold release. But, if the mold you are using is stiff. I would definitely use mold-release or a light coating of oil.
The Process

1. Melt your clean beeswax. The safest way to melt beeswax is using a double boiler. You can see the little pouring pot that I have sitting in a larger pot of water. The larger pot was found at a thrift store for a couple of bucks – it is dedicated for my wax crafting.
2. If you are using a stiffer mold – spray it well with mold release spray.
3. Once your beeswax is melting, pour it into the molds of your choice.
4. Leave the filled molds sitting until the wax has cooled back to solid form.
Storing
As long as you don’t store it in a hot car on a summer day or in the attic. You really don’t have to worry about your beeswax bar melting. But, if it is used a lot you might want to freshen it up a bit.
Re-Soften Your Sewing Bar
Over time, a wax thread conditioner block gets rather gnarly. If the surface of your bar gets notched or scarred, it is easy to smooth it out.
Place the bar on a piece of aluminum foil or parchment paper. Use a heat gun or hair dryer to heat and melt the outer surface of the wax. Let it cool and the wounded surface will smooth out a lot.
Making it Gift Ready
You might wonder who needs a beeswax cake or bar? Is this only a good idea for someone who does a lot of sewing.
Honestly, most people could benefit from this gift – even if they never pick up a needle and thread. Seamstresses, basket makers, leather crafters, book binders and more know of the value of beeswax.
Natural wax made by honey bees is so useful -it seems almost magical. It never spoils, stays solid at room temperature and a little bit goes a long way. One of the best things to do with a sewing cake of beeswax is to share it.
Use the tutorial at the bottom of the page to see how I presented my sewing cakes. But, you don’t have to be that elaborate. Just a simple ribbon would be fine too.
More Ideas
This simple project should go on your list of easy handmade gifts. Great for Christmas, Mother’s Day, Birthdays or even teacher gifts. They make a great addition to a gift basket with a honey bee theme.
Need another project that is also suitable for gifting? Try these beeswax wax melts to go along with your sewing bar. You can personalize the fragrance to your favorite scents.
For a more personal project – homemade beeswax lip balm is always appreciated – it can fit right in the bag with the sewing bar too.
There are so many gift ideas you can create with a little beeswax. Don’t wait – get started today!
FAQs
Beeswax is versatile and beneficial for various sewing projects, including garment construction, quilting, embroidery, and leatherwork.
While beeswax is compatible with most threads, it’s particularly useful for natural fibers like cotton and silk. However, it can also improve the performance of synthetic threads.
No, beeswax should not be used on sewing machine threads as it can leave residue and potentially damage the machine. Beeswax is best suited for hand-sewing projects.

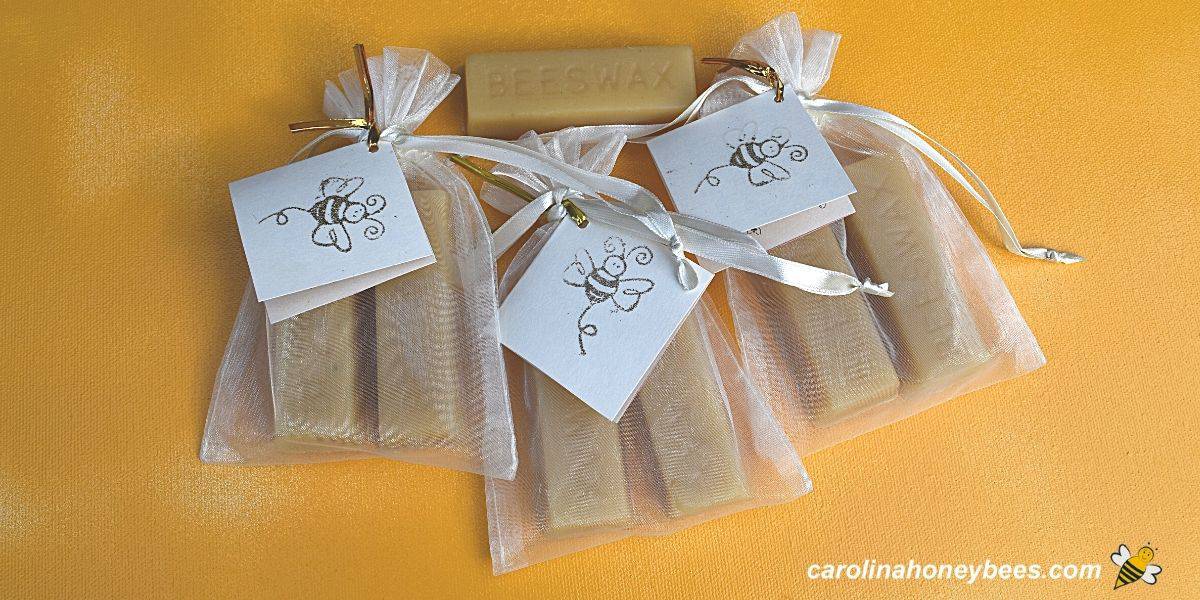
DIY Thread Conditioner – Beeswax Sewing Cake Gift Bag & Label
This post may contain affiliate links. As an Amazon Associate, I earn from qualifying purchases.
Read my Disclosure.Tools
- 1 double boiler (pot to melt wax) (to make your own bars)
- 1 bar mold (optional – can use other things)
Supplies
- 6-8 ounces beeswax
- 6 pieces organza bags small (or equivalent)
- 1 sheet cardstock – your choice color
- 1 roll ribbon or string
- 1 piece bee stamp (optional)
- 1 piece embossing pad
- 1 bottle embossing powder
Instructions
- Beeswax bars: If you have the time, you can purchase raw beeswax and make your own bars. Use a double boiler to melt the wax and pour into suitable molds. This can be a regular bar mold or you can make a fun shape – even silicone cup cake liners work!If you don’t have the time for that – buy some bars that are ready to go. The most common size is the 1 oz (net wt) bar of wax – though of course they can be any size or shape. This rectangular bar is easy to handle and looks rather like a little bar of gold – which of course it is -to the bees!

- Choose a container or gift bag: The bar needs a container. Presentation is everything – it can be a tin or bag. Small organza bags are great for beeswax and can be used for any shape. The bag will hold 1, 2, 3 or more small 1-ounce bars.The very nature of the bag, allows the wax to show through and the delightful wax aroma to escape. Choose any color that matches the occasion or compliments your natural wax color. Avoid bag materials that are fuzzy. Beeswax does not melt unless it is exposed to temperatures over 147°F but it will attract fuzzy particles.
- Gift tag: Add a tag – this is where you can let your creativity go wild. Make it as simple or as fancy as you wish.While some people do understand the value of a beeswax bar, not everyone realizes the potential. Add a small tag that explains the intended purpose of the bar of wax. I have a simple template that you can use or adapt to your project.
- Fold and attach tag:You can simply place your gift tag inside the bag. But, I think it looks very nice to embellish the tag in some way and attached it to the outside.Fold your tag and use a small hole punch to create a hole for ribbon or string. This will attach the label to your gift bag.
- Embellish gift tag front:For the front of the tag, you can decorate in any way. Something special that I like to do is use a simple bee outline stamp with some embossing ink and embossing powder. This create a unique raised bee design on the front of the cover.Let dry and then assemble your beeswax sewing cake gift bag. Your friends will be delighted.


Does the beeswax stain the thread?
No, beeswax should always be cleaned before using it for crafts projects. It should not stain anything.
Thanks for all of the great articles!
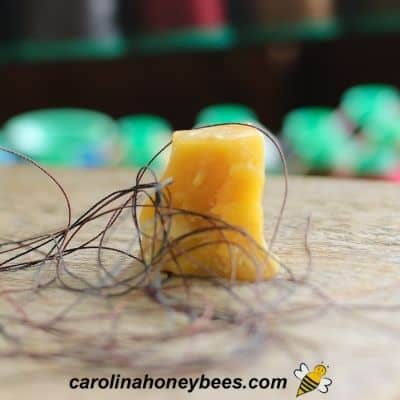
I have a quick question… just how is the sewing block used? As in, how do I apply the wax to the thread?
Thanks!
You are welcome. In most cases, a length of thread of ran across the block – using your thumb to gently hold it against the wax. The friction and heat from your skin will cause a very light coating of wax to accumulate on the thread – this makes hand sewing much easier and I find less tangles too.