DIY Beeswax Christmas Ornaments

Nothing is more magical than decorating your tree with handmade ornaments. The warm glow of beeswax Christmas ornaments provide a warm glow and sweet scent that you won’t find in modern commercial objects. In this tutorial, you will learn how to make DIY Beeswax Christmas ornaments that can last for years with proper care. They are fun to make and a lovely way to bring a bit of the hive inside for Christmas.

Beekeepers, like me, love to find interesting ways to use beeswax. You can do a lot with a little wax and some imagination. These beeswax Christmas ornaments make great gifts too.
German bakers were the first to use tin cookie molds for making beeswax ornaments. I feel sorry for those fellows trying to get wax out of a tin mold without release spray. But, they did it.
Today, the tradition continues with many crafters using clay molds for beeswax creations.
Vintage Brown Bag molds are my favorite but any brand- but others work well too. In fact, anything that can stand up to the temperature of melted wax (170°F) has probably become a wax mold at some time in history. Now, you can have a piece of history on your tree.
This post may contain affiliate links. Carolina Honeybees earns a tiny commission when you shop from our links. See our privacy policy for terms.
Materials & Tools You Need
Only a few items are needed to complete your project.
- beeswax
- clay cookie mold – or similar
- mold release or vegetable oil
- material to use for ornament hangers
- way to melt the wax
- paper to protect working table surface
Beeswax
It only takes a small amount of beeswax to make a Christmas ornament. How much? Well, it depends on the size of your mold and how many you hope to make.
Better to have a little extra than not enough. I suggest buying 1 pound or at least 1/2 pound to begin. Beeswax does not spoil. You can save any leftovers and use it to make other small beeswax gifts.
It doesn’t matter if you use raw bees wax or commercial beeswax pellets but it must be clean. If you use raw wax from your hives or a local beekeeper, be sure to clean the beeswax before using it for craft projects.
The color of beeswax doesn’t really matter either but be aware that without added colorant – your ornament will be the color of the wax.
Molds – I Use Clay Molds
In this project, I am using Brown Bag Molds – I’ve had them for years and they are getting harder to find. Any brand of clay cookie mold will work. Pampered Chef and a few other companies also make clay molds.
Choose carefully, you want a mold that is deep enough to create a sturdy wax piece without a lot of shallow, small pieces around the edges. If the ornament is too thin it will break easily.
Don’t have clay or want to use it. No problem, cookie tins and silicone molds work just as well too.
Mold Release
Even when it is completely set, beeswax can be difficult to remove from some mold. I use mold release (spray can) because it feels less greasy than regular oil (olive, vegetable, canola etc). However, a light coat of either one will help get the wax out of your mold at the right time.
Hanger Material
For the ornament hanger, you have several choices. Jute or similar cord is a popular choice because of the traditional look. However, a small piece of wire works too. A pretty Christmas ribbon looks nice as well. It is your choice.

How to Make Beeswax Christmas Ornaments – Step by Step
(Full Instructions in Card at Bottom)
1. Melt your beeswax in a small double boiler (or similar set up). Be patient – wax melting takes time. While it is melting, spray the cookie mold with mold release (or a light coat of oil).
We also want the mold to be warm (not hot) if possible. If the clay mold feels cold, a quick, gentle blast from my hair dryer does the job.
2. Lay your mold on flat level surface – flat is important. If the mold is not level, wax will pour over the edge and make a big mess when you try to fill it.
(The First Run – Preparing the Mold) When enough wax is melted (no harm in having extra) – slowly pour the hot wax into the mold to fill. Try to avoid over-filling.
Now, wait a minute or so and let the casting cool enough to see the edges pulling away from the mold edges. The wax surface will completely skim over – the ornament is solid but pliable.
Now, turn the mold over and dump the first casting out. Save this wax for another pouring. This process was just a trail run to make sure the interior of the mold was warm. You can skip this step – but do so at your own peril.
3. While the mold is still warm. Clean away any little pieces of wax left and if needed respray or oil the mold. Now, fill with melted beeswax again. Let it cool for just a minute – giving the wax time to start cooling.
Watch closely, just before the wax surface cools enough to skim over- insert a folded piece of cord (string, ribbon etc) to serve as a hanger.
You may need to hold the cord under the wax surface with a toothpick or similar for a few seconds. Then you should be able to release and it stay in place.
4. Now, let the beeswax ornament cool completely. This may take several hours or less than one – depending on the pouring temperature of the wax, temp of the mold and room temp.
Once completely cool – it should come out of the mold easily. Ready to clean (lightly polish with soft rag) and use.
Expert Tips
Prewarm – Pre-warming your cookie mold is a great idea – but do not try to warm it with hot water. We want it to be dry.
Wrap the mold in a warm towel for a while before use. Let the heat transfer from the towel to the clay. Or, the easiest way for me is to plan on pouring the ornament twice.
The first time I pour my beeswax ornament, the wax will curl as it cools. The edges pull away from the clay mold. My second pour is always better.
Let Cool slowly- Beeswax naturally contracts as it cools. Your beeswax Christmas ornament will be much nicer if your beeswax cools slowly.
This also helps prevent wrinkles on the back. If the room is a bit cool, place a small cardboard box over your casting as it cools to hold in a bit of heat.
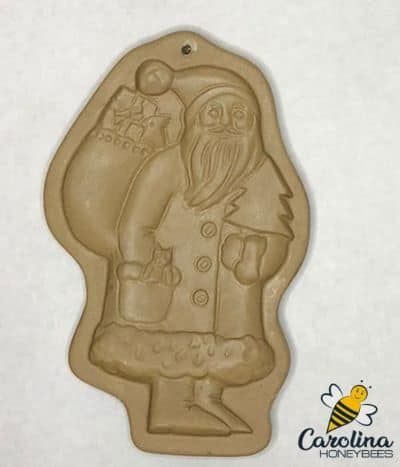
Choose molds wisely – This Santa clay mold is one of my favorites. It has a nice deep cavity that will yield a thick sturdy ornament. My Christmas tree mold is a pain because it is really too thin to be sturdy.
Be patient – When you are making beeswax Christmas ornaments with clay cookie molds, things progress fairly quickly. You can easily make 2 ornaments from the same mold in 1 day. But do not get into a hurry.
If you try to remove the wax before it has cooled, it may stick to the mold. This can become very messy. You will have the best results if you allow the wax to harden slowly – give it time.
Storing Handmade Wax Ornaments
Once the wax is completely cooled, it’s time to polish the wax surface with a soft cloth and hang it on the tree.
After Christmas, wrap your ornaments in white tissue paper and store in a box in the closet – not in your attic! Beeswax melts at a temperature of about 147°F but it will bend at lower temperatures.
More Ideas
Now if you want to add even more of a folk art look to your project, be sure to read about making Blackened Beeswax Christmas Ornaments. It gives them a unique look but can be a bit tricky to get the color right with natural materials.
Special projects such as these beeswax luminaries add a unique touch to any occasion. You will be amazed at how easy they are to make-but they look so hard.
Enjoy making rolled candles with beeswax that are so elegant. Or, take a walk on the wild side with these cute Christmas tree candles made from the same kind of sheets.
But honestly, there is no harm in buying some flashy bee-themed Christmas ornaments either. They offer color and flash that is hard to make in natural items.
A Final Word
One of the easiest traditional beeswax crafts is casting ornaments. Making beeswax Christmas ornaments is a lot of fun. If you make a mistake, remelt the wax and try again. No pressure or fear of total failure.

Beeswax Christmas Ornament Tutorial
This post may contain affiliate links. As an Amazon Associate, I earn from qualifying purchases.
Read my Disclosure.Tools
- 1 stoneware cookie molds
Supplies
- 1/2 pound beeswax (or enough for number of ornaments)
- 12 inches jute twine for hangers (twine, ribbon or wire)
- 1 can Mold Release Spray
Instructions
- Melting Beeswax: Beeswax has a low melting point of about 147° F. We want to get the wax just hot enough to melt. It will discolor and turn dark if over heated. The flash point of beeswax is 400° F . We do not want a fire so proceed with caution – not fear!I am not a big fan of heating beeswax in a microwave. However, if you choose to do so: use a glass container and heat at short intervals at low power. This will take a while. **Do not leave unattended. The safest way to melt beeswax is with the double boiler method. This process allows the wax to heat evenly and is considered a safer method.

- Prepare Your Mold:Place the mold on a table or counter. Don’t forget to protect the counter surface against spills. You want the mold to sit level. If it is not level, you will not be able to fill the mold full of wax without making a mess. It is important to use some type of mold release. This is especially true when you are using cookie molds with a lot of detail.If you do not want to use a spray, some people report good results using vegetable oil. Lightly brush the inside of the mold. Just a thin coat is enough.
- Prepare Ornament HangerYou can use any type of hanger for your beeswax Christmas Ornament. Wire, cord or ribbons are just a few possibilities for hanger material. Choose your material and cut to a suitable length. You want enough length to push some down into the wax and still have enough to hang.

- Pour Melted Wax in MoldPour melted beeswax into your prepared clay mold. You do not have to work fast but you want to pour the wax consistently. Don’t have a lot of stops and starts. Continue until the mold is full and almost to the point of running over. If you do have some run-over don’t worry, you can trim any excess off later.The melted beeswax will start to cool and set right away. You will notice this first along the edges of the mold. Then the surface will skim over. Let’s place our hanger quickly before the wax cools too much.
- Insert Ornament HangerBend the hanger into a U shape. Insert both ends into the melted wax. If the hanger material starts to float to the surface, use a toothpick or similar object to gently press the hanger back into the wax. In a few seconds, you can let go and it should stay in place.
- Cover and CoolAs the surface (back side) of your beeswax ornament cools, the wax surface will become wavy. Honestly, the slower the wax cools – the better it looks to me. My work room is cool this time of year. My clay mold is sitting on a towel. Once I have finished pouring and inserting the hanger, I cover the mold with a cardboard box and place a towel over all. My project is left to slowly cool for a couple of hours.
- Remove Cooled OrnamentAfter several hours, remove beeswax ornament from mold. If it sticks, place it in the refrigerator for 30 minutes.


Would you answer some questions for me if I send you some pictures on my first time trying these. Not a total success
I will do my best.
Sure I’ll be glad to try.
My first ornament was ok but when I repeated the process the entire thing stuck inside the mold. How the heck to clean other than HOT water.
Did you spray the mold with mold release? And leave it in until it was pretty well set? Sometimes, I find that I need to use more spray than others. I don’t know if it is due to the difference in the wax, temperature or what. The best way to clean stuck wax out of the mold is to use a hot water bath and let the melted beeswax float up. You can use a hair dryer to melt and allow the wax to drip off but be careful to avoid burning yourself.