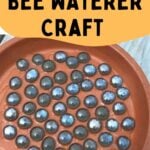
DIY Bee Waterer
Looking for an easy way to help bees and promote the importance of all pollinators? This DIY bee waterer craft project will do just that. A small water source can be a very beneficial addition to your garden or yard. In this guide, you will learn how easy it is to make this bee craft project suitable for any age group – young or old.
Adding something of beauty to the garden is always fun. However, bee crafts such as this can be used to educate young and old on the importance of bees and their needs.
Small Bee Waterer Craft Project for Your Garden
The simplicity of this bee waterer is what makes it so wonderful. It is a good time to get the children and grandchildren involved.
At it’s core, this is a very simple bee craft for kids that even younger children can enjoy with supervision. (Participants should be beyond the age of choking!)
Beyond the artistic opportunity of the design, you can teach the importance of bee pollination and other ways bees benefit our lives.
It is also suitable for adults that struggle with poor motor skills. Everyone loves bright colorful jewels and you don’t have to be precise in their placements. Their only purpose is the look pretty and give the bees a safe place to drink.
Materials Needed
For this “make it together” project for a weekend visit or Summer day. You only need a few items:
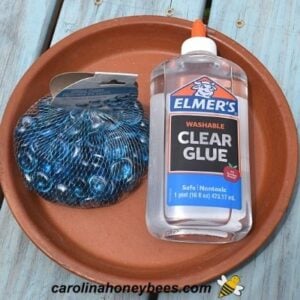
- large clay saucer
- color glass gems or real stones
- clue or adhesive
Dish, Saucer, Container
Choose a large clay saucer, plastic will work too in a pinch-but clay is better. Of course, the larger the dish the better because it will hold water for a longer time. However, if the plan is to fill it every day or so – smaller dishes are easier for young people to handle.
Glass Gems or Stones
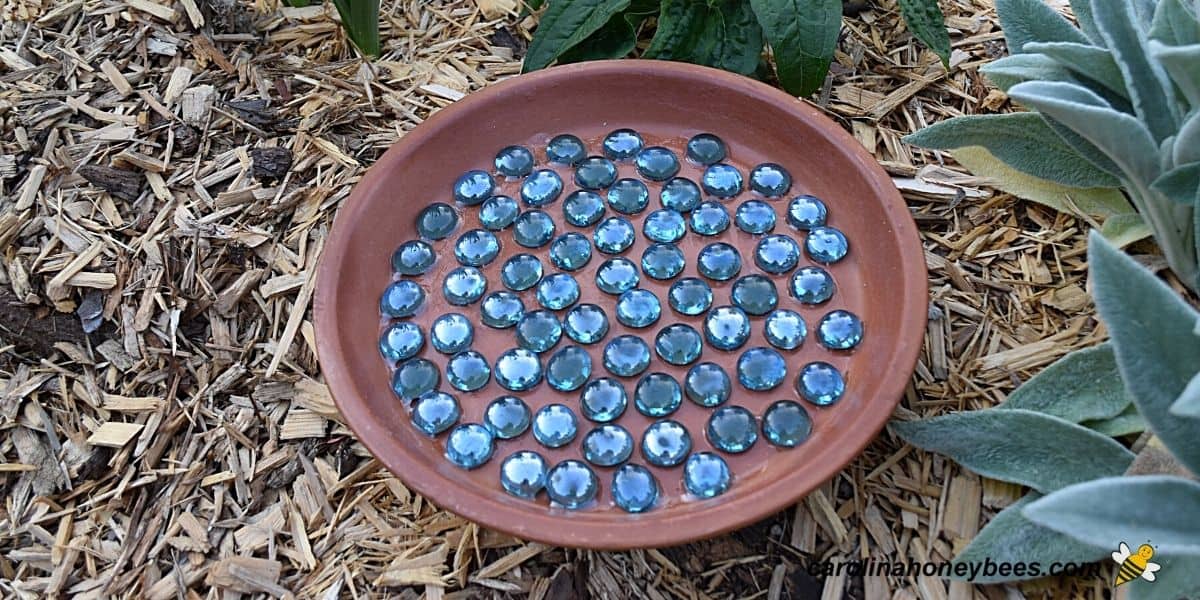
Choose some colorful glass gems or even small stones to place in the dish. Inexpensive ones from a dollar store for color and a base are perfect.
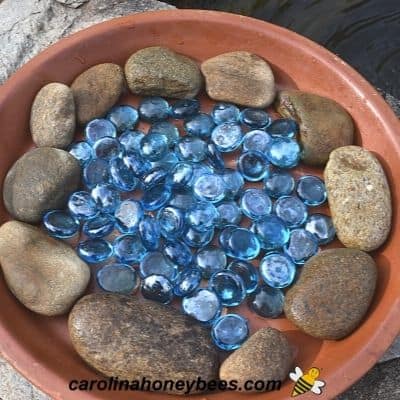
Honey bees drown rather easily. They need a safe place to sit and collect water. Either place larger stones around the rim or stack a double row of small stones – or scatter them across the base of the dish.
Glue
I often use Elmer’s washable glue (as pictured) and it will work but requires a longer drying time than you might think. I
believe gorilla glue or a similar adhesive is stronger and faster. However, if you are working with small children Elmer’s glue is easier to deal with.
Putting it Together

1. Make sure that your clay saucer is clean and dry. If using clay or terra cotta, you can spray it top and bottom with an acrylic sealer to water it more waterproof – but this is optional.
2. Dribble glue across the surface of the dish. This is the easiest method. But it is okay to place glue directly on the bottom of stones if you wish.
3. Place stones in the bee waterer dish. They can slide around a bit before the glue dries to achieve the look you want.
4. Let the project dry completely before filling with water. Depending on the type of glue and the amount used – it can take a couple of hours or a couple of days!
How to Use Your Bee Waterer
Use only water in your bee water dish. Don’t make sugar water for bees or add honey. This would attract ants and cause a bee robbing frenzy resulting in bee deaths.
Make a plan to check your waterer often and refill as needed. On a hot day, a small water source can run dry quickly.
Don’t be afraid to have fun and experiment. One popular version is to add natural stones around the edge and put colorful gems in the center. The larger stones are glued in and the middle ones are loose for easy cleaning
Tips for Beekeepers
For a garden or backyard, a smaller structure like this bee waterer craft works well. You only need it to hold enough water to last until you check it each day.
However, If you are a beekeeper with beehives, you need a larger bee water source.
Some Ideas include:
- a large bucket (with lid) that drips water slowly through a faucet
- a large bird bath with pebbles to create a shallow area
- a plastic “whisky barrel” planter with a small fountain
- a small-medium water garden with plants and fish
Educational Opportunities
When working with kids, never miss the opportunity to educate. The more they understand about the importance of bees and other pollinators – the better the world will become.
- honey bees use water to dilute honey and help cool the hive during hot days
- butterflies, wasps, other insects and small animals need a water source too
- sometimes natural water sources are far from the hive – or polluted
- talk about the numerous fun facts about honey bees
More Ideas
If this bee waterer project has you really thinking bee – here are some more cool ideas.
If you want to create a second, slightly larger water source, consider building this clay pot and saucer water station too! It is designed to hold more water and can serve as a pollinator water station for more insects.
Clay pot crafts are often a favorite. For older kids or adults this DIY bee candy dish is a fun project. And for something larger – decorate your garden in a bee theme with this – Clay Pot Bee decoration.
For sensory play, older kids love making honey slime. It can be a bit messy with there are some wonderful learning opportunities here (not it is not edible).
As the season draws to an end, consider this easy project of preserving Fall leaves with a beeswax dip. The kids will enjoy helping and its a wonderful nature craft.
Finally
A bee waterer can be a cute addition to your bee friendly garden or backyard. These cute bee craft projects are one simple way to provide a sip for thirsty bees and butterflies. Thus inviting more insects to visit your oasis of beauty.
Make several, they are great gift ideas for small kids to make and give for Mother’s Day, Teacher Gifts or any occasion. You can even use colored stones to spell out the child’s initials in the dish.
Bee Waterer DIY Craft
This post may contain affiliate links. As an Amazon Associate, I earn from qualifying purchases.
Read my Disclosure.Tools
- Parchment Paper (optional)
Supplies
- 1 piece 8" – 12" clay saucer (plastic is okay)
- 1 bottle Clear Glue
- 1 bag Assorted Glass Pebbles
Instructions
- Choose a Clay Dish: Obviously, the larger the dish the better from a standpoint of it holding more water. However, if you are working with folks with small hands… a large dish may be overwhelming and will require more stones too!It should be clean of any dust or dirt. For extra longevity, you could spray it with acrylic sealer to make it more water proof – but that is optional.Parchment paper or similar can be used to protect your working space.

- Add Glue: A quick word about glue. Clear glue is generally the best because you don’t have to worry about any of it showing.However, if you use Elmers Washable Glue (again a good choice for working with children) – you must let it dry a day or more before adding water. Otherwise your stones will release. Dribble some glue in the bottom of the dish. Don’t put too much. You only need the glue to hold the stones in place.
- Add stones – glass or rock: Place your glass stones ( or real ones) in the dish. Arrange them in any design. You may only need one layer. They do not have to be touching, just close enough together to prevent bees from drowning.We want some of the stones to stick up out of the water when finished. This gives the bees a place to stand and drink. Honeybees drown very easily. Stack your stone 2 deep if needed.
- Let glue dry and cure: If you are using washable glue, it can take 2-3 days to dry and cure. The time frame depends on the humidity where you live too.Once the glue is completely dry – your bee waterer dish is ready to use. Add some water and place it in your garden. (If you want to be extra cautious, add a couple of small floating sticks etc, to offer the bees even more drinking locations.)


