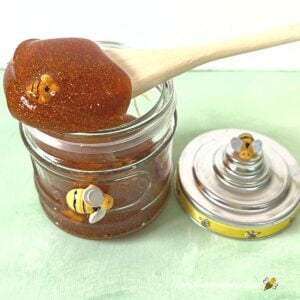
Honey Slime Craft

Creating honey slime is an entertaining craft project that kids will love. This project mimics the sticky appearance of honey and provides a sensory experience without the mess of real honey. Older kids will enjoy participating and learning about the viscosity of honey. This tutorial gives you step by step directions to create a honey-like slime that can be used for bee theme parties, educational activities and more.

I am a beekeeper so bee-themed projects are special to me. But, you don’t have to be a beekeeper to enjoy bee crafts. It is one of the best ways to introduce the importance of honey bees and other pollinators to new generations.
The Science Behind Honey-Like Slime
There are many recipes for making slime but I will use one of the most common. In truth, this tutorial for honey slime is a science project.
Perhaps one of the most educational of suitable honey bee crafts for bigger kids. (Not a project for toddlers who might want to eat their experiment!)
It is a basic chemistry experiment where combining 2 different things together results in a reaction that changes their molecular structure. Slime is a non-Newtonian fluid, which means its viscosity or the way it flows – changes with applied force.
We begin the process with glue which has long chain polymers. Adding the activator (borax) transforms the glue into a more semi-solid material.
When we squeeze the slime in our hand, the applied force temporarily breaks the chain allowing the slime to flow. Sounds like fun, right?
Materials Needed
Here is the very short list of materials needed to make honey slime. You will not find any real honey in this non-edible recipe.
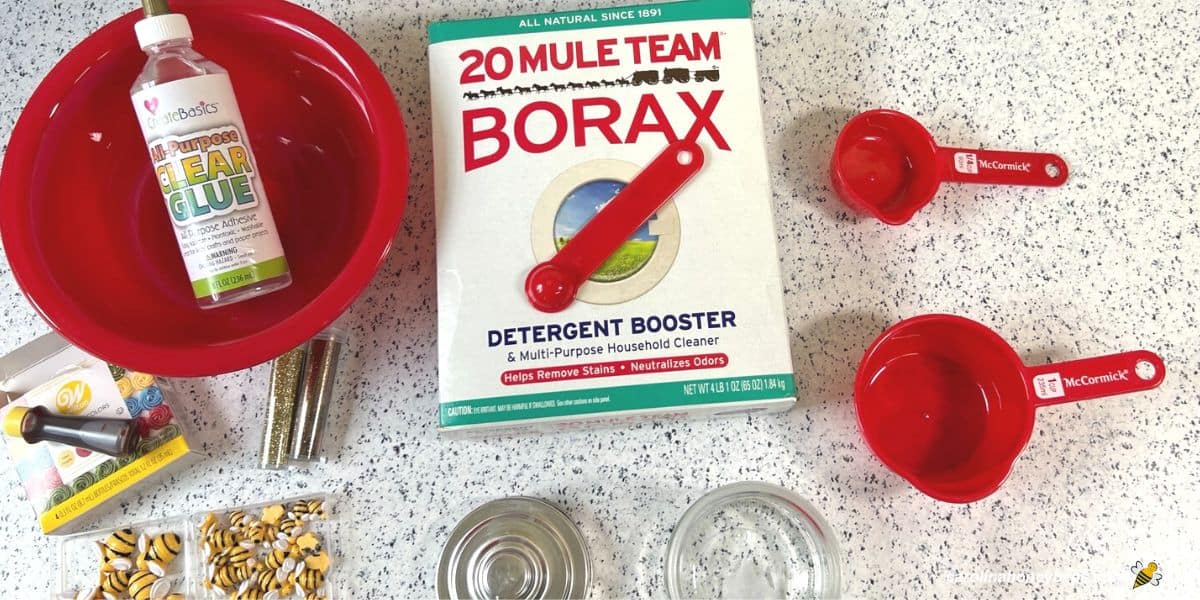
- clear glue
- borax (just a little)
- water
- embellishments
Glue
You will need a medium sized bottle of clear glue. The common clear school glue is fine – there is no need to spend a lot of money for a fancy brand.
Borax
Borax is a powder that is often used in washing clothes. It can be purchased from craft supply stores but you may already have some in your washroom.
If not, look for it in the laundry section of most grocery stores. I use it as a laundry detergent booster for a really dirty load of jeans.
Water
Plain tap water is the last ingredient of the basic recipe for honey slime. You will need two containers of water – one with warm water and another with water that is room temperature. You don’t have to heat the water – you can use warm/hot water from the tap.
Embellishments
To stay with our honey theme, let’s use some yellow and brown gel food coloring to tint our project to a respectable honey color. This is optional but an important part of creating the honey illusion.
For fun and sparkle, you can add some gold (extra fine) glitter and some small pieces that look like bees (plastic or resin). Of course, these are optional and you certainly can omit them if you wish.
How to Make Honey Slime
Here are the basic steps for making honey slime. The measurements for each material is listed in the how to card at the bottom of this article.

1. Begin by mixing the borax and hot tap water (measurements below) in a bowl. Mix well and set aside.
2. In another bowl, add the room temperature water and the clear glue and stir until very well blended.
3. Now it is time to add a bit of food coloring – this is needed to get that beautiful color we want in our honey slime. I use yellow gel food coloring and you do not need a lot.
To give your honey slime a sparkle – you can add extra fine glitter to the mixture. Be sure to use extra fine to avoid a scratchy feeling. Young children seem to enjoy the addition of small plastic bees to complete the illusion of honey.
4. Now pour the contents of the bowl with glue and glitter into the bowl with borax water and let sit for 30 seconds. You will see some reaction.
5. After 30 seconds, take your hand and kneed the slime mixture in the water. The material will begin to clump together. If it still feels a bit too sticky, add a pinch more of borax to the water. When satisfied, remove from water and store.
Expert Tips
A slime recipe is not carved in stone. Ingredient amounts may need to vary a bit due to temperature and humidity. This recipe makes a firmer slime that is not too runny.
Let your kids experiment and use problem solving skills to decide exactly how much glue or water/borax they need to get just the perfect consistency that they wish.
Honey slime can be messy. Prepare for some spills and drips ahead of time. Don’t let the young ones wear their best clothes when creating slime masterpieces.
This is a time for play clothes – plastic table cloths and maybe even a drop cloth on the floor. The cleaner of choice for most slime spills seems to be white vinegar.
Use and Storage
Because slime is a non-Newtonian fluid, pressure affects how it moves. Unlike playdough that responds to gentle slow squeezing – slime moves best with quicker movements. Handle it quickly with faster finger motions.
Be sure to store your homemade slime in an airtight container a lid. It should last several weeks – especially with borax as an ingredient. If you notice any mold – it’s time to make a new batch.
Sometimes, we may think that the kids like it because it can be messy. Perhaps there is some truth in that – but there is more going on here than you may think.
Working slime with your hands creates a calming feeling. This type of sensory play is often lacking for older kids. A messy tactile experience may be just the thing they need to explore and refocus.
Playtime is a great opportunity to talk about how bees make honey. They use nectar not pollen as many people think.
More Ideas
If this project has really got you buzzing to try more fun bee-themed crafts, here are a few more ideas.
If you love the idea of reusing and recycling, a great idea for the older kids are these golf ball craft bees. Suitable for older children or adults with a bit more dexterity, they make a cute addition to any bee decor.
Another project that is super easy and works well with younger children is to create a tin bee for the garden. While no honey bees will liver here, it does provide a home for solitary insects such as mason bees.
Create a bee candy dish jar using clay pots for a whimsical gift! Or sit down with the younger kid for a traditional craft, learn how to make a bee with craft sticks and pipe cleaners. What a great opportunity to talk about the importance of insects.
FAQs
Slime is a mixture of a type of glue and activator. Borax and water are commonly used but some recipes call for a saline solution or corn starch.
No, you should not be worried about children playing with your homemade slime. It is not edible – so keep that in mind when deciding which ages is most appropriate for this project.
Monitor play especially in younger children and watch for any allergies. If your child has sensitive skin – monitor them closely at first. And, look for any signs of redness after a short play time.
If your slime is too sticky, add more of the slime activator (borax solution, saline solution, or liquid starch) in small increments until it reaches the desired consistency.
Final Thoughts
Why do people enjoy crafting? It’s fun, creative and a great way to spend time with family and friends. Enjoy making honey slime with the kids these early years will pass all too soon.
And, while this project is not edible, there is no harm in having a few homemade honey sticks on hand. Everyone deserves a sweet treat from the hive after all this hard work.
Resources
Honey Slime Recipe and Tutorial
This post may contain affiliate links. As an Amazon Associate, I earn from qualifying purchases.
Read my Disclosure.Tools
- 2 small bowls
Supplies
- 11/4 cup Water (1 cup hot – 1/4 cup room temp)
- 1/3 teaspoon borax
- 5 oz clear glue
- 1 tube food coloring yellow gel
- 1 pkg gold glitter extra fine (optional)
- 1 pkg small bees (optional)
Instructions
- Add 1 cup of hot water and the borax to a small bowl and stir well.

- Pour the glue into a small bowl and add 1/4 cup of room temperature water. Stir gently but firmly until well mixed.
- Add your food coloring to the glue mixture. Gel food coloring works well. I use 5 drops of yellow. Then mix a bit of red and green to make a brown and added only a small bit of that trying to achieve a perfect honey color. Stir well.
- To this colored glue mixture – extra fine glitter can be added – it really makes the honey slime colors pop. Use extra fine glitter to avoid a scratchy feeling and you only need a little. I add 1/2 tsp of gold and 1/2 tsp of dark gold.
- If you wish to really go for the bee theme – now is the time to add your small plastic bees, bee buttons or gold sequins (etc) to your glue mixture – stir them in.
- Pour this glue mixture into the bowl with water mixture or borax solution. Let sit for 30 seconds. You will see the mixture start to form a clump or form a glob.
- After 30 seconds, use your hand to grab the honey slime and put it into an empty bowl. Kneed it for a few seconds. It may feel sticky as first, if it still feels sticky after a minute of kneading – add a small amount of the borax and water to it.
- Once it reaches the consistency you like- it is time to put it in a jar with a tight lid. Clean up and drips, spills etc right away.


