How to Requeen a Hive
Every beekeeper needs to know how to requeen a hive. While bees can make a new queen – they are not always successful. And, there will be times when the beekeeper wants to control the hive genetics by choosing a queen or a specific breed or race. Once she arrives, you have to safely get her in the hive and accepted. In this guide, I will cover the most important factors to consider when requeening your beehive.
While she is only one bee in a family of thousands, the role of the queen bee can not be performed by workers or drones. She is responsible for producing the female work force. Every beekeeper hopes for a good queen.
Requeening a Beehive
A good queen is one that is healthy and productive. She lays plenty of fertile eggs to help the colony stay strong.
If the queen begins to fail – workers can build special queen cells to make a replacement. But, there will be times that the efforts of the bees fails and the beekeeper needs to step in.
Sometimes, a hive that has failed at queen rearing and has no fresh, fertile eggs to try again. Therefore, when the colony needs help or the beekeeper wants to inject new genetics into the apiary – attempts will be made to requeen the hive.
Methods of Requeening With Caged Queen
In most cases, the beekeeper will buy a new queen bee for the colony in need. These mated queens arrive in special cages (wood and wire – or plastic).
There are 2 common methods of queen introduction:
- direct
- indirect
Direct Release
If the new queen is released into the hive immediately, this is called “direct release”. This is normally a really bad idea.
Unless the workers are queenless and desperate, the bees will kill the new queen. I do not recommend using this method. But, I mention it here because some folks will tell you to do it.

Indirect
The other method of queen introduction is indirect – the most common and best way to requeen your beehive.
With this method, the new queen is slowly introduced to the colony over several days. A queen bee’s pheromones are unique – the colony bees need time to accept her.
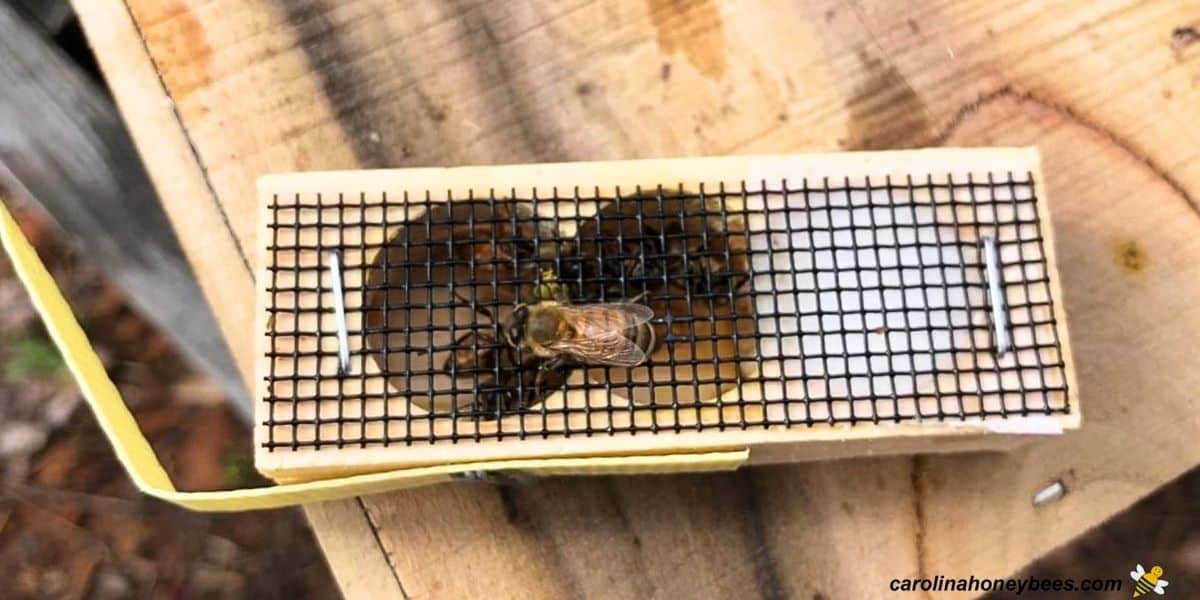
The new queen and a few attendants (bees that came from her hive) arrive in a small cage with a white candy plug on one end to block the exit. Take good care of your caged queen until you are ready to install it into the hive.
Installing the Queen Cage in the Hive
The colony must have enough bees to maintain hive life during the requeening process. If you have other hives, giving the weaker colony a frame of bee brood is a good measure.
- Remove the old queen if still present
- install the new caged queen
Removing a Current Queen
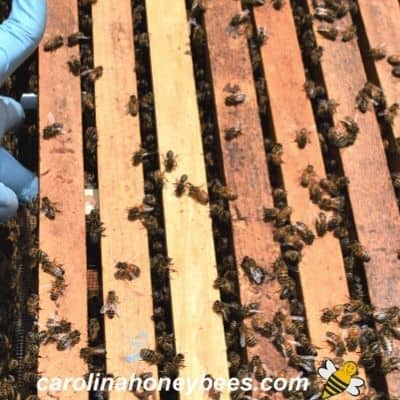
Finding the queen bee is often a difficult task for beginner beekeepers. The job gets easier with time. Start your search in the brood box area of the hive.
Of course, if you know you have a queenless beehive – you can skip this step.
Once you have located the old queen, you can decide how to dispose of her. Some beekeepers squish the old queen and leave her dead on the frames. They feel that this helps the colony to realize that she is gone.
Install Queen Cage
Place your caged queen between 2 frames in the hive. Choose frames in the area with brood or central part of the hive-if no brood is present.
The candy end should point up to prevent any dead workers inside – blocking the exit. If the exit hole (candy end) points down, workers inside the cage might die and block the exit.
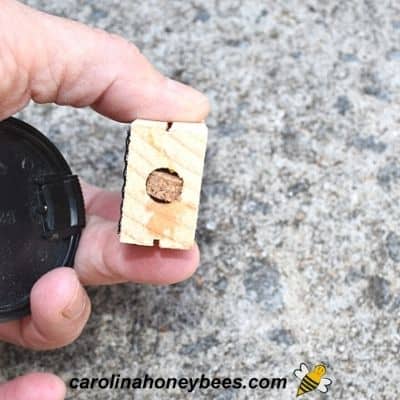
If there is a cork over the candy plug, remove the cork. Only remove the cork on the candy end – not the other end!
Tip – If you live in a very hot climate that might cause the candy to melt, place the cage horizontally. Within a few days, the candy is eaten away allowing the bees inside to be released.
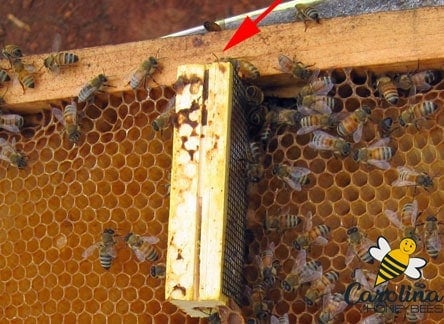
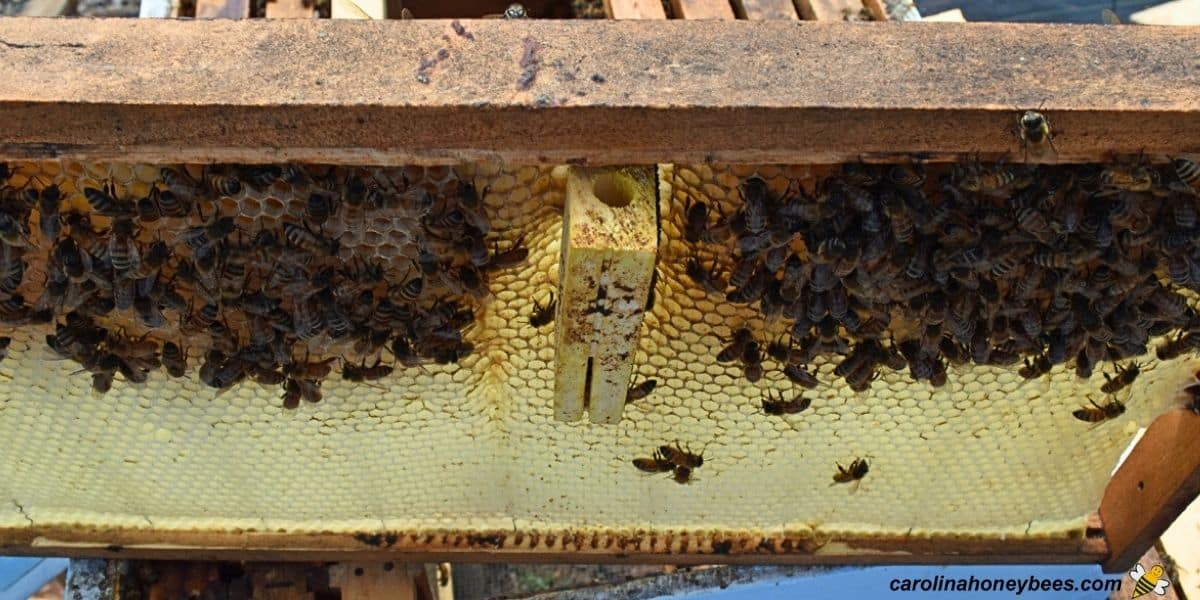
Fitting a wooden cage into a mature hive can be tricky. I like to push the cage just below the top bars and then gently squeeze the frames together just enough to hold the cage in place.
It is important to be sure that the exit hole is open between the top bars – to allow the bees inside to exit once the candy is gone.
If you twist the cage so that the screen is open to hive workers, they will communicate with the new bees and even feed them.
This temporarily leaves a bigger gap between your frames than normal. That’s okay. You will remove the cage in a few days.
If your new queen comes in a plastic cage, you may find a cap over the candy tube. Remove the plastic cap – allowing the hive bees access to the candy plug.
When I am using the plastic cages, I use the same procedure. I remove any plastic cap over the candy.
Then, I push the frames close enough together to hold the candy exit tube between the wooden parts of the frames.
Over several days, the bees inside and outside the cage, slowly eat through the candy plug. This gives the bees time to get to know the queen.
Poking a Hole in the Candy?
Some resources suggest that you should poke a very small hole in the candy to give the bees a head start. My advice is to gently test the candy plug. If it is pliable, do not punch a hole in the candy.
If the candy plug seems very hard and dry, you may want to use a small nail or toothpick to make a small hole.
Be careful, I can’t tell you how many new beekeepers have killed their queen trying to make a hole in the candy. If the candy is almost eaten – you can make more queen candy to fill the tube.
All beekeepers have their own way of doing things – find what works for you. Some enjoy using special queen introduction cages.
Natural Requeening
If you want to allow your hive to requeen naturally – you may need to lend a hand. They must have fresh eggs or young bee larvae (tiny).
Natural Method
By taking a frame containing fresh bee eggs and/or very young larva from another hive- and giving it to the colony in need – the have what they need to make make a new queen.
This works more often than not and it is a good way to keep a colony going at a time when purchasing a new queen is not possible.
But, there must be enough drone bees in the area for proper mating of the new virgin queen. And the population of the colony must be large enough to sustain the hive until a new queen emerges, mates, begins laying and new worked are produced.
Common Reasons for Requeening
Here are some common reasons for replacing a queen bee.
- the colony is queenless
- the current one is over 2 years old
- a bad pattern of worker brood
- introduce new genetics
The most common reason for requeening is to replace an older unproductive egg layer. While they can live for several years, it is rare for a queen bee to be productive in her role past the age of 2 years.
As she ages, her pheromone levels begin to drop and egg laying rate is reduced. As this bad brood pattern continues colony population drops.
Another reason to requeen a hive on your own schedule is to avoid having a drone layer.
A colony without a laying queen or brood for a period of time will develop laying workers. This situation spells disaster without beekeeper intervention.
New Genetics
Or, the beekeeper may simply wish to add some new genetics from another type of honey bee to the apiary.
Requeening is a great way to achieve “different bees” in the yard without having to buy a whole colony.
When to Requeen a Hive
If a colony is in dire need, you can replace the queen during any of the warm months. Sometimes you just can’t wait if the hive is in danger of collapse.
One of the best times of year to requeen is during late Spring into early Summer. At this time of year, a mated replacement should be relatively easy to obtain and purchase.
As you move into early Summer, the Spring rush is over, availability become less sure. By giving them a new queen during Summer, she will have several months to become established before Winter. And if you have problems, you have time to try again.
Test for Queen Acceptance
The last step in requeening a hive is checking to make sure it worked. To avoid stressing the colony, wait 7 days after cage placement to check the hive. If you see the new queen walking around on the comb, she has been accepted.
Seeing new eggs that she has laid, means you have been successful at requeening your hive. Now, the empty cage can be removed and the frames pushed back together properly.
If you do not see eggs, check again 3 or 4 days later. Sometimes, the new queen needs a little time to settle down and get to work.
It is always a good plan to do another check at the 2-3 week point to make sure she is a fertile queen and is producing worker brood.
FAQs
The colony recognizes the “scent” or pheromones of the current queen. Hastily installing another will almost always result in death of the new queen. Find and remove the old queen first.
When replacing an existing queen, some beekeepers recommend leaving your hive queenless for 24 hours. I don’t do this as it requires the hive to be opened twice. The choice is yours.
If your bees kill the new caged queen, this normally means that there is already a queen in that hive.
If possible, it is always best to give a weak colony a frame of capped brood from another hive. There must be enough workers to care for any brood produced.
If she is free of the cage and walking around, she is accepted. Sometimes you can get a hint at the attitude of a colony by their reaction to the caged queen. But this is no guarantee and the introduction phase should not be skipped.
Final Thoughts
Requeen a hive is a simple procedure once you understand the needs of the bees. Before you do anything to your old queen, you should have a new one “in your hand”. Not on order, or on its way – “in your hand”. Do not kill the old one until you have the new one ready to go!
Consider feeding your bees sugar water when you are requeening. Yes, even if a nectar flow is on. I have found my bees to be more receptive to a replacement when food is plentiful.
Requeening can be a good hive management tool. But, do not jump to this conclusion for every situation facing your bees. Have a good reason to do it.
I hope you reply soon. I lost a queen a few weeks ago, by the time I realized they were queenless was at least 2 weeks. I got a queen from a local supplier but she did NOT lay. I haven’t seen her in 2 weeks. Another supplier said he has queens but thinks that because there are no nurse bees she may still be in there but he wants to sell me a package. I think it makes sense but want a second opinion. Today is Sunday March 23. He can have a package tomorrow. Opinion?
If after 2 weeks, you don’t see any brood..I would think you don’t have a laying queen. Another issue is hive population. Every week with no new bees hatching – your population is dropping as old bees die. A package would be a good idea if the population of your hive is getting low. I would take another good hard look for a queen or signs of one before installing a package. If you still have the queen in the hive, they may kill the new caged queen. If you feel very confident that there is no queen, a package might be a quick way to build up the hive for Spring.